Are you noticing some sagging drywall in your older home? It’s a common problem that often sneaks up on you, usually due to moisture damage, a lack of support, or just the wear and tear that comes with age.
It’s worth keeping an eye out for signs like visible drooping, cracks near joints, or even gaps between the drywall and framing.
To get a better idea of how serious the issue is, measure the sag. If it’s more than half an inch, that’s a red flag that something’s not right. So, what’s the next step? Tools like stud finders and drywall adhesive can be really useful in addressing smaller issues and securing loose areas.
But let’s be real here: if the sagging is extensive or you see water damage, it might be time to call in a pro. After all, you don’t want to end up in a situation that requires extensive repairs down the line.
It’s better to tackle these problems early before they escalate!
In conclusion, don’t ignore those signs of sagging drywall. Is it time to take action on those issues you’ve been putting off?
Key Takeaways
- Older homes, especially those built in the 1970s, are prone to sagging drywall due to age-related wear and tear.
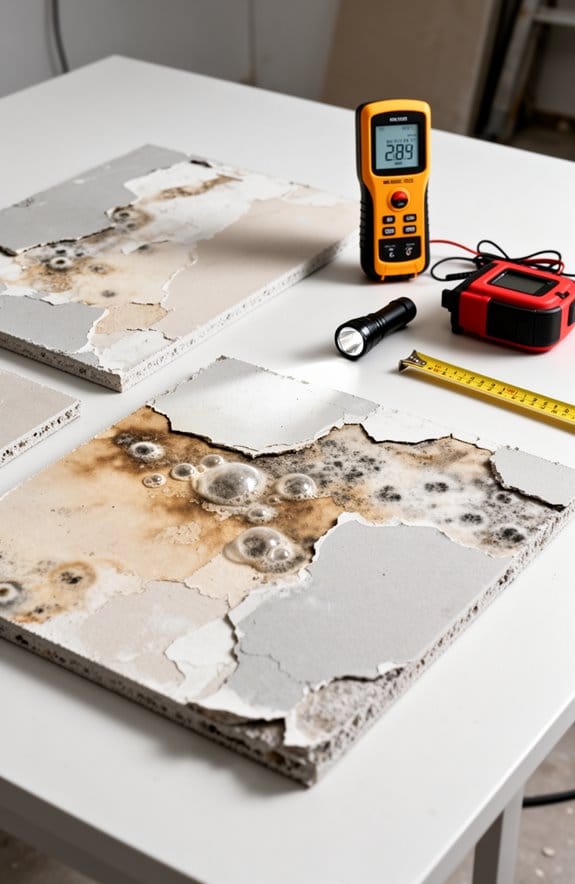
- Moisture absorption can separate the drywall’s paper face from the gypsum core, leading to sagging and decay.
- Excess construction adhesive combined with insufficient nailing can destabilize drywall, causing visible drooping.
- Regular inspections for visible cracks and gaps can help catch sagging issues early before they worsen.
- Structural issues, such as settling foundations, can significantly contribute to drywall sagging and should be addressed promptly.
What Causes Sagging Drywall in Older Homes?
Ever walked into an older home and noticed the drywall looking a bit droopy? It’s a common sight in houses that are a few decades old, and there are several reasons for that sagging.
Moisture is often the biggest culprit here. When drywall absorbs moisture, it separates the paper face from the gypsum core, leading to those unsightly sagging spots. Think about the original installation, too—if too much construction adhesive was used with not enough nails, the drywall might not stay secure over the years.
There’s also blown-in cellulose insulation to consider. It can trap moisture, adding extra weight to the drywall and making it more prone to sagging. And let’s not forget about the soil under our homes. Clay soil can shift, leading to foundation movement and differential settlement, which stresses the drywall joints. Homes built in the 70s are especially vulnerable to wear and tear.
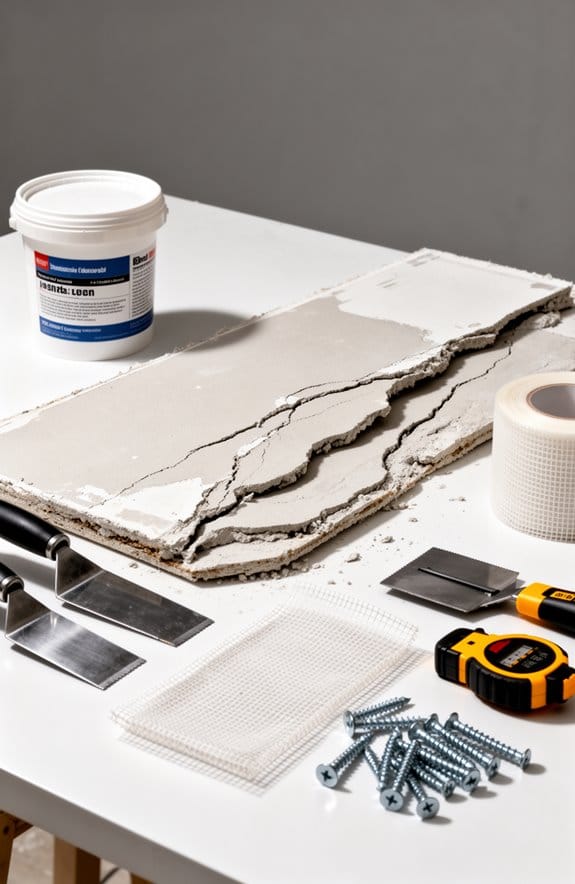
Using quick-drying compounds specifically designed for drywall repair can help address sagging issues efficiently and prevent further damage.
Recommended Products
IDEAL DRYWALL PRIMER - ROMAN Clear Primer is excellent for priming over torn or bare drywall and most other porous surfaces. Ready to hang wallcoverings after approximately 4 hours dry time.

Innovative Water-Based Sealer/Primer: Draw Tite Penetrating Sealer/Primer is a unique water-based solution, perfect for sealing damaged drywall, shredded or gouged surfaces before applying repair compounds.

Built for 5/8" Moisture-Resistant Drywall – Perfectly sized for commercial-grade or high-moisture shower drywall applications using 5/8" board.
Identifying Signs and Symptoms of Sagging Drywall

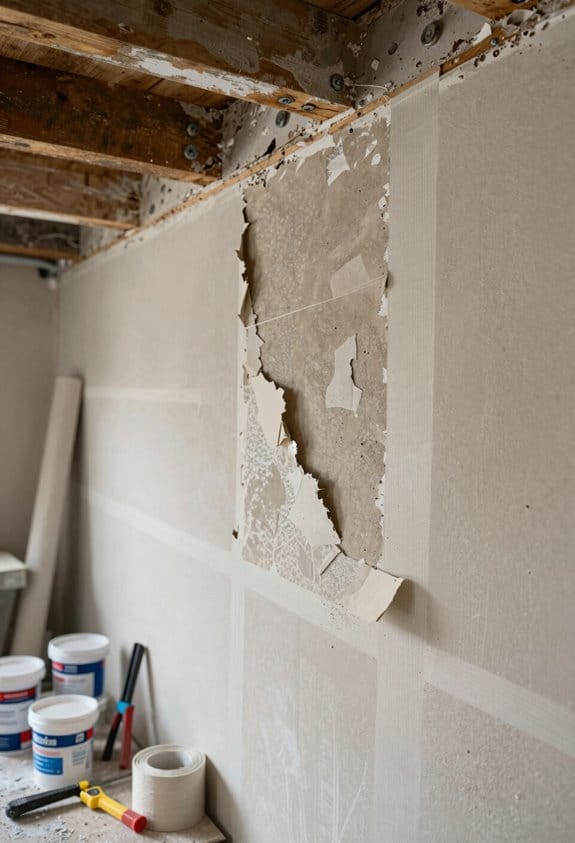
Have you ever walked into a room and noticed the ceiling doesn’t quite look right? Sagging drywall is a real problem that can lead to bigger issues down the line. When you notice visible drooping, especially in ceilings, it’s a clear sign something isn’t right.
Keep an eye out for hairline cracks near joints. These cracks often point to underlying problems that, if left unchecked, could worsen. Check for gaps between the drywall and the framing, too. If you see these, it might mean that the drywall has absorbed moisture, which is never a good thing. So, why does this matter? Addressing these symptoms sooner rather than later can save you a lot of headaches and expense.
When you’re inspecting the drywall, pay attention to how it feels. If areas feel spongy when pressed or if you see light sneaking through, that could indicate decay is setting in. Areas near air conditioning vents or other spots prone to humidity should be checked regularly to catch potential issues early.
Honestly, being aware of these signs can mean the difference between a simple repair and a major renovation. Keeping tabs on your drywall doesn’t just keep your home looking great; it helps maintain its safety and soundness too. So next time you walk into a room, take a moment to look up. You never know what you might find! Using waterproof sealants around windows and moisture-prone areas can help prevent drywall sagging caused by water damage.
How to Evaluate Sagging Severity in Drywall

So, you’ve noticed some sagging in your drywall? That’s not just a cosmetic issue; it can actually signal a bigger problem. Let’s break down how to evaluate the severity of sagging in a few straightforward steps.
First, give your drywall a good visual inspection. Look closely, especially at the seams and joints. If you see any noticeable sag, it could be a sign that something’s off. Next, grab a stud finder. This handy tool will help you pinpoint where the studs are. If you find significant sagging and the drywall doesn’t seem fastened securely, that’s a red flag.
Now, here’s the part you don’t want to skip: measure the sag. If the drywall has dropped more than ½ inch from the original wall plane, it might be time to call in a pro. Don’t forget about moisture issues; they can really make the situation worse. Check for water stains or mold around the area. Unresolved moisture is no joke – it could lead to bigger problems down the road.
Lastly, keep an eye on how things change over time. Use a straight edge or level to monitor any widening gaps in the drywall. Is it getting worse? That’s definitely something to pay attention to.
Using specialized drywall cutting tools can help if you need to make repairs yourself.
In short, recognizing and evaluating sagging drywall is crucial to maintaining your home. If you find these issues, shouldn’t you take action sooner rather than later?
Recommended Products

Ideal for efficient and accurate detection of a wide surface area with a large 4.1 inch screen

INSTANT RADAR DETECTION: No more swiping back and forth. Bosch Radar Technology provides instant, accurate object detection the moment you place it on a wall, floor, or ceiling. It's the fastest, most reliable way to see what's hidden behind any surface.

ADA COMPLIANT FOLDING WALL-MOUNT SHOWER SEAT: Folds flat to 1.75 in. deep and flips down with one hand; locks in both open and folded positions. Meets ADA and ANSI A117.1 requirements; ideal for aging-in-place, handicap, senior, and recovery bathrooms.
DIY Steps for Repairing Sagging Drywall
Have you ever looked up at your ceiling and noticed it’s sagging a bit? It can be a real eyesore and, worse, it might signal bigger problems. Let’s get into how to fix that.
First up, assess the damage. You’ll want to check for any water damage or structural issues; these can lead to bigger headaches down the line. Grab a stud finder to locate the studs in the wall. It’s crucial to check for loose fasteners because, if they’re not holding strong, it can cause the drywall to sag even more.
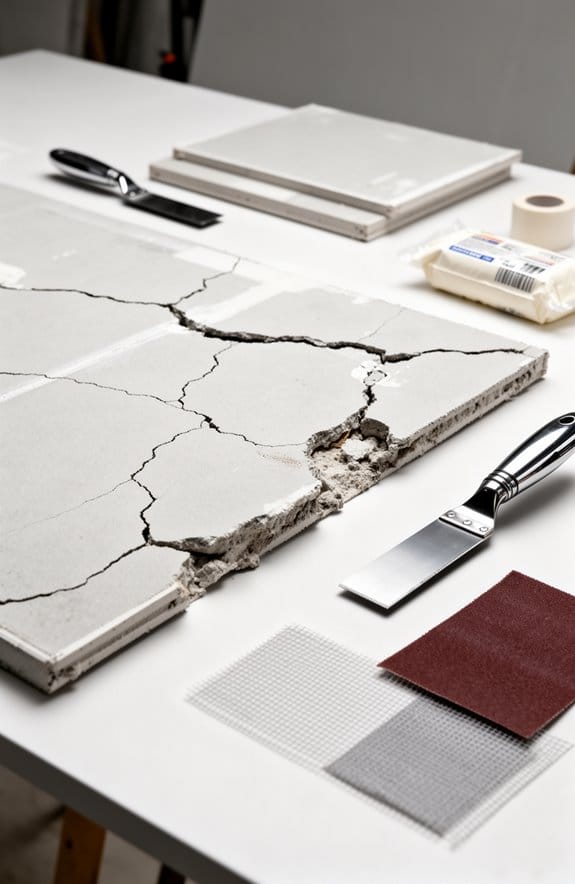
For minor sagging, it’s pretty straightforward. Try this: apply some drywall adhesive along the stud line and then secure the drywall using new screws. Make sure to space them evenly for the best results. But, if the sagging is severe, you might need to cut out the damaged area. Replacing that with new drywall will ensure a proper fix. Just make sure it’s firmly attached to the studs so it doesn’t have the same issue again.
Once you’ve secured everything, it’s time to make it look good. Apply some joint compound to create a smooth surface. Sand it down afterward for that seamless integration with the rest of the wall. It really makes a difference in the end.
Using drywall repair clips can simplify securing new drywall panels and improve the durability of your repair.
In short, fixing sagging drywall isn’t too tricky, but it’s all about catching those problems before they get worse. Ever tackled a home repair like this before?
Recommended Products

Precision machined one-piece stainless steel frames : Provides unmatched durability and a no-leak design with tight tolerances for cleaner corner finishes.

Premium quality CNC machined, billet aluminum body that has been hard-coat anodized for long term durability and easy cleanup.

Combo Flusher Creases and Beds AND Feathers Inside Corners without Switching Tools
When Should You Call in the Pros for Drywall Repairs?
When do you need to call in the pros for drywall repairs? If you notice your drywall sagging more than 1/2 inch, it’s time to reach out for help. That can be a sign of serious structural issues that might need a professional’s eye. Also, keep an eye out for water stains or any signs of moisture damage. Those can turn into bigger problems if left untreated, so consulting with water damage restoration experts is a smart move.
What about larger areas of damage? If you’ve got extensive cracks or if the drywall is separating from the framing, you’ll probably want to let the pros handle that. They have the skills to assess the situation and do the repairs efficiently.
If your home is older, like one built in the ’70s with glued drywall, it might make sense to hire a contractor experienced with older homes. Honestly, those kinds of repairs can be tricky, and you might end up saving yourself a lot of headaches by letting someone with the right expertise take over.
For repairs that get into the nitty-gritty involving insulation or any structural changes, professional help is definitely a must. Trying to tackle these on your own might not only put your safety at risk but could lead to more issues down the line.
It’s also important to use moisture-resistant products for any bathroom drywall repairs to prevent ongoing damage in humid conditions.
Recommended Products

Includes one pallet of 60 cases (720 tiles/2880 sq ft); Versatile; The no-fuss smooth texture and color allow for seamless integration into any room or design scheme; Perfect for office buildings, restaurants, and home improvement


【Floating Vanity with Optional Towel Rack】The wall mounted design frees up floor space and makes cleaning easy. Includes an optional towel rack, keeping towels within reach. Ideal for multiple bathroom layouts—large bathrooms, guest baths, family, villa or hotel-style setups.
Preventive Measures for Avoiding Future Drywall Issues
Have you ever noticed annoying stains on your walls that seem to appear out of nowhere? It’s frustrating, and it’s often a sign of moisture problems lurking behind the surface. To help prevent future drywall issues, regular wall inspections are key, especially in those humid areas like bathrooms and kitchens.
First off, proper insulation matters. Think about installing a vapor barrier to keep moisture at bay. Another important step is to keep an eye on your foundation. If it settles too much, it can lead to sagging drywall, which nobody wants to deal with.
When it’s time to make repairs, here’s a tip: using plaster washers can provide that extra support you need. And when you’re securing your drywall, make sure to use screws that are at least 1 ¼ inches long and space them about 12 inches apart. This simple trick can make a big difference in how well your repairs hold up over time.
Scheduling regular assessments with professionals can also be a lifesaver. They can pinpoint potential problems before they escalate into major headaches. After all, why wait until a small issue turns into a costly repair?
For minor cracks or holes, consider using a drywall repair kit that includes patches and spackle, as these products offer easy application and help achieve a seamless finish that blends well with your existing ceiling or wall texture.
Moisture Management Techniques for Preventing Drywall Damage
Managing moisture is a real challenge when it comes to protecting your drywall. Have you ever noticed those unsightly water stains on the walls? Or worse, the sagging that comes with too much humidity? Implementing some smart moisture management techniques can save you from those headaches.
Try this: installing a vapor barrier in rooms that attract humidity, like basements and bathrooms. It’s a simple way to reduce moisture buildup that can lead to drywall damage. Don’t forget regular check-ups around your home. If you spot any plumbing leaks, fix them quickly—trust me, even a tiny leak can cause major wear and tear over time.
Exhaust fans in kitchens and bathrooms are another effective tool. They can significantly lower humidity levels, which is key. Maintaining indoor temperatures between 68-72°F and a humidity range of 30-50% will also keep moisture from becoming a problem. I know it sounds like a lot, but proper insulation in attics and walls can go a long way in preventing moisture-laden air from reaching your drywall.
Using oscillating tools with drywall-specific blades can help you efficiently repair any damage caused by moisture before it worsens.
Honestly, a little bit of attention to these simple techniques can save you from costly repairs down the line. So, are you ready to take charge of moisture management in your home?
Cost Estimates for Drywall Repairs and Budgeting Tips
Dealing with drywall repairs can feel like a never-ending chore for homeowners. If you’ve noticed sagging drywall, particularly in older homes, you’re not alone. It’s one of those issues that often sneaks up on you, and understanding the costs involved is key.
If you catch minor sagging early, you’re looking at repair costs between $50 and $200. But let it go too long, and that number could jump to $500 or more—especially if structural changes are needed. Full replacements can hit your wallet hard, anywhere from $2,500 to $8,000, particularly if there’s moisture involved. So, why does this matter? Because staying on top of these repairs can save you a chunk of change in the long run.
Try this: schedule regular inspections of your drywall. It’s a smart way to catch any issues before they balloon into bigger problems. For those minor repairs, don’t hesitate to roll up your sleeves and tackle them yourself; you’ll save a bundle. However, if you’re facing severe sagging, budgeting for a professional assessment is your safest bet. It guarantees the repairs are done right without putting too much strain on your finances.
Truth is, knowing the costs and being proactive can make a world of difference. Keep an eye on your walls, take action when necessary, and you’ll avoid nasty surprises in your repair bills later on. After all, it pays to be prepared! What’s the worst drywall repair story you’ve got?
When choosing repair solutions, consider kits with moisture-resistant formulations to ensure durability in areas prone to dampness.
Recommended Products

GENUINE LEVEL5 | If quality, performance, and reliability of your finishing tools matters, choose LEVEL5 brand tools.

GENUINE LEVEL5 | If quality, performance, and reliability of your finishing tools matters, choose LEVEL5 brand tools.
Complete Drywall Finishing Kit – Includes 10" and 12" flat boxes, quick clean pump, filler, corner roller, angle box applicator, angle head finisher, and fiberglass handles.
Frequently Asked Questions
Why Is My Drywall Sagging?
Our drywall’s sagging could be due to moisture damage weakening the structural support, causing drywall materials to separate. It’s essential we investigate any water sources and reinforce the installation for long-lasting stability.
How Much Ceiling Sag Is Acceptable?
We’ve noticed that up to 1/2 inch of ceiling sag is generally acceptable, reflecting natural settling. If we’re concerned, let’s explore repair options to guarantee proper ceiling support and maintain our home’s integrity.
Does Drywall Sag Over Time?
Yes, drywall can sag over time, impacting its lifespan. We should employ preventative measures, like proper installation and moisture control, alongside effective repair techniques to maintain its integrity and avoid costly damage down the line.
What Are Signs of Bad Drywall Installation?
We can spot signs of bad drywall installation by checking for visible seams, bubbling, or sagging. Common installation mistakes include inadequate fasteners and poor hanging methods, which ultimately impact the overall appearance and durability of our walls.