Have you ever noticed a doorknob hole in your drywall and thought, “Great, just what I needed”? It can be a real bummer. But don’t worry! Fixing it isn’t as tough as it seems.
Start by cleaning up the area around the hole. You want it clear of dust and debris so the repair sticks better. For small holes, it’s pretty straightforward: just grab a self-adhesive mesh patch, pop it over the hole, and smooth on some spackling compound.
Be sure to let it dry and then sand it down until it’s nice and smooth. It’s a quick fix that makes a noticeable difference.
Now, what if that hole is bigger? Here’s the trick: you’ll need a piece of drywall. Cut a patch to fit, secure it with screws, and don’t forget to apply joint compound around the edges to blend it in.
Once that’s dry, give it a good sanding too. It takes a little more work, but the result will be worth it.
So, why does it matter? A nicely repaired wall not only looks better but helps protect the integrity of your home. And who doesn’t want that?
After following these steps, you can take a step back and admire your handy work. Honestly, repairs like these can feel rewarding. Have you tackled any drywall repairs lately?
Key Takeaways
- Inspect the size of the hole and surrounding area to determine the appropriate repair method.
- For small holes, use a self-adhesive mesh patch and spackling compound for a smooth finish.
- For larger holes, cut a drywall patch, secure it with screws, and use drywall tape and joint compound around the edges.
- Apply multiple thin layers of joint compound, feathering edges to blend with the surrounding wall for a seamless look.
- Sand the repair area smooth, prime, and paint to match the existing wall once fully dry for a cohesive appearance.
Why Doorknob Holes Occur in Drywall?

Have you ever noticed how doorknobs seem to love drywall? If you’ve got kids or a busy household, you probably know what I mean. When a doorknob hits a wall, it can create a hole—the kind that’s not only frustrating but can lead to bigger issues if left unchecked.
These holes often pop up due to improper door alignment, or people simply not paying attention when they swing doors open. High-traffic areas, like main entrances, seem to be the worst offenders. And let’s face it: if you’ve got little ones running around, the chances of seeing one of those doorknob craters increase tenfold.
Typically, a doorknob hole measures about 2-3 inches in diameter. Repairing them isn’t just a cosmetic fix; it’s about keeping the integrity of your walls. If you’ve got areas with inadequate drywall support, the damage might crumple even more easily, making repairs more complicated.
So, what’s the best way to tackle these holes? Try this: assess the damage first. If the hole isn’t too big, a simple patch can do the job. You’ll want to have some joint compound, a putty knife, and sandpaper on hand for a smooth finish. But don’t skip the inspection—ensuring your drywall has good support will go a long way in preventing future mishaps.
Truth is, ignoring these doorknob holes can lead to more extensive repairs later on, and nobody wants to deal with that. Just a little attention now will save you time, money, and the headache of major repairs down the line. For best results, consider using fillers with advanced microsphere technology that dry quickly and provide an ultra-smooth finish.
Assessing the Damage Before Repairing

Have you ever found yourself staring at a doorknob hole in your wall, wondering where to start with repairs? First, it’s crucial to take a good look at the surrounding area. You’ll want to check for cracks or dents in the drywall that might need attention too.
Start by measuring the hole. The size can make a big difference in how you approach repairs. Small doorknob holes are often easier to fix and might just need some spackle, while larger ones may require more involved techniques. Is the hole just a surface issue, or does it go all the way through the drywall? Getting this right will help figure out the repair method you’ll need.
While you’re inspecting, pay attention to any wear or damage nearby that could affect how well the patch sticks. Don’t forget about the wall’s texture and finish, either; this little detail can make a world of difference in making your repairs blend seamlessly with the rest of the wall.
Also, considering the right fasteners, like coarse-thread screws, can be important if you need to secure patches in the drywall for a more durable repair.
All said and done, assessing the damage isn’t just a step; it’s what sets you up for success. So, what’s your next move? Are you ready to tackle that wall?
What Tools and Materials Will You Need?

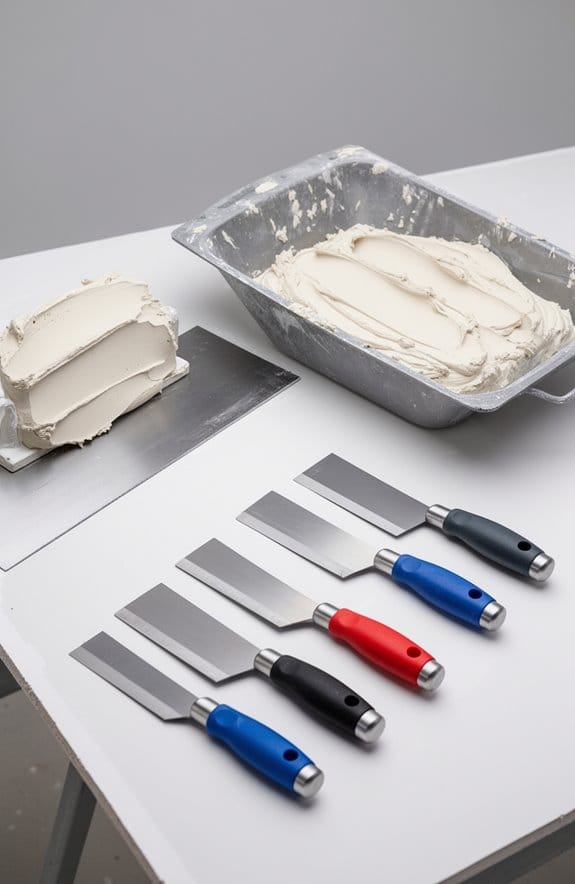
After you’ve assessed the damage, what comes next? It’s time to gather your tools and materials for the repair job. You’ll want to have a utility knife to score the drywall neatly. A drywall saw is also key—it gives you the precision you need for those cuts.
Don’t forget to grab a patch kit with a piece of matching drywall that’s a bit bigger than the hole you’re fixing. You’ll need drywall screws and a power drill handy to secure that patch properly. Applying joint compound? A drywall knife is your best friend here, and a putty knife will help you smooth everything out nicely so it blends in.
Thinking about bigger holes? Make sure to have a stud finder in your toolbox. It’ll help you pinpoint those wall studs for a solid anchor. Finally, grab a sanding sponge to prep the area before the final touches. Coating it with joint compound will give you that smooth finish you’re after. Using a protective drop cloth can help keep your workspace clean during this process.
Recommended Products

【12PCS Drywall Tools Set】 C&T drywall knife set includes 1", 2", 4", 6", 8"Stainless Steel Putty Knives, 8",10" Taping Knife, 6.5" Bucket Scoop, 8-in-1 Painter Scraper, 16" Mud Pan and13" Floor Scraper Blade with 4" Replacement Blade .Handle any task on your drywall with this complete knife set, designed for both intricate repairs and smoothing expansive surfaces.

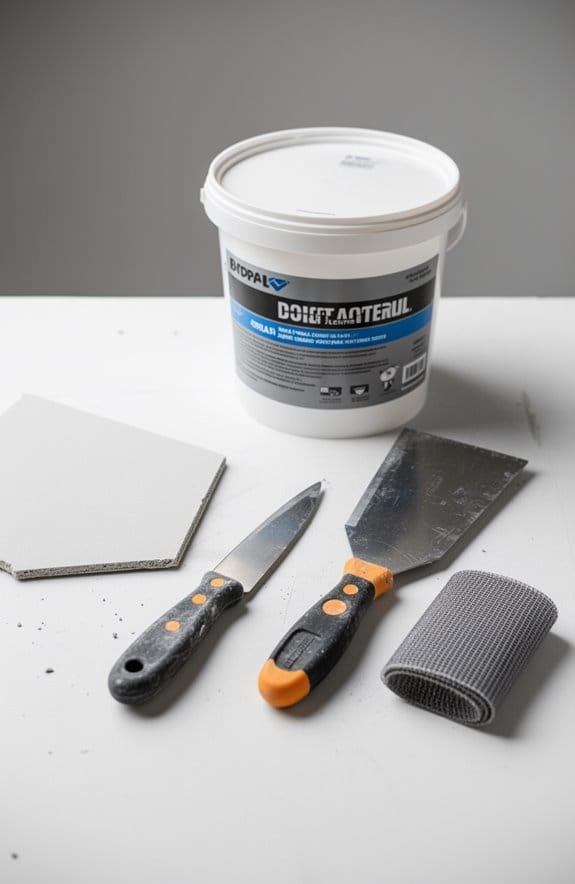
Complete Repair Kit: Contains 1 pieces repair putty(8.5oz), 2 inch wall repair patches(2pcs), 4 inch wall repair patches(1pcs), 2 pieces of sandpaper, and 4 plastic scrapers.

14-Piece Drywall Tools: You will get 1″, 2″, 3″, 4″ putty knives; 6″ joint knife; 8″, 10″, 12″, 14″ taping knives; 14″ drywall mud pan; 2 reusable sanding sponges; safety goggles; all zip into the bonus Oxford carry tote for grab-and-go jobs
Step-by-Step Guide to Fixing Small Holes
Got a small hole in your drywall? You’re not alone. It happens to the best of us, whether it’s from moving furniture or a wayward door handle. Thankfully, fixing it is simpler than you might think.
Start by cleaning the area around the hole. It’s essential to get rid of any dust or debris so that the patch sticks properly. Now, here’s the trick: grab some self-adhesive mesh patch and cover the hole. Make sure it extends at least an inch beyond the hole’s edges—this ensures a strong repair.
Next, you’ll want to grab a drywall knife and apply a thin layer of spackling compound over the mesh patch. Smoothing it out is key here; you want it to look as even as possible. After about 1-2 hours, when the compound is dry, go ahead and lightly sand the area with some fine-grain sandpaper. This is the step where you can really achieve that smooth finish you’re after.
Once you’re satisfied with the surface, don’t forget to clean off the dust. It might not seem like a big deal, but trust me, this makes a difference when you go to prime and paint. Speaking of which, use a primer and paint that matches your wall for a seamless repair.
For faster project completion, consider using fast-drying spackling compounds that can dry in as little as 30 minutes.
And there you have it! A quick and straightforward fix for those pesky drywall holes. So, what’s stopping you from tackling that repair today?
Recommended Products
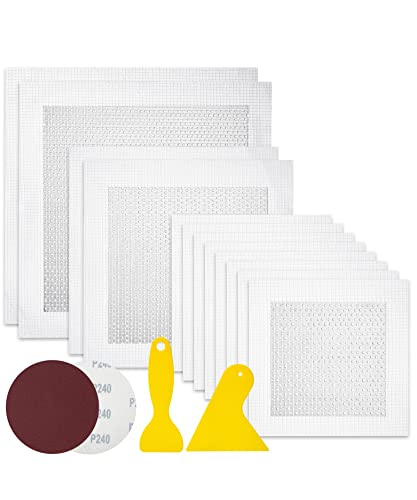
Package includes 12 pieces of drywall repair patch in three different sizes (8 pieces of 4-inch, 2 pieces of 6-inch and 2 pieces of 8-inch), 2 pieces of sandpaper (240 grit), and 2 plastic scrapers.

Meet Your Various Wall Repair Needs -- Our kit contains 14 PCS Aluminum Mesh patches, including two 10-inch patches, two 8-inch patches and ten 4-inch patches. To help you repair your walls more effectively, we also offer you 1 pack large size scraper, and 2 pieces 240 grit sandpaper. This Aluminum Drywall Repair Kit can almost satisfy the desired size you need

COMPLETE KIT: 15-piece dry wall patch set includes multiple sizes - 4 pieces (2x2"), 5 pieces (4x4"), 3 pieces (6x6"), and 3 pieces (8x8")
How to Patch Larger Holes Made by Doorknobs
When you find a hole in your wall from a doorknob, it can feel a bit daunting. Don’t stress too much, though. Patchwork like this is manageable if you break it down step by step.
Start by cutting a square piece of drywall that’s at least two inches larger than the hole. It’s better to overestimate here. Score the back of the drywall and snap it cleanly—this helps with a tidy cut. Next, remove any damaged edges around the area and make sure it’s clean. Nobody wants debris stuck under their patch!
Now, you’ll want to secure that drywall patch with screws. Make sure it sits flush with the wall—that smooth finish is key. Here’s the trick: apply some mesh drywall tape around the edges of the patch. This holds everything together and helps create a seamless look when you add the joint compound.
Speaking of joint compound, it’s time to grab your putty knife. Spread it over the tape, feathering out the edges to blend it into the wall. After it dries, which usually takes a few hours, you’ll need to sand it smooth. Nobody wants a lumpy wall!
The best part is, after a bit of sanding, you can touch it up with paint. Just make sure you match the color so it looks like new. Honestly, a little patience goes a long way here, and those walls will look good as new. Using fiberglass mesh tape can enhance durability and prevent cracking around the repair area.
Recommended Products

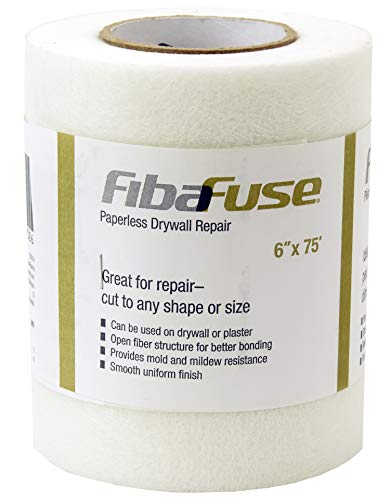
【100% Fiberglass Mesh 】0.8mm Thickness -Made Of High-Quality Commercial 100% Grade Fiberglass Mesh.

APPLICATIONS: LLPT Drywall Fiberglass Tape is widely used for repairing and reinforcing wall cracks, ceiling joints, plasterboard seams, drywall repair, kitchen bathroom renovations, DIY projects, concrete walls, sanding, painting and curved edges; suitable for both exterior and interior applications; it provides a fast, neat, professional and permanent repair to cracks and holes; spackle the tape area is required for long time support. It's compatible with cement, wood, tile, concrete, plaster, paint and so on

100 percent fiberglass mesh
Techniques for Applying Joint Compound Smoothly
Got a patch on your drywall that needs some attention? Applying joint compound smoothly can be a bit tricky, but with a few simple steps, you can make it look like a pro did the work.
Start off with a putty knife that’s about six inches wide. You’ll want to cover the entire patch with drywall compound, but the trick is to keep that layer thin. This not only gives you more control but also leads to a smoother finish. Once you’ve applied it, let it dry completely; this is where patience pays off.
After the compound has dried, take a drywall knife and feather those edges out beyond the patch. This technique helps the repair blend seamlessly into the wall. If you notice any rough spots poking through, don’t fret—just add another thin layer of compound and let it dry again. Trust me, using multiple thin layers is key to achieving that polished finish and hiding the repair as much as possible.
So, why does this matter? The more care you take with each layer, the better the final look will be. Remember, you want to minimize any visible spots, and that takes just a bit more effort upfront.
In the end, getting your joint compound applied smoothly is all about the right technique and not rushing the drying process. Using drywall repair kits designed with self-adhesive patches can also simplify the repair of large holes and improve overall results. Have you tried these steps before? If not, give it a shot—you might surprise yourself with the results!
Sand and Finish for a Seamless Repair
Have you ever tackled a patch job on your wall only to realize the repair looks worse than the original damage? You’re not alone! The real secret to a flawless finish lies in how you sand and finish the joint compound.
Once that compound has dried up, it’s time to grab some fine-grain sandpaper. Start sanding gently; this part is key. You want to feather the edges so they blend in completely with the surrounding drywall. It’s like giving that area a little TLC. You can either sand in circular motions or go back-and-forth along the grain. Both methods work, but stick with whatever feels more natural for you.
Now, take a step back and give everything a good look. Do you see any bumps or uneven spots? If so, don’t hesitate to add another layer of joint compound. Let it dry, then sand again. It’s all about getting it just right.
Once you’re satisfied with the smoothness, consider applying a primer to the area before painting. This is a crucial step—primer helps the new compound stick well and ensures that the paint color matches the rest of the wall perfectly. Using the right drywall finishing tools can make a significant difference in achieving a seamless repair.
When to Repaint After Repairing the Area
Have you ever found yourself staring at a doorknob hole in your drywall, unsure of when to repaint it after making repairs? It’s a common dilemma, but the good news is that there’s a clear path to get a smooth finish.
First, make sure the patch is completely dry and sanded smooth. Waiting for this step is crucial because it sets you up for a more polished look. If the wall around the repair has a glossy finish, don’t skip the primer! Applying a coat of primer ensures that the new paint adheres nicely, leading to a more consistent appearance.
When it’s time to paint, blending the new paint with the old is key. To do this effectively, consider using multiple thin coats instead of one thick layer. This will help avoid those pesky visible lines that scream “I tried to fix this!” If the entire wall was painted prior, you might want to tackle the whole wall to keep color and texture uniform.
So, why does this matter? It all comes down to the beautiful finish you want for your space. Remember to keep an eye on the drying times as specified by the manufacturer—this is a step you definitely don’t want to rush.
Additionally, consider the material durability of the surfaces you’re working with to ensure your repair lasts and looks great over time.
In short, take your time with the repair and painting process for the best results. What project are you planning to tackle next?
Preventing Future Doorknob Holes in Drywall?
Have you ever found yourself staring at a fresh doorknob hole in your drywall? It can be a real headache! Luckily, there are some simple steps you can take to keep those pesky dents and holes from popping up in the future.
One effective solution is to install a doorknob shield or bumper right behind your doorknob. These little gadgets act like a cushion that absorbs the impact every time you swing that door open. Also, don’t overlook the power of door stoppers or wall-mounted devices. They can stop the doorknob from making contact with the wall in the first place.
Another tip? Regularly check and adjust your door hinges. A well-aligned door closes without much force, which means less wear and tear on your walls. And if you’re tired of dealing with repairs, consider doorknobs that have a deeper inset or a protective design. They can significantly lower the risk of a direct hit to your wall.
So why does this matter? Educating your household about controlling door movements can really cut down on accidental damage. The more everyone is aware, the fewer the problems!
In short, with a few proactive strategies, you can keep your drywall looking fresh and save yourself some time on repairs. Using specialized tools like corner bead clinchers can also help reinforce drywall edges and prevent damage. What steps are you willing to take today to protect your walls?
Recommended Products

Protect walls from damage - Stop door knobs, cabinets, and furniture from denting and scratching your walls. Our 3.14"(8cm) large-diameter pads provide 60% more coverage than standard 2-inch stoppers, acting as an invisible shield for high-traffic areas like kitchens, bathrooms, and bedrooms.
DOOR KNOB WALL PROTECTOR: Use the Prime-Line U 9271 wall shields to protect interior walls from impact damage by shielding the point of contact on the wall from door knobs

FLAT DISC DESIGN — STAYS FLUSH TO THE WALL: Unlike tapered dome-style pads, these 2-inch silicone guards use a flat disc profile with more even thickness from center to edge. That helps the rim stay down, keep fuller wall contact, and look cleaner over time
Troubleshooting Common Issues During Repairs
When you’re fixing doorknob holes, you might run into a few snags along the way. Large holes can be especially tricky, but there’s a way to make it work. Start by cutting your patch so it fits snugly between the wall studs — this adds stability that you really want. Smoothing out the edges of the patch is also key, as it helps the adhesive stick better.
Here’s the trick: using mesh drywall tape around the patch’s edges can keep cracks at bay when the joint compound dries. And if you find yourself with a hole that’s too close to the edge of the drywall, don’t hesitate to add some extra support. Dry time matters, too; make sure to wait long enough for the joint compound to set completely. Sand it lightly between coats to achieve that flawless finish. For best results, apply multiple thin layers of joint compound, sanding between each layer to ensure a smooth surface.
Recommended Products

【Heavy-Duty Fiberglass Mesh】 Made from premium high-density fiberglass mesh, this drywall joint tape offers excellent tensile strength, crack resistance, and alkali resistance. Designed to reinforce drywall seams and help prevent future cracking for long-lasting repairs.
Thin profile is easy to conceal for a smooth, processional finish
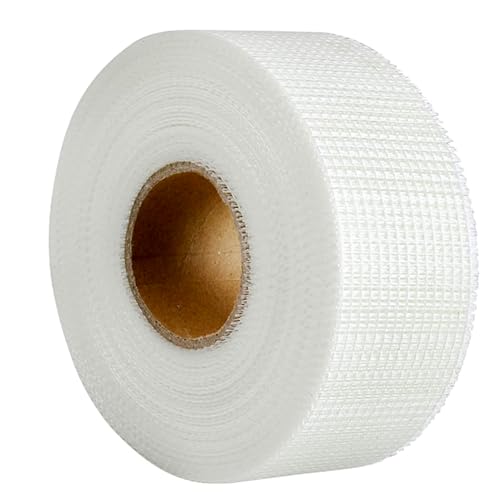
SIZE And MATERIALS: Size and material: 1 roll of 50 mm (width) x 45 m (length) fiberglass tape, made from fiberglass with 2.36 mm x 2.36 mm mesh holes.
Frequently Asked Questions
How to Patch a Door Knob Hole in Drywall?
To patch a doorknob hole in drywall, we’ll gather tools like putty and tape, prepare the wall properly, avoid common mistakes, sand effectively, and use paint matching methods for a seamless finish!
How to Fill in a Doorknob Hole?
Filling a doorknob hole’s like stitching a favorite shirt—precision matters. For effective drywall repair, we’ll gather our repair tools, apply spackle, sand it smooth, and use painting techniques to restore our home’s aesthetics beautifully.
How to Fix Holes in Drywall Without Making It Noticeable?
To fix drywall holes seamlessly, we’ll use DIY tools like joint compound and mesh tape, apply matching drywall texture, and finish with effective painting techniques, ensuring our home repair remains affordable while enhancing our interior design.
How to Fix Doorknob Dent in Wall?
When it comes to doorknob damage, we need to roll up our sleeves! With some DIY tools, good patching techniques, and a bit of patience, we can tackle drywall repair and maintain our home’s interior design.