Got a big hole in your drywall that’s more than 6 inches across? You’re not alone. It can be frustrating to deal with, but patching it up is definitely doable with a little know-how.
Start by checking out the hole’s size and state. Make sure there aren’t any loose bits around it that might cause problems later.
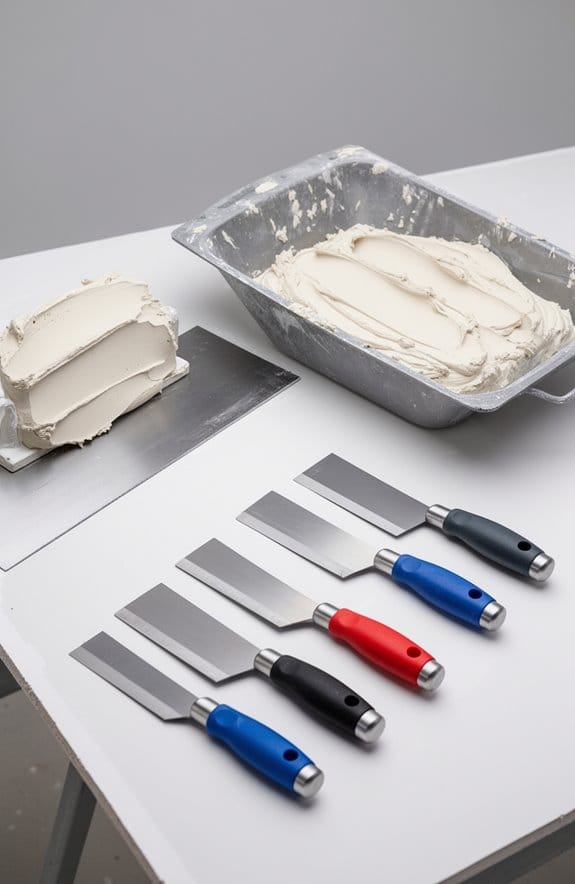
Then, gather your tools: you’ll need a utility knife, drywall screws, mesh tape, and some joint compound.
Here’s the trick: cut a new piece of drywall that’s at least 2 inches larger than the hole. This extra room helps you secure it better. Use 1-1/4″ screws to fasten this piece to the wall.
After you’ve got the drywall in place, it’s time for the mesh tape. Apply that around the edges where the new piece meets the old.
Once that’s done, spread joint compound over the mesh tape and around the edges of the new drywall. Just remember to feather the edges to blend it in smoothly. This part can be messy, but that’s why it’s called DIY, right?
Don’t forget to prime the patched area before painting; this step really makes a difference in the final look.
So, why does this matter? A well-done repair not only freshens up your space but also saves you from bigger problems down the line.
You’ve got this! Just take it one step at a time, and you’ll be enjoying a smooth wall again in no time. What’s your next home repair project going to be?
Key Takeaways
- Cut a square around the hole’s edges for clean removal, ensuring to inspect surrounding drywall for damage.
- Use a backing support like a 1×4 wood piece and securely attach the new drywall piece to it.
- Apply drywall tape around the patch edges to reinforce seams and prevent cracking.
- Use joint compound in layers, allowing each coat to dry before sanding for a smooth finish.
- Prime the patched area with an oil-based primer before painting for enhanced adhesion and durability.
Assessing the Size and Condition of Drywall Holes

So, you’ve got a hole in your drywall, huh? It’s one of those annoying little problems that manage to pop up when you least expect it. Before you jump right into repairs, take a moment to consider both the size and condition of that hole. If it’s bigger than 6 inches, trust me, you can’t just slap a patch on it and call it a day.
Start by checking the surrounding drywall to see if there’s any additional damage that needs attention. It can often be the case that a hole is just the tip of the iceberg. Once you’ve assessed the damage, make a square cut around the hole. This simple trick ensures you’re working with clean edges, which makes the whole patching process a lot easier.
Next up, you need to find some backing to support your new piece of drywall. Look for wall studs or, if they’re not available, furring strips. This backing is crucial for keeping everything secure and stable. After securing the new drywall in place, don’t forget to prime the patched area with oil-based paint. This helps the new patch blend in with the existing wall and ensures a solid bond.
Why go through all this trouble? Well, if you want your repair to look professional and last for years, these steps are necessary. Using spackle products resistant to shrinking and cracking can help ensure the durability of your repair. In the end, you’ll have a smooth, seamless wall that’ll make you feel proud every time you look at it. So, what do you think? Ready to tackle that drywall hole like a pro?
Essential Tools and Materials for Drywall Repair

Have you ever found yourself staring at a hole in your drywall and feeling a bit lost? You’re definitely not alone. Once you’ve figured out how big your damage is and what you’re dealing with, it’s time to gather the essentials for your repair job.
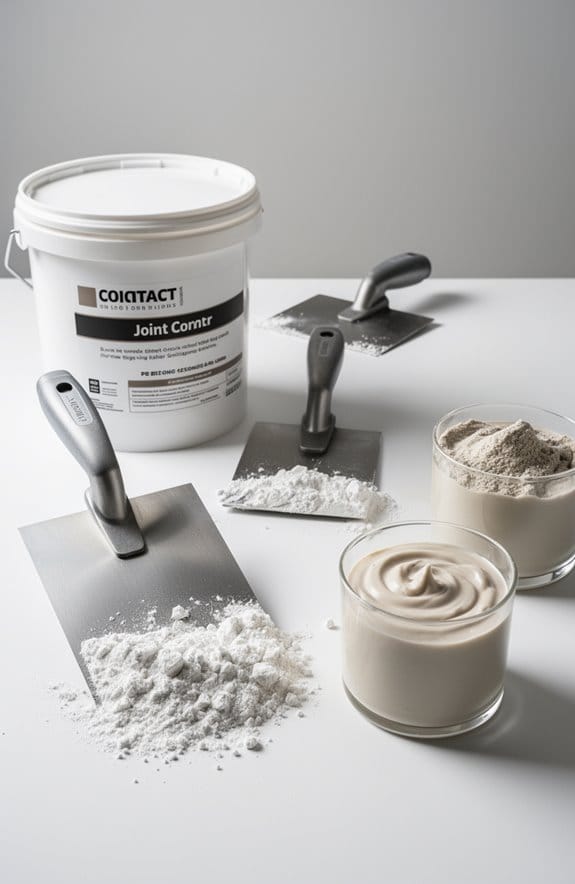
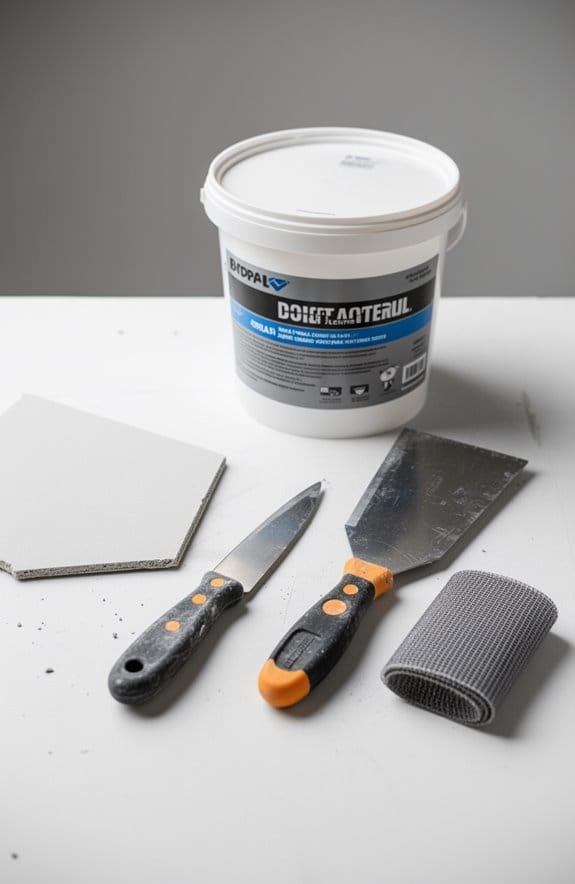
First things first, a solid utility knife is a must for cutting drywall. You’ll also need a putty knife to spread on that joint compound like a pro. Drywall patches will be your best friend for covering up those pesky holes, and don’t forget the mesh tape—it’s key for reinforcing those seams so everything stays put. Drywall screws will help fasten your patches securely, and if there aren’t any studs available, a 1 by 2 piece of wood can act as a backing to give you some extra support.
Once you’ve patched everything up, a sanding sponge will smooth the area out nicely after the joint compound dries. Truth is, this step can make a big difference in the final look. Finally, having a mixing container on hand will help you blend your joint compound to just the right consistency. For larger repairs, using a joint compound designed for drywall can provide the best adhesion and a smooth finish.
Step-by-Step Guide to Cutting a Clean Patch

Have you ever stared at a hole in your drywall and thought, “How on earth am I going to fix this?” I’ve been there, and it can feel overwhelming. But making a clean drywall patch isn’t as tricky as it seems if you follow a few simple steps.
First things first: outline the damaged area. Grab a utility knife and score a square outline around the hole. It’s important to keep those lines straight and clean. Once you’ve got that down, measure the hole and cut out a piece of new drywall that’s about 2 inches larger on each side. This extra space will help you secure the patch easily to the surrounding wall.
Now, it’s time to remove any loose chunks of drywall around the hole. You want a solid base for your patch, so if there aren’t any studs in the area, go ahead and add some backing support. A 1×4 piece of wood works great for this. Just screw it into place to ensure your patch has something to hold onto.
Ready to put that new drywall patch in? Use 1-1/4″ drywall screws to secure it to the existing framework. Be sure to space the screws out evenly along the edges—it makes for a more solid patch and helps avoid any future problems.
Finally, it’s time to make everything look smooth and pretty. Apply some joint compound over the seams, feathering the edges to blend it in with the rest of the wall. This step is crucial for a clean finish.
Once everything’s dry, you’ll have a seamless repair that looks like new. Using a lightweight joint compound can make the application easier and reduce sagging on walls and ceilings. It might feel like a bit of a task, but the satisfaction of seeing a clean patch can’t be beat. So, what do you think—are you ready to tackle that wall repair?
How to Secure Your New Drywall Patch
Securing your new drywall patch is key to making sure your repair lasts. If you’re dealing with a hole in the wall, the first thing to think about is support. Make sure that your drywall patch is anchored to something solid like wall studs, or you can use 1×4 strips if studs aren’t available.
When it comes to fastening the patch, grab some 1-1/4″ drywall screws. Distributing these screws evenly around the edges will help stabilize everything. If your hole is bigger, say around 2ft x 2ft for those long, thin damages, check if there’s any loose drywall on the edges before you dive into repairs.
Before you slather on that joint compound, don’t skip the drywall tape around the edges of your patch. This step is essential for reinforcing seams. After putting the tape down, just press gently around the edges to see if everything feels flush and secure. Using a high tensile strength tape will ensure a stronger bond and reduce the risk of cracking later on.
Applying Mesh Tape and Joint Compound for Smooth Results
Have you ever tried to patch a wall only to be left with an uneven mess? You’re not alone, and getting that smooth finish can feel like a challenge. But let’s break it down into manageable steps that can help you get it right the first time.
Once you’ve securely patched up the area, it’s time to add some mesh tape and joint compound for that polished look. Start by wrapping mesh tape around the edges of your patch. This little step is critical because it adds strength and helps prevent any future cracks. Here’s the trick: next, grab your putty knife and apply joint compound. Begin in the center of the patch, then feather the edges out to blend it seamlessly with the wall.
Now, take a moment to think about drying time. It’s crucial to let the first coat dry completely—this usually takes several hours or sometimes overnight. Why is this drying period so important? If you rush ahead and apply another coat too soon, it can mess up the whole project. Once that first layer is dry, feel free to add a second or even a third coat if needed. Just remember to wait for each layer to dry fully before moving on.
For the best results, consider using a lightweight joint compound which not only dries faster but also sands more easily, helping you achieve that flawless finish with less effort.
In short, applying mesh tape and joint compound might seem daunting, but with these tips, you can achieve that smooth finish you’re looking for. Are you ready to dive in and give it a shot?
Sanding Techniques for a Flawless Surface
Achieving a smooth surface after patching can feel like a real challenge, right? It’s all about mastering some sanding techniques. One of the first steps is to grab a sanding sponge or some fine-grit sandpaper once your initial coat of joint compound has dried. When you’re sanding, remember to keep your pressure light to avoid messing up that patch you just worked so hard on.
Try this: sand in a circular motion around the edges of the patch. This little trick helps create a seamless blend with the surrounding wall. And don’t skip out on safety—always wear a dust mask and goggles to keep that fine dust out of your lungs and eyes. After you’ve sanded, a quick wipe with a damp cloth does wonders. It removes all that pesky dust, ensuring a clean surface for any additional coats you might need to add.
Truth is, if you need to, repeat this sanding process after each coat of compound. This step is crucial to make sure everything feels smooth before you finally slap on that fresh coat of paint. No one wants to see bumpy walls when they’re done, right?
Using drywall files with integrated dust collection can minimize dust during sanding and help maintain a cleaner workspace.
Why Priming Is Essential Post-Drywall Repair
Have you ever finished repairing drywall only to realize that the paint doesn’t quite match the rest of your wall? That can be so frustrating! The trick to ensuring that your repairs blend seamlessly is priming.
Once you’ve mastered those sanding techniques, it’s time to focus on this step that often gets overlooked. Priming your repaired drywall surfaces is crucial. It seals the joint compound, making sure the paint absorbs evenly. This not only promotes a consistent finish but also hides any visible patches. So, why does this matter? Well, a good primer can really make a difference between a flawless job and a patchy mess.
It’s best to opt for an oil-based primer. Why? Because it provides superior adhesion, which means you’re less likely to deal with peeling or bubbling later on. Remember, whether you’re painting with flat or glossy finishes, priming the repaired areas is non-negotiable. Skipping this step can lead to a patchy finish that draws attention to your hard work instead of blending in.
Here’s the bottom line: priming enhances the durability of your final coat and extends the lifespan of those repairs. So, don’t rush this part! Also, consider primers with stain-blocking technology to prevent discoloration and ensure a truly professional finish.
In a nutshell, never underestimate the power of a good primer. Taking this extra step can save you from a lot of headaches down the line. Ready to get started? Your walls will thank you!
Choosing the Right Paint for Drywall Repair
When it comes to fixing up drywall, matching the paint can be a bit tricky, right? The goal is to get a color that looks just like what you already have, so the repair blends in nicely. A great tip is to bring a sample of your wall color to the paint store. They’ll help you get it just right.
Consider using a high-quality paint-and-primer-in-one. These products can save you a lot of time and they do a better job covering up those patched areas. If your walls have a glossy or semi-gloss finish, make sure to prime the patched sections before you start painting. This step is crucial for ensuring the paint sticks properly.
Now, if you have textured walls, you have a couple of options. You can either use a spray-on texture solution or try to mimic the texture with a brush. Honest advice: it can take some practice, but it’s definitely worth the effort for a seamless look.
Remember to let the repaired area and primer cure completely—usually, that means waiting at least 24 hours—before you apply the final coat of paint. Think about it: giving it time to set will ensure you won’t run into more issues later on.
For best results, consider using a quick-drying spackling product that changes color to indicate dryness to know exactly when it’s ready for painting.
Wrapping it up, choosing the right paint for drywall repair really matters for that flawless finish. What tips or tricks have you found helpful in your own home repair projects?
Troubleshooting Common Drywall Repair Issues?
When you’re diving into drywall repair, you might run into a few bumps in the road. Ever applied joint compound only to find air bubbles popping up? That can be frustrating! If you do see those pesky bubbles, try digging them out with a utility knife to score the surface. This little trick can help prevent cracking down the line.
Now, let’s talk about those larger holes. Instead of getting overwhelmed, consider using a self-adhesive mesh patch. It’s a simple solution: just cut the patch slightly larger than the hole, stick it on, and then cover it with joint compound. Make sure to feather the edges with your drywall knife to get a nice, smooth finish. If it still doesn’t hold, you may need to layer on more joint compound to really seal it.
Honestly, the quality of the materials you choose makes all the difference. A good patch job not only looks better but also lasts longer. So, why does this matter? Because nobody wants to redo their repairs down the road. Keep this advice in mind, and you’re likely to have a sturdy, professional-looking result. Got any repair tips of your own? For seamless results, using a tape with strong adhesive strength ensures the patch stays in place without slipping.
Final Touches for a Professional Finish
Got a patch job on your drywall that’s looking a little rough around the edges? You’re not alone—getting that spot to blend in can feel daunting. But with a few straightforward steps, you can achieve a professional finish without breaking a sweat.
After you’ve applied your final coat of joint compound, it’s time to ensure a seamless appearance. Lightly sanding the patch with fine-grit sandpaper works wonders for blending it smoothly into both the hole and the surrounding wall. Trust me, this step is essential; it gets rid of any bumps that might catch the light weirdly.
Next up is priming and painting your handiwork. Grab a good drywall primer for even absorption before you slap on your finish coat. When you start painting, it’s important to match the existing wall color as closely as possible. If the wall has a certain texture, you might consider a texture product or even the flicking method with joint compound to mimic it. This little trick can really make your patch disappear.
And don’t forget about your tools! A quick clean-up will have them ready for your next project.
To ensure your repair lasts, choose fillers that resist shrinking and cracking for long-term durability.
So, why go through all these steps? Because a little extra effort can make a big difference in how seamless your repair looks. A polished patch can boost the overall feel of your space.
In the end, it’s all about that little attention to detail. Have you tackled any drywall projects before? Share your experiences!
Frequently Asked Questions
How Big Is Too Big of a Hole to Patch?
When it comes to hole size, anything larger than six inches can be tricky for us. We need to evaluate proper patch options, reinforcement methods, and avoid common mistakes to effectively repair drywall damage.
How to Repair an 8 Inch Hole in Drywall?
Wondering how to fix that 8-inch hole? We’ll use drywall repair techniques, our patching tools guide, and finishing techniques explained—with sanding drywall tips and paint matching advice, while following drywall safety precautions. Let’s get started!
What Is the Largest Hole You Can Spackle?
We can’t effectively spackle holes larger than about 4 inches. For bigger sizes, we should use proper drywall repair methods, considering patch materials, surface preparation, and finishing touches to guarantee a durable result, following professional tips.
How to Patch Drywall Holes All Sizes Like a Pro?
They say “measure twice, cut once,” and for drywall repair, it’s essential! With the right patching techniques, surface preparation, and tool selection, we’ll avoid common mistakes and achieve perfect texture matching and finishing touches.