Have you ever looked at a hole in your wall and wondered what your next steps should be? It can be a bit overwhelming, especially if you’re not quite sure what size patch you need. Here’s how to figure it out!
First, measure the diameter of the hole at its widest point. For those tiny holes—think ⅛ inch or smaller—you can simply grab some spackling compound to fill them in.
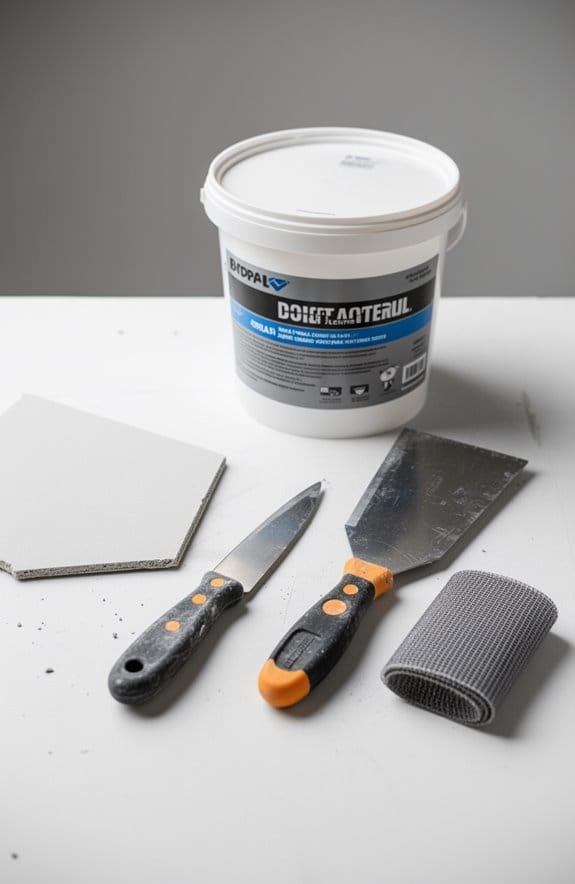
If you’ve got small holes, a basic repair kit should do the trick nicely.
For medium-sized holes, which range from ½ inch to 3 inches, self-adhesive mesh patches are your best bet. They’re easy to work with and can help make the repair process smoother.
Larger holes, anything over 3 inches, will require a more involved approach. Here, you’ll want to try the California patch method, which involves installing a new piece of drywall.
So, why does this matter? Getting the right size patch not only makes your job easier, but it can also save you time and materials.
After you’ve figured out the size of your hole and the appropriate patch, you’re all set to explore the best patching techniques that work for your specific situation.
Just remember, taking these steps will help you achieve the best results in your repair project!
Key Takeaways
- Measure the hole diameter at its widest point to determine the appropriate patch size.
- For holes ⅛ inch or smaller, use spackling compound for repair.
- Small holes (¼ to ½ inch) can utilize a small hole repair kit.
- Choose self-adhesive mesh patches for medium holes (½ inch to 3 inches).
- For large holes (3 inches or bigger), use the California patch method with a drywall piece.
How to Choose the Right Patch Size for Different Hole Types?
Dealing with holes in your drywall can feel like a headache, right? But don’t stress—choosing the right patch size isn’t as complicated as it seems.
For those pesky little nail or screw holes that are ⅛ inch or smaller, you really don’t need a patch. Just grab some spackling compound and you’re good to go. It takes just a little bit of time, and you’ll have that wall looking smooth in no time.
Now, if you’re dealing with small holes from ¼ to ½ inch, consider using a small hole repair kit. These typically come with a patch and spackling compound, which makes the job super simple. You just follow the directions and you’re on your way to a repaired wall.
Medium holes, those between ½ inch and 3 inches, definitely require a little more attention. Here’s the trick: use a self-adhesive mesh patch. It adds strength to your repair so it’ll hold up better in the long run. Just make sure to apply the spackling compound evenly.
For large holes—anything 3 inches or bigger—you’ll want to tackle it with the California patch method. This involves fitting a new piece of drywall into the hole and then applying joint compound for that smooth finish. It might sound a bit daunting, but once you break it down step by step, it’s totally manageable.
Many repair kits include tools that simplify the process, improving adhesion properties for a lasting fix.
How to Measure Hole Size Accurately?

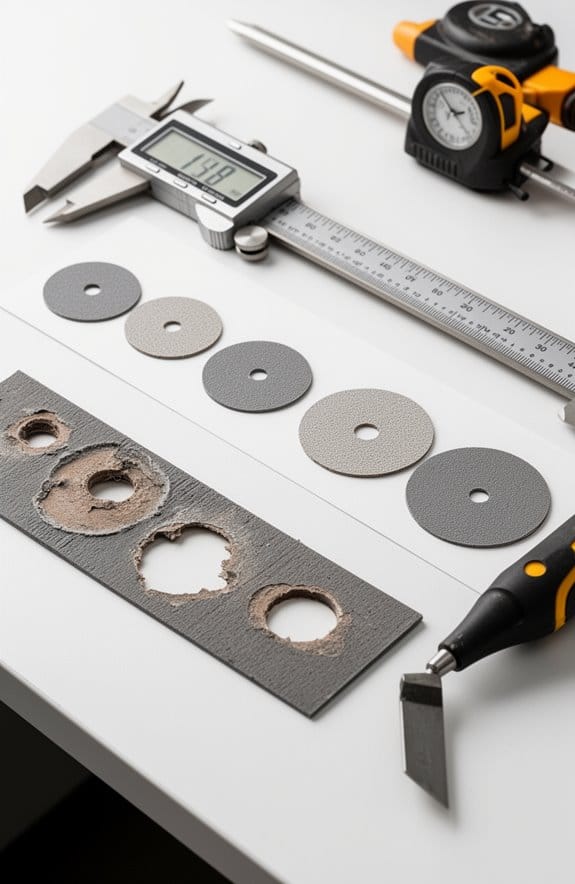
Measuring a hole in drywall accurately can feel a bit overwhelming, but it’s really not that complicated. If you’ve got a hole that needs fixing, you’ll want to grab a measuring tape or ruler to figure out how big it is. The first step is to find the diameter at the widest point of the hole. If your hole isn’t a perfect circle—maybe it’s a bit irregular—measure both the longest and shortest dimensions. From there, you can calculate an average size.
Make sure you’re measuring from the inner edges of the hole. Why does this matter? It’s all about getting the right coverage for your patch. If the hole is smaller than ½ inch, a calibrated caliper can be your best friend. It’ll give you that extra touch of precision you need.
Now, for larger holes—those over 3 inches—things get a bit more involved. You’ll want to pay attention to both the shape and the dimensions since these irregularities might mean using specific patch techniques.
So, here’s the trick: use the right tools and take your time with those measurements. You’ll be setting yourself up for a better repair job in no time. Remember, the more accurate your measurements, the easier your patching will be—it’s a simple formula that can save you a lot of headaches later on.
When it comes to drywall repairs, being meticulous pays off. Are you ready to dive into fixing that hole? Choosing the correct patch sizes and materials can significantly improve the durability and finish of your repair.
Recommended Products


Selecting the Right Patch Type for Various Hole Sizes
Have you ever looked at a hole in your wall and wondered how to fix it? Choosing the right patch type can make all the difference in how your drywall repair turns out. For really tiny holes, like those pesky nail or screw holes (⅛ inch or smaller), just grab some spackling compound. It’s super easy and dries pretty quickly.
Now, if you’re tackling small holes in the ¼ to ½ inch range, it’s time to go for a small hole repair kit. These kits come with patches specifically designed to blend in seamlessly, making your repair work look professional.
When you’re faced with medium holes—think ½ inch to 3 inches—self-adhesive mesh patches are your best friend. They provide solid support when you’re applying joint compound, which helps prevent cracking.
For large holes, anything 3 inches and up, you’ll definitely want to use the California patch method. This approach involves cutting out a piece of drywall that can be secured in place, giving you a sturdy fix. Honestly, it takes a bit more effort, but the results are worth it.
So, why does all this matter? It’s not just about aesthetics—choosing the right patch type affects how durable your repair will be in the long run. For indoor repairs, mesh patches work well, while you should consider fiberglass patches for areas prone to moisture.
To ensure the repair is long-lasting, consider using water-resistant compounds especially in kitchens and bathrooms where moisture exposure is more frequent.
In a nutshell, get the right tools for the job, and you’ll be well on your way to making your wall look good as new. What’s the most challenging repair you’ve faced in your home?
Key Considerations When Choosing Patch Sizes
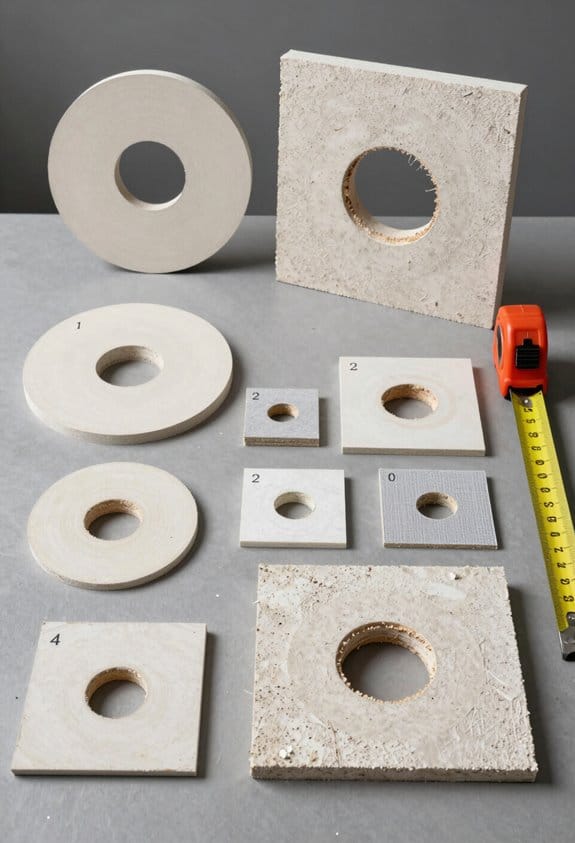
Choosing the right patch size for a hole can feel a bit tricky, but it’s crucial for making sure your repair lasts and looks good too. So, how do you figure out what size you need? Start by taking a good look at the size of the hole.
For tiny drywall holes—think ¼ to ½ inch—you won’t need much of a patch; something minimal will do just fine. But for holes that are larger, like those 3 inches or bigger, you might want to try the California patch method. It’s often the best approach for those stubborn gaps. And if you’re dealing with an irregular shape, measurements are key! Always measure from the longest points to ensure a snug fit.
When it comes to medium holes, approximately ½ inch to 3 inches, self-adhesive mesh patches are where it’s at. They’re super easy to use and provide solid reinforcement, making your job a whole lot easier. Plus, matching the patch thickness to the hole depth is vital. Typically, you’re looking at a thickness between 0.015 to 0.018 inches.
Now, what about aesthetics? That’s an important consideration too. Smaller patches tend to blend in better and create a more subtle repair. Meanwhile, larger patches can stand out, which might be exactly what you want depending on the context. So, think about what you’re aiming for.
Also, to ensure durability and a flawless finish, be mindful of the surface compatibility when selecting patch materials.
In short, knowing how to properly size your patch can save you time and hassle. Are you ready to tackle those holes?
Recommended Products

SELF ADHESIVE: Simply peel and stick over the repair area

STRONG FIBERGLASS CONSTRUCTION: Durable fiberglass mesh tape provides reliable joint reinforcement for drywall seams and repairs. Ideal for long-lasting wall patching and spackle applications.

Repair Your Walls: This drywall repair kit is made of fiberglass self - adhesive mesh and aluminum plate, working well with compound and paint, which is lightweight and durable, easy to stick, and has good adhesion. It is insulation, anti - corrosion, and moisture - proof, and can keep for a long time. Don't worry about falling off
How to Properly Install Your Patch?
Have you ever stared at a hole in your wall and wondered how on earth you’re going to fix it? It can feel overwhelming, but don’t worry—I’ve got some straightforward advice to help you out.
Start by measuring the hole carefully to ensure your patch fits well. A good rule of thumb is to cut your drywall patch about 2 inches larger than the hole. This extra bit ensures you get proper support all around. Then, apply joint compound around the edges of your patch. When pressing it into the hole, be gentle; you don’t want to compress it too much since that could compromise its integrity.
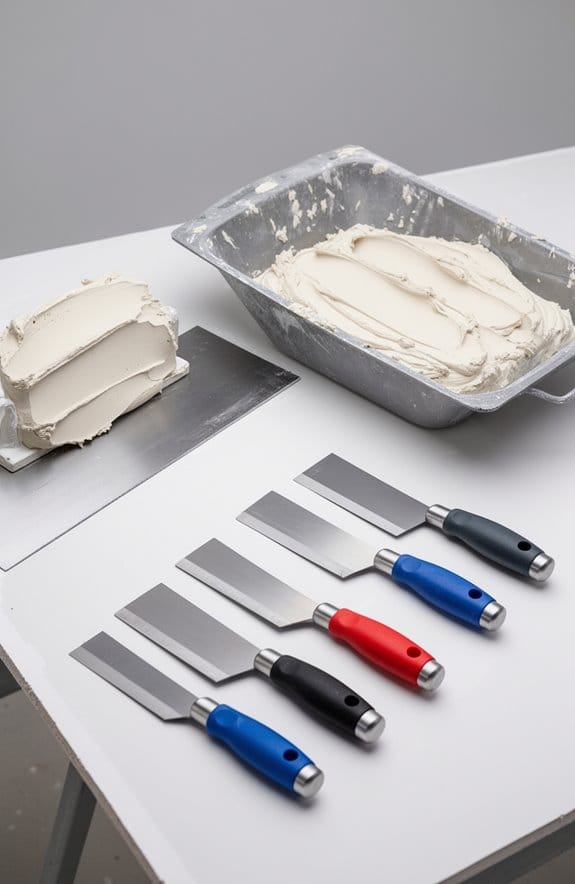
Once the patch is in place, grab a 6-inch spackle knife to spread joint compound smoothly over the area. Feather the edges, blending it into the wall as you go. It may take a little patience, but your goal here is to make it look like it was never even there.
After letting the joint compound dry completely—this usually takes about 24 to 48 hours—you’ll want to sand it down. The key is to make it flush with the wall. If you’re worried about getting it perfect, just remember, a little practice goes a long way.
Finally, prime and paint over the patched area so it matches the rest of your wall. Nothing beats the feeling of stepping back to admire your hard work. For best results, consider using lightweight joint compound designed for both wall and ceiling repairs.
So, how does it look? Don’t hesitate to share your results! It’s rewarding to see a transformed space with some simple DIY effort.
Recommended Products

Large Capacity: A large capacity putty box can hold more putty powder at once. Thus the one-time processing area is larger, so you don't have to repeatedly refill the drywall box to delay your work efficiency.

ALUMINUM PERFORATED PATCH: Durable 6 x 6 in. aluminum patch designed for easy wall and ceiling repairs. Ideal for covering wall holes and reinforcing damaged surfaces in your home.

Recommended for application to new or previously painted wood, hardboard, metal, drywall, cured plaster, masonry
Common Mistakes to Avoid in Patch Selection
When it comes to fixing a hole in your wall, choosing the right patch can really make a difference in how the repair turns out. Ever tried covering a small hole with a patch that’s just too tiny? It’s frustrating when you end up with uneven coverage and need to redo your work.
Think about where that hole is. If it’s in a spot that sees a lot of stress or movement—like near a doorframe or window—you need something strong that’ll stick well. The last thing you want is your repair falling apart because it couldn’t handle a little wiggle. And don’t overlook matching the patch material to your wall type. This helps with both adhesion and how it looks afterward.
Another thing to consider is the depth of the hole. Underestimating this can leave you with an odd, uneven surface that stands out like a sore thumb. Now, here’s the trick: always plan for compound or joint finish. Taking that extra step prevents those pesky visible seams, making your repair look professional.
For the best results, use tools with flexible blades to easily apply and smooth patching compounds, ensuring a clean and even surface.
Frequently Asked Questions
What Size Hole Requires a Patch?
Holes larger than ½ inch typically require a patch. For example, over 60% of DIYers prefer mesh patches for medium-sized holes. Understanding hole types, patch materials, and repair techniques guarantees we’ve got the right approach every time.
How to Measure Patch Size?
When measuring patch size, we’ll use precise measuring techniques with a ruler or tape. Let’s guarantee we consider patch materials and suitable patching tools to achieve the best fit for our repair job.
What Size Should a Patch Be?
When we select patch dimensions, we should consider the hole size and guarantee the patch material extends at least an inch beyond the edges. This approach enhances patch durability, leading to lasting, seamless repairs.
What Size Hole Is Too Big to Patch?
Holes larger than 6 inches are too big to patch using standard methods. For effective hole repair, we must consider patching techniques and material selection, often requiring professional help to guarantee durability and a seamless finish.