Have you ever found yourself waiting impatiently for joint compound to dry before you can apply that next coat? It can be frustrating, especially when you’re eager to see the finish line of your project. But knowing how long to wait between coats can make all the difference.
Drying times really can vary based on what you’re working on. For those smaller repairs, you’re looking at about 2 hours for it to dry.
Larger areas, though? You might be waiting as long as 24 hours. And if you’re applying thinner coats—think 1/16 to 1/8 inches—those typically dry quicker, usually between 12 to 24 hours.
So, why does this matter? It can impact how smoothly your next coat goes on.
To help speed things along and ensure proper drying, keep your work area comfortable. Aim for a room temperature between 60°F and 70°F, and try to keep humidity levels below 50%.
Do you have a fan? Using one can really boost air circulation, making a noticeable difference in drying time.
Frankly, it’s worth taking the time to get it right. If you want to dive deeper into optimizing your project, there’s plenty more info out there.
Just remember: patience pays off in the end. How long will you wait before you scoop up that next coat?
Key Takeaways
- Joint compound typically requires 24 hours to dry fully between coats, but drying time can vary based on application thickness and environmental conditions.
- Small screw holes can dry in about 2 hours, while skim coats may be ready in 15 to 20 minutes.
- Environmental factors significantly affect drying; optimal conditions are 60°F to 70°F and less than 50% humidity.
- Thinner applications dry faster, often between 12 to 24 hours, and using a fast-setting compound can reduce wait times.
- Always check for a completely dry surface, ensuring no shiny spots and a firm texture, before applying another coat.
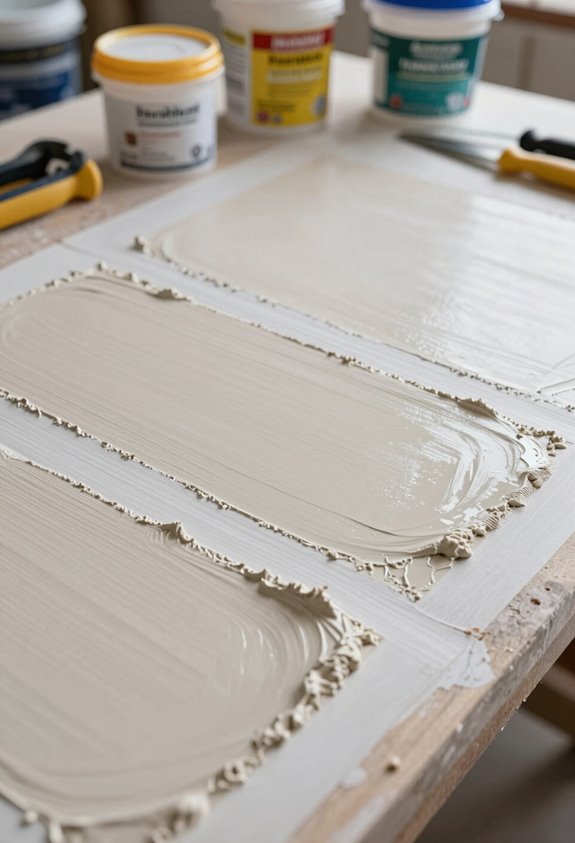
Joint Compound Drying Times: What to Expect?
Ever wondered how long you really need to wait between coats of joint compound? It’s a common headache for DIYers. Generally, when you’re applying drywall mud, the safe bet is to wait up to 24 hours for it to fully dry. But don’t panic—if you’re just filling small screw holes, you might only need to give it a couple of hours. And when it comes to skim coats? You’re looking at just 15 to 20 minutes on average.
Factors like room temperature and humidity can throw a wrench in those drying times, though. So, why does this matter? Because if you’re applying thinner layers or improving air circulation, you could see those times shrink significantly.
Here’s a quick rundown of what to expect:
- General drywall mud applications: Up to 24 hours
- Small screw holes: About 2 hours
- Skim coats: 15 to 20 minutes
Planning ahead and knowing these timelines can make your project run a lot smoother. It helps you avoid unnecessary delays and keep the momentum going. So, the next time you pick up that joint compound, just remember: drying times can vary, but with a little patience and the right conditions, you’ll be on your way to a great finish before you know it! What’s your go-to tip for speeding up the drying process? For faster results, consider using a fast drying joint compound designed to set in as little as 5 to 90 minutes depending on the product.
Key Factors Impacting Joint Compound Drying Time
Ever wonder why your joint compound isn’t drying as fast as you hoped? It’s one of those little mysteries that can really put a damper on your drywall projects. A few key factors come into play here: ambient temperature, humidity, and how thickly you’re applying that compound. For example, if you’ve got just a few small screw holes, you might be in luck—they can dry in about two hours. But if you’re layering it on thick, you’re looking at a wait of up to 24 hours.
Now, if you decide to use hot mud, a quick-setting compound, that can really speed things up—sometimes, you’re looking at drying times of just 20 to 60 minutes, depending on the formulation you choose. So, what’s the secret to speeding this up? Try improving air circulation with fans, or bump up the room temperature with heaters.
Humidity is another big player here. So, why does this matter? In high-humidity areas, moisture can cling around longer than you’d like. Using a dehumidifier can help minimize that dampness, making sure your joint compound dries efficiently between coats.
Truth is, keeping an eye on these factors can make all the difference in your drywall project. If you play it smart with temperature and humidity, you’ll be back to enjoying your space in no time! Have you tried any tips to speed up drying times before? For quick repairs, consider products like Red Devil ONETIME Lightweight Spackle which cure in as little as 15 minutes for faster project completion.
Best Conditions for Quick Joint Compound Drying
Have you ever had a project stall because your joint compound just wouldn’t dry? It’s a common frustration. But with a few adjustments, you can speed up the drying process and get back on track.
First off, pay attention to the room temperature. Keeping it between 60°F and 70°F can really make a difference; this sweet spot helps the compound dry more efficiently. If the humidity levels are high, consider bringing in a dehumidifier. It helps to speed up moisture evaporation, which is exactly what you want.
So, what else can you do? Boosting air circulation is key, and you can easily do that by using fans or simply cracking open a window. Good airflow can dramatically reduce humidity, allowing your compound to dry faster. And if you’re looking for a faster option, try hot mud. This quick-setting compound dries in just 20 to 60 minutes, which can be a real lifesaver if you’re under a tight deadline.
Another tip: apply thinner coats of joint compound. They dry a lot quicker than thicker layers, which can take up to a full day. By keeping your application light, you’ll save yourself time and hassle. Using fast-drying compounds can also significantly reduce wait times between coats, helping streamline your drywall repair process.
Recommended Products

Reliable Moisture Protection - It features a pliable, sheet-applied membrane with a modified polyethylene (PEVA) core, and non-woven polypropylene on both sides, ensuring robust waterproofing and vapor retardation.
Reliable Moisture Protection- It features a bonded waterproofing membrane with a high-density polyethylene (HPDE) core, and non-woven polypropylene on both sides, ensuring robust waterproofing and vapor retardation.

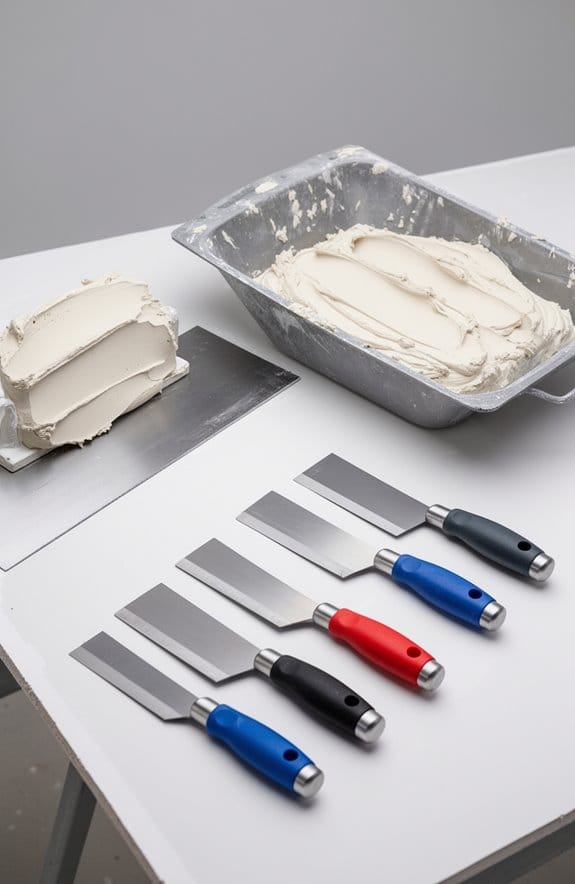
PROFESSIONAL GRADE | Expertly dispense an even, consistent layer of drywall joint compound to taped flat and butt joints on walls and ceilings. The flexible brass blade allows you to provide the proper compound application and crown - whether you're applying the first fill coat or the final finish coat. Butt and flat joint edges are also feathered to perfection.
Should You Choose Thinner or Thicker Coats for Joint Compound?
Choosing the right thickness for your joint compound application can feel overwhelming, right? It’s one of those small details that can make a huge difference in the end result. So, let’s break it down.
First off, going with thinner coats is often the way to go—think around 1/16 to 1/8 of an inch. Why? Well, thinner layers dry faster, usually in about 12 to 24 hours depending on your environment. This means you can keep the project moving along without long waits. Plus, thinner coats reduce the chances of cracking, which is a big win since it means less sanding for you later.
For those initial layers, stick to the thinner approach to set a solid foundation. It helps create a smooth base that’s easier to work with. If you’re considering thicker applications, save that for the final coat if absolutely necessary. Here’s the trick: find a balance that suits your needs.
So, why does this matter? Well, it helps keep your project efficient while making sure you achieve a quality finish. After all, who wants to spend extra time fixing mistakes when you could be enjoying your newly finished space?
In short, thinner coats are often your best bet for joint compound. It’s an easy strategy that helps you get the job done right the first time. Using a lightweight joint compound can also make application easier and reduce physical strain during longer projects. What’s your go-to tip for working with joint compounds?
Recommended Products

GENUINE LEVEL5 | If quality, performance, and reliability of your finishing tools matters, choose LEVEL5 brand tools.

GENUINE LEVEL5 | If quality, performance, and reliability of your finishing tools matters, choose LEVEL5 brand tools.

GENUINE LEVEL5 | If quality, performance, and reliability of your finishing tools matters, choose LEVEL5 brand tools.
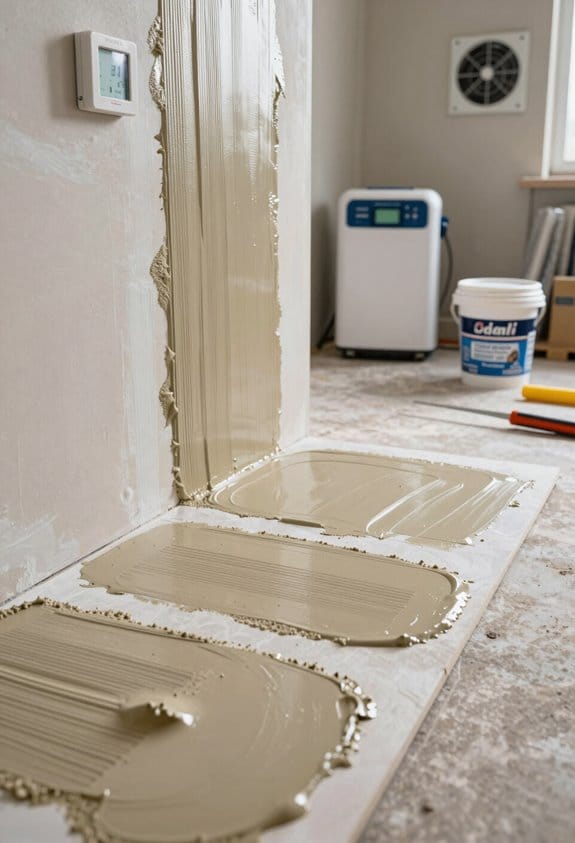
How Temperature and Humidity Affect Drying?
Have you ever found yourself staring at wet joint compound, wondering why it just won’t dry? The answer often lies with the temperature and humidity in your workspace. Higher temperatures can make a significant difference, speeding up drying times. Ideally, you want that temperature hovering around 70°F. But let’s not ignore humidity—when it’s over 50%, you could be waiting up to 24 hours for thicker applications to fully dry.
Here’s a tip: lower humidity can be your best friend, reducing drying time to about 12 hours. So, what can you do? Proper ventilation is key! Improving air circulation can help bring down humidity levels, which means faster drying times. Consider using a fan or opening windows to let the fresh air in.
During colder months or if you’re working in an unheated area, keeping things dry can be a bit tricky. Think about using a space heater or a dehumidifier to create better drying conditions between coats. What’s the worst that could happen if you don’t? Frankly, you might end up with the frustration of waiting longer than you need to.
Additionally, using moisture-resistant materials can improve the durability and performance of your drywall repairs, helping with drying and overall results.
Tips for Speeding Up the Drying Process
Ever find yourself waiting forever for joint compound to dry? It can be the most frustrating part of a project. Thankfully, there are some straightforward techniques you can use to speed up the process.
First off, think about applying thinner coats of joint compound. This really makes a difference because each layer can set faster, which is a win-win! Ideally, keep your room temperature between 70°F and 80°F. If it’s humid out, consider getting a dehumidifier; it’ll help reduce the moisture in the air.
Also, try adding some fans to the mix. More air circulation can help evaporate moisture quicker than just leaving it alone. And here’s the trick: think about using a quick-setting joint compound, commonly known as “hot mud.” It sets in about 20 to 60 minutes, which means you won’t be waiting as long between coats.
Using a lightweight joint compound can also reduce drying times and make sanding easier.
Recommended Products

Use a CanAm Compound Tube with popular Drywall Applicator Heads to achieve the best finish on flat joints, inside corners, and outside corners
Patent Pending Dual Sear Locking Design

【Complete Full-Body Training System for 2x2 Power Racks】Transform your power rack into a fully functional strength station. These lever arms support presses, rows, deadlifts, squats, and dips to target shoulders, back, arms, legs, and core. Train unilaterally to correct imbalances or perform compound lifts for total-body development
Mistakes to Avoid That Extend Joint Compound Drying Time
Drying joint compound can be super frustrating, especially when you accidentally make mistakes that drag out the process. Ever applied a thick layer only to watch it take ages to dry? It’s a classic problem. Thinner applications actually dry much faster, so that’s something to keep in mind next time you’re working on a project.
Humidity can be another culprit in slowing down your drying time. Have you ever noticed how high humidity can make everything feel sticky? If you’re dealing with a humid environment, consider using a dehumidifier. It really can make a difference.
Air circulation is another key player. If the air is stagnant in the room where you’re working, you’ll find that things just don’t dry as quickly. Try using some fans to improve airflow; it’ll help keep everything moving along nicely.
Choosing the right joint compound is crucial too. Some low-quality products can lead to longer drying times, and that’s the last thing you want when you’re eager to finish up. Stick to reputable brands to save you time and headaches.
And don’t forget about the time between coats. If you’re putting on a thicker layer, it’s a good idea to let each coat dry fully before adding another. Rushing through this can trap moisture and lead to delays.
Using quick-setting compounds can significantly speed up drying times and help you complete projects faster.
Recommended Products

Three speed settings (4,000/8,000/12,000 OPM) engineered for faster material removal

【Pure Copper Motor】 - Powered by a highly efficient 1680W pure copper motor, this electric power trowel delivers exceptional torque for both smoothing concrete and mixing materials. Strategically placed cooling vents prevent overheating during prolonged use, ensuring reliable performance even on demanding jobsites

Boat Mount for GoPro: Convert 12V from navigation port to 5V for GoPro Hero 13, 12-5, DJI, Insta360, Mevo & all action camera. Battery charger & protection to over-voltage, short circuit & overcharge.
Signs Your Joint Compound Is Ready for the Next Coat?
How do you know when your joint compound is ready for that next coat? It can feel a bit tricky, especially if you’re new to drywalling. But don’t worry, I’ve got you covered with some helpful tips!
First off, take a good look at the surface. You want it to look completely dry without any shiny spots—those glossy patches mean there’s still moisture hanging around. Keep in mind that drying times can be all over the place, ranging anywhere from 1 to 24 hours depending on factors like how thick the layer is and the humidity in your space. So, don’t rush it.
Next, give the surface a gentle touch. If it feels cool or damp, you definitely need to wait longer. Also, keep an eye on the color. The joint compound should shift from a darker shade to a much lighter one as it dries. It’s pretty noticeable once you get the hang of it!
Here’s the trick: when you run your fingers over the compound, it should feel firm and not sticky. That’s your green light to add another layer. If you find yourself hesitating after these checks, it might be best to give it a little more time.
So, why does this matter? Rushing can lead to imperfections in your finished work, and nobody wants that! It’s really worth waiting just a bit longer to achieve that smooth, professional look you’re aiming for.
To wrap things up, make sure to keep an eye on those signs of dryness before diving into another coat. Proper surface preparation and patience can make all the difference in your drywall repair success, especially when working with indoor water-based products.
Have you had any experiences with joint compound that taught you a thing or two?
Recommended Products

Professional-grade design ensures smooth, even application for drywall finishing.

PROFESSIONAL GRADE DRYWALL MUD TUBE WITH CAM-LOCK LEVER REMOVABLE HEAD FOR EASY CLEANING - Just flip the cam levers up with a finger and the head comes off - no screws to remove

Frequently Asked Questions
How Long to Wait Between Layers of Joint Compound?
We should wait anywhere from 15 minutes to 24 hours between layers of joint compound, depending on thickness. For best texture techniques, thinner coats and improved air circulation really help in speeding up drying time.
Do I Really Have to Wait 24 Hours for Joint Compound to Dry?
No, we don’t always have to wait 24 hours for joint compound to dry. Drying factors like thickness and humidity can shorten that time, so we should adjust our expectations based on those conditions.
How Long to Let Joint Compound Dry Before Painting?
Before painting, we should let the joint compound dry completely, ideally for at least 24 hours. Checking that it feels firm and not sticky guarantees a smooth paint finish without issues later on.
How Long Does Jointing Compound Take to Set?
Setting time’s practically a cosmic event! Typically, jointing compound takes about 20 to 60 minutes to set, but factors like thickness and environment play a huge role. We should always keep that in mind.