Got drywall dust and wondering how to get it clean before applying compound? You’re not alone! Drywall dust can be a nuisance, but taking the time to clean it up properly is key to ensuring your compound sticks well.
First off, safety is important. Grab some safety goggles, gloves, and an N95 respirator. Dust can be irritating, and you don’t want to be breathing it in.
After that, let the dust settle for about 15 to 30 minutes. This little trick can help reduce the amount of airborne dust when you start cleaning.
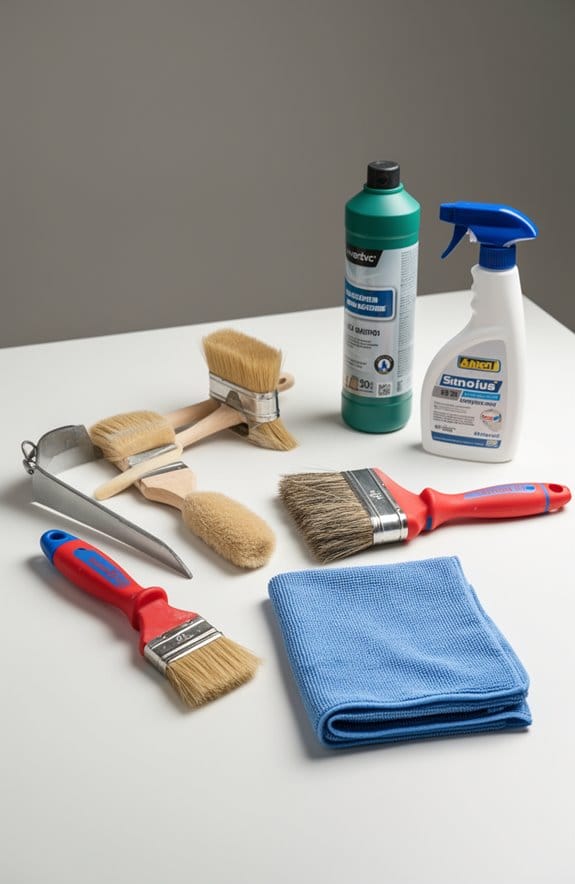
Now, grab a soft-bristle brush or a dry microfiber cloth. Dusting surfaces with these tools can make a big difference.
If you’re dealing with more stubborn grime, dampening a microfiber cloth and rinsing it often will do the trick.
Don’t forget to use a broom and dustpan or even a HEPA-filtered shop vacuum for that lingering dust that just won’t quit.
So, why does this matter? Clean drywall means better adhesion for your compound. When it’s clean, you cut down on the chances of bubbles or peeling in the long run.
In the end, taking these extra steps can save you time and trouble down the road. You’ll find that a little effort goes a long way in achieving that smooth finish you want.
Have any tips of your own? Don’t hesitate to share!
Key Takeaways
- Allow dust to settle for 15-30 minutes before cleanup to ensure effective dust removal from drywall.
- Use a soft-bristle brush or dry microfiber cloth to dust off the surfaces initially.
- Dampen a microfiber cloth for deeper cleaning, rinsing it regularly to avoid smearing dust.
- Utilize a HEPA-filtered shop vacuum for fine particles, ensuring thorough cleanup of all debris.
- Wear safety gear, including goggles and an N95 respirator, to protect yourself during the cleaning process.
Why Cleaning Drywall Is Essential

Cleaning drywall is more important than you might think, especially when you’re gearing up for a renovation project. If you’ve ever tackled one of these projects, you know how frustrating it can be when things don’t go as planned. One major culprit? That pesky drywall dust. It can really mess with how well your compound sticks to the surface, leading to peeling or cracking down the road.
So, how do you tackle this? Start off by grabbing a vacuum with a HEPA filter. This will help you get rid of all the loose dust lying around. After that, take a damp cloth or a sponge and wipe down the surfaces. It’s like giving your walls a little bath! Make sure you cover every inch; a clean surface is key for a solid bond later on.
You might wonder, why put in this extra effort? Well, a tidy surface means better paint adhesion and a smoother finish on your walls. If you skip this step, be prepared for some real headaches later, like uneven patches and paint that just won’t stick. Trust me, it’s worth the time to prep properly.
Cleaning drywall not only prevents issues but also enhances the overall look of your finished work. Taking the time to prepare right will save you a lot of trouble in the long run. So, before you dive into the fun stuff, do yourself a favor and get those walls clean. It’s also important to use chip-free cuts tools for drywall pieces to maintain the integrity of the surface, which helps compound adhesion.
What’s your go-to method for tackling dust before starting a project?
Essential Safety Gear for Cleaning Drywall

Cleaning drywall can honestly be a messy job. Before diving in, it’s crucial to think about your safety. One of the first things you’ll want to do is make sure you’ve got safety goggles on hand. They’ll protect your eyes from all that dust and debris flying around.
An N95 respirator is another must-have. This isn’t just any mask; it filters out harmful particles like silica and gypsum that could really do a number on your lungs.
Don’t forget about your hands. Put on some work gloves to avoid skin irritation from drywall dust. It’s easy to overlook the little bits that can cause discomfort. And closed-toe shoes are essential! They’ll keep your feet safe, and if you really want to avoid tracking dust all over your home, consider using shoe covers.
Now, let’s talk about air quality. Keeping your workspace ventilated is super important. Open those windows and turn on some fans to help clear out the dust from the air. A breathable environment will make a big difference in how easy and safe the cleaning process feels.
For added protection, choosing a mask that meets N95 filtration standards ensures effective filtering of fine dust particles during your drywall cleaning tasks.
Step-By-Step Guide to Removing Dust From Walls

Have you ever looked at your walls and noticed a layer of dust that just won’t quit? If you’ve been sanding or working on a DIY project, dust can really accumulate. Let’s tackle that dust head-on with a simple step-by-step approach.
First things first, give that dust some time to settle. Waiting about 15 to 30 minutes after your work is done can make a big difference. After that, grab a soft-bristle brush or a dry microfiber cloth. Start at the top of the wall and work your way down. Don’t forget to check corners and ledges—these spots are like magnets for drywall dust!
Once you’ve dusted everything off, it’s time for a deeper clean. Dampen another microfiber cloth slightly and go over the walls again, rinsing it often. This helps catch any dust you’ve missed, and it really does get the walls looking fresher. For any stubborn debris that’s still hanging around, pull out a broom and dustpan. A shop vacuum with a HEPA filter is your best friend here when it comes to getting rid of fine dust particles.
So, what do you do with all that collected dust? Toss it in some heavy-duty garbage bags to keep everything tidy. Using a drywall sander with a built-in vacuum significantly reduces the amount of dust left behind, making cleanup easier and your workspace safer.
Techniques to Clean Dust From Floors Effectively
Have you noticed how dust can gather on your floors after you’ve cleaned your walls? It’s such a hassle when all that debris settles down. First things first, grab a broom and dustpan to sweep up any large clumps of drywall dust. This quick step helps clear the bulk of the mess.
Next, switch over to a shop vacuum fitted with a HEPA filter. This is key for sucking up those pesky finer particles that always seem to hang around. Truth is, this type of vacuum helps prevent dust from swirling back into the air while you’re cleaning, which is a big plus! After vacuuming everything, consider mopping the floor with a damp mop. It picks up any leftover dust and leaves your floors looking fresh.
Here’s a tip: make sure to regularly check and change the vacuum filter, and don’t let that mop water get too dirty! Stick to manufacturer recommendations for cleaning products to keep your flooring safe and clean. Using dust collection solutions that can capture up to 99% of particles significantly improves air quality and reduces cleanup time.
Using Damp Cloths Safely on Drywall
Cleaning your drywall can feel like a daunting task, especially when it’s cluttered with dust and smudges. But don’t worry, I’ve got a simple method that’ll make it easier to keep those walls in tip-top shape without causing any damage.
First things first: grab a damp microfiber cloth. Your goal is to have it just slightly moist—no one wants to soak the drywall and ruin that finish! And here’s the trick: as you clean, make sure to constantly rinse the cloth in clean water. That way, you’re not just smearing dust back onto the wall. Start at the top and work your way down; otherwise, you’ll end up with dust settling back on areas you’ve already wiped clean.
As you’re wiping, apply only light pressure. I can’t stress enough how much this protects the joint compound from getting damaged. It’s easy to think scrubbing harder will help, but it really doesn’t. Trust me, a gentle touch works best.
Once you’re done cleaning, let the drywall dry completely before you think about applying any primers or other materials. If it isn’t dry, you could end up with poor adhesion or a finish that’s not as smooth as you’d like. So, why does this matter? Because a well-prepped surface goes a long way in achieving that professional look you’re after.
For the most precise work, consider using a tool with measurement switching capabilities to ensure accuracy when marking and preparing your work area.
Top Tools for Cleaning Drywall Dust
Tackling drywall dust can feel like a never-ending battle, right? It gets everywhere and can be such a pain to clean up. But having the right tools can seriously make your life easier.
A vacuum with a HEPA filter is a must-have. It catches all that fine drywall dust and keeps it from swirling back into the air. For surfaces, microfiber cloths are fantastic. They grab the dust without scratching anything—no one wants to deal with that!
Another sneaky tip? A soft-bristle brush is perfect for getting into those pesky corners and crevices. Just think about all the nooks that are gathering dust. Once you’ve brushed them off, you can vacuum or wipe down the area with ease. And don’t underestimate a damp rag—it helps keep the dust settled, making collection a lot simpler and less messy.
Larger particles? A broom and dustpan can be your best friends for that. Sweeping up the bigger bits before diving into a detailed cleanup can save you time and hassle.
Using a dust-free sander with an integrated vacuum system is also an efficient way to minimize airborne dust during surface preparation.
When you combine these tools and methods, you’re setting yourself up for success in getting rid of drywall dust. How do you tackle that annoying mess? Share your tips!
Common Cleanup Mistakes to Avoid
Ever tackled a drywall project and found yourself knee-deep in cleanup chaos? It’s a common struggle, but a few key mistakes can make your life a lot harder than it needs to be.
Using the wrong tools is a biggie. Seriously, if you skip out on a HEPA vacuum, you’re missing out on a way to get rid of pesky fine drywall dust. Just think about it: that stuff doesn’t just disappear! And here’s another tip: if you grab a damp rag, make sure you’re rinsing it out often. Otherwise, you could just be pushing dust around, which messes with the joint compound’s stickiness.
Have you thought about protecting your stuff? It’s tempting to dive right into your project, but leaving furniture uncovered can result in more cleanup later. Rushing through the process can kick up dust into the air too, so give the particles some time to settle before you start moving things around.
And let’s not forget about your safety gear. Wearing an N95 respirator and safety goggles isn’t just a good idea; it’s a must. You want to protect yourself from those harmful dust particles floating around while you’re cleaning up.
For best results, consider investing in a portable dust extractor designed to capture fine particles efficiently and keep your workspace cleaner throughout the job.
Why Ventilation Is Key When Cleaning
Have you ever tried cleaning up after a home project only to be swallowed by a cloud of dust? That’s not just annoying; it’s also potentially harmful. Proper ventilation is key for keeping you safe and making your cleaning efforts more effective.
Try this: open those windows and crank up some fans while you’re tidying up. This simple step promotes airflow, helping to disperse airborne particles like drywall dust. You know, the kind that might contain silica and gypsum? When you get that airflow going, dust can settle much faster, keeping your freshly cleaned surfaces safe from recontamination. It’s amazing how much better the space feels when you can breathe freely!
And let’s not forget about the importance of keeping a negative air pressure. Using exhaust fans can help ensure that dust doesn’t waft into other areas of your home. Honestly, who wants to have to clean the same area twice?
So, what’s the takeaway? Good ventilation isn’t just about protecting your lungs; it also boosts how efficiently you can use your cleaning tools like damp cloths and HEPA vacuums. All of these steps combined can really help you tackle that dust in a proactive way, making your cleanup a lot easier.
In the end, making sure you’ve got plenty of airflow while cleaning is key to both your health and your cleaning success. Using panels with impact-resistant materials installed properly can also reduce dust spread by sealing maintenance areas effectively. What’s one small change you can make to improve your cleaning routine?
How Proper Cleaning Affects Compound Adhesion
Have you ever struggled with drywall that just won’t hold the compound? It’s frustrating, right? One major reason for this can be the dust left behind from sanding and cutting. That dust, filled with harmful gypsum and silica, can create a barrier that keeps your drywall compound from sticking properly.
To avoid this headache, make sure you clean the drywall well. Here’s the trick: use a microfiber cloth or a vacuum cleaner attachment specifically designed for fine dust. This thorough cleaning not only helps the joint compound dry evenly but also minimizes cracking and peeling. And don’t skip the primer—it seals the paper surface and boosts that compound adhesion even more.
Now, let’s talk about ventilation. After you clean, ensure proper airflow in your workspace. A dust-free environment is crucial for a smooth, uniform texture on your walls. So, why does this matter? It can lead to that professional finish you’re aiming for. Using sanding pads with pre-punched holes can also improve dust collection, helping keep the drywall cleaner before applying compound.
Frequently Asked Questions
How Do You Clean Walls Before Joint Compound?
To clean our walls before compound application, we can use effective cleaning techniques like vacuuming drywall dust and wiping surfaces with a damp cloth. Proper surface preparation guarantees smooth wall maintenance for better results during application.
What Does Adding Dawn Dish Soap to Drywall Mud Do?
Like magic in a bottle, adding Dawn benefits our drywall mud by improving texture and enhancing compound adhesion. This soap’s effectiveness acts like a cleaning solution, ensuring smoother application and effortless cleanup while reducing stickiness.
Do I Need to Wipe Dust off Drywall Before Priming?
Yes, we should definitely wipe dust off drywall before priming. Using effective drywall cleaning techniques and proper tools guarantees surface preparation, minimizing drywall dust impact while enhancing priming importance for a flawless finish.
How to Prep a Wall for Joint Compound?
Before our drywall mud application, let’s guarantee proper drywall surface preparation. We’ll use wall cleaning tools for surface dust removal, guaranteeing a clean canvas for effective joint compound application—just like an artist preps their masterpiece.