Dealing with water damage can feel overwhelming, but getting things sorted doesn’t have to be a nightmare. First off, start by getting rid of any standing water you can see. This is where a shop vac or even some buckets come in handy.
Now, let’s make safety a priority. It’s vital to turn off any electricity in the area. You don’t want to risk a shock while you tackle this mess! And don’t forget to gear up with some gloves and rubber boots, just in case.
Once you’ve got your safety measures in place, it’s time to clean those surfaces. Use a damp cloth along with some Selleys Sugar Soap to tackle any dirt or grime.
While you’re at it, check for hidden damage—this means peeking up at ceilings and using a moisture meter if you have one handy. Honestly, you might be surprised at what you find.
After you’ve cleaned up, gather your tools. You’ll want a scraper, polyfiller, and primer to help with repairs. Here’s the trick: gather everything before you start, so you’re not running around looking for supplies mid-repair.
In the end, preparing for water damage repair involves a few simple steps. Are you ready to tackle that project?
Remember, dealing with water damage doesn’t have to be scary; just take it one step at a time!
Key Takeaways
- Remove standing water using a shop vac or absorbent materials while wearing protective gear.
- Ensure safety by turning off electricity and water supply in affected areas.
- Inspect surfaces for visible damage and use a moisture meter to detect hidden moisture.
- Clean affected areas with Selleys Sugar Soap and prepare surfaces for painting.
- Document damage with photos and notes for future reference and insurance claims.
Quick Steps to Remove Standing Water and Dry the Area

What do you do when water starts creeping into your space? It’s never a fun situation, but the first thing you need to tackle is getting rid of any standing water. You can’t waste a second here, so grab a shop vac, some buckets, or even absorbent towels. Protect yourself, too—put on gloves and rubber boots. Safety first! Don’t forget to turn off the electricity in the affected areas to avoid any electrical hazards.
Once you’ve cleared out the standing water, it’s time to focus on drying out the place. Dehumidifiers and fans can really help speed up the drying process. You’re looking at about 3-5 days for everything to be completely dry, but trust me, it’s crucial to stop mold from taking hold. So, how will you know if there’s still water hiding out in those nooks and crannies? Try using a moisture meter—it can help you find any spots you might’ve missed.
After you’ve made sure everything’s dry, clean those hard surfaces with water and detergent. It’s a good idea to follow up with a disinfectant to minimize the risk of mold and bacteria. It might feel like a lot of work, but you can handle it!
In the end, keeping your space dry is all about acting fast and staying safe. Applying vapor barrier tape in vulnerable areas is a great step to prevent future moisture issues. So, what’s your next step in making sure your home stays dry?
Prioritize Safety Before Starting Repairs

Have you ever dealt with water damage in your home? It’s a real headache, and safety should always come first when you’re facing this kind of mess.
To kick things off, you need to turn off the closest water supply. This simple step can prevent even more damage from happening. Then, take a moment to deactivate the electricity in any areas affected by water. This is crucial to avoid any shocking surprises!
Don’t forget to gear up with protective equipment. Think rubber boots, goggles, and gloves. You really don’t want to expose your skin to contaminants and mold spores during cleanup. Also, give your home a good check for any signs of mold which can start to develop within just 24 hours of being exposed to moisture.
It’s essential to take a close look at the structure of your home too. Make sure there’s no risk of anything collapsing. Now, that might sound a bit overwhelming, but these precautions are super important. By keeping safety at the forefront, you’re setting yourself up to tackle those repairs in the best way possible. Consider using mold test kits to identify hidden mold before beginning repairs.
Effective Cleaning and Sanitizing Methods for Water-Damaged Surfaces

How do you clean and sanitize water-damaged surfaces effectively? If you’ve dealt with water damage, you know it can be a hassle. It all starts with grabbing a damp cloth and some Selleys Sugar Soap. This will help you get rid of dirt and debris that have collected.
Now, if you’ve got a damaged ceiling, don’t just ignore it. You’ll want to scrape off any flaking, bubbling, or peeling paint with a scraper—this makes for a smooth surface and is essential for the restoration process. Planning ahead? Applying Zinssers Water Based Peel-Stop can really help prevent future water seepage.
Once you’ve got that squared away, it’s time to tackle any imperfections. Try filling them in with Selleys Polyfiller and let it dry for about a day. After that, sand it smooth so it’s ready for a coat of paint. The primer I recommend is a water-based type like Berger Triple Prep; it’ll set you up perfectly for whatever paint you choose later.
So, why does this matter? Taking these steps not only prepares the area for painting but also helps ensure that you won’t run into more issues down the line. Cleaning and prepping is just as vital as the final coat.
For optimal results, consider using fast drying fillers to expedite the repair process and prevent prolonged exposure of the damaged surface.
To wrap it up, following these steps will guide you through cleaning and sanitizing water-damaged surfaces effectively. Got any tips or experiences with water damage you want to share?
How to Detect Hidden Water Damage and Assess Repair Needs?
How do you know if there’s hidden water damage in your home? It’s one of those sneaky problems that can cause major issues if you don’t catch it early. You might think everything looks fine, but there could be trouble lurking just out of sight.
Start by taking a good look at your ceilings. Are there any stains, bubbling, or discoloration? Those are pretty clear signs that something’s not right. Don’t just stop there; you also want to check under sinks and behind appliances for any pooling water. Standing water isn’t just annoying—it can lead to much bigger problems down the line.
Here’s a tip: using a moisture meter can be a big help in detecting hidden moisture in walls and floors. It’s a handy little tool that can pinpoint areas where water may have seeped in. Honestly, documenting what you find with photographs and taking detailed notes can really pay off later, especially if you need to file an insurance claim. It’s better to be safe than sorry!
Now, let’s talk about the different types of water damage you might encounter—clean, gray, or black. Understanding these classifications is key. They’ll guide your decisions on what materials need to be replaced and how to prevent future damage. So, why does this matter? Because being informed can make all the difference in getting your space back to normal and ready for painting or any further refurbishing.
In short, be proactive when it comes to checking for water damage. The sooner you catch the problem, the easier (and cheaper) it might be to fix. Have you done a thorough check in your home recently? Using moisture-resistant drywall in repairs can significantly reduce the risk of recurring damage in previously affected areas.
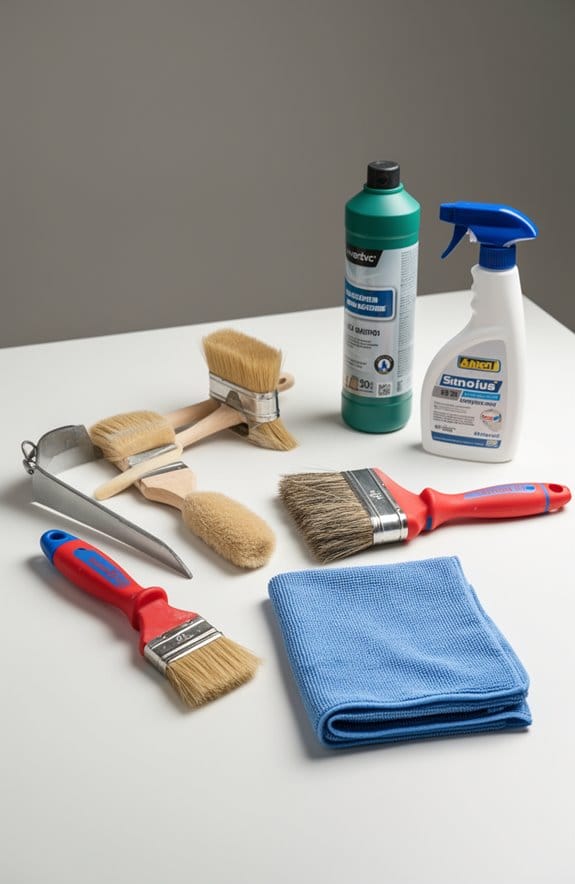
What You’ll Need for Your Repair: Materials and Tools
When dealing with water damage, having the right materials and tools is key to making the repair process smoother. You don’t want to be halfway through and find yourself missing something vital. Start by gathering your cleaning supplies: you’ll need a damp cloth, Selleys Sugar Soap, and a scraper for thorough cleaning. Don’t underestimate these basics; a good clean makes all the difference.
Next up, grab a water-based peel-stop like Zinsser’s Water Based Peel-Stop. This isn’t just some extra step; it solidifies the area and keeps more water from seeping in later. You’ll also want to have filler on hand, like Selleys Polyfiller, to fill in any dents or holes for a level finish. After applying the filler, sandpaper will be your best friend for smoothing out those rough spots.
Don’t forget about primer! A water-based primer, such as Berger Triple Prep, is essential if you’re planning to paint over those repaired areas. It preps the surface beautifully, ensuring your finish looks sharp. Lastly, your safety should be a priority. Protective gear like gloves, goggles, and masks isn’t just for show; it’s there to help keep you safe during the entire restoration process. For added effectiveness in humid conditions, consider using a waterproof wall repair product to ensure long-term durability.
Frequently Asked Questions
What Are the Main Steps in Water Damage Restoration?
When our basement flooded last summer, we quickly learned the main steps in water damage restoration: assessment, moisture detection, water extraction, drying, structural integrity checks, and employing professional services for long-term prevention strategies.
How to Fix Something With Water Damage?
To fix water damage, we should assess the area, employ restoration techniques, file insurance claims, guarantee mold prevention, maintain structural integrity, utilize proper drying methods, consider material replacement, and follow maintenance tips for longevity.
What Kills Mold From Water Damage?
Like vigilant gardeners tending our plants, we should embrace mold removal techniques. Effective cleaners, natural solutions, and prevention strategies keep mold growth conditions at bay, ensuring better air quality and safeguarding our health from lurking risks.
Can I DIY Water Damage Restoration?
Yes, we can DIY water damage restoration with careful inspection, essential tools, and safety precautions. Utilizing drying techniques and mold prevention is crucial, but we should consider professional help and insurance for extensive damage and cost analysis.