Have you ever tried sticking something together, only to find that it just won’t hold? Getting good adhesion in damaged areas can be tricky, but with the right prep, you can make it work. Let’s break it down.
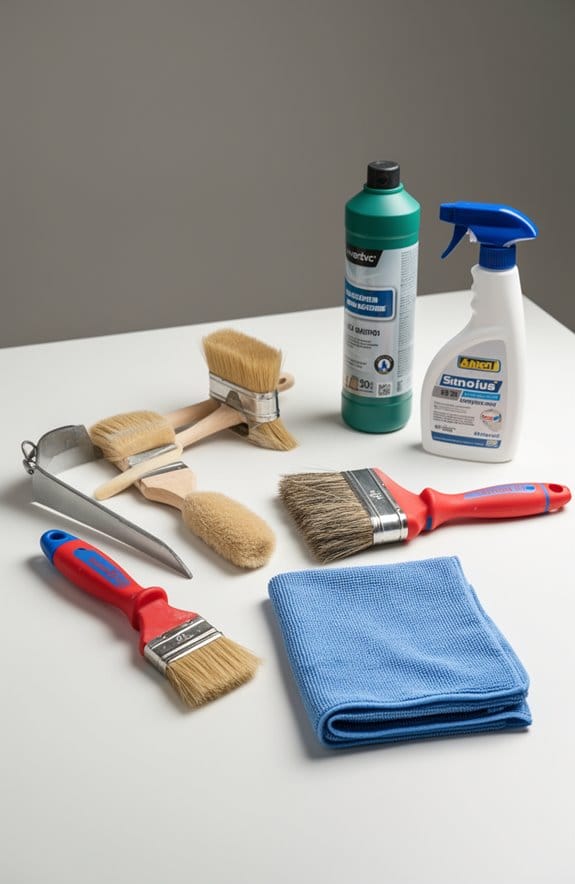
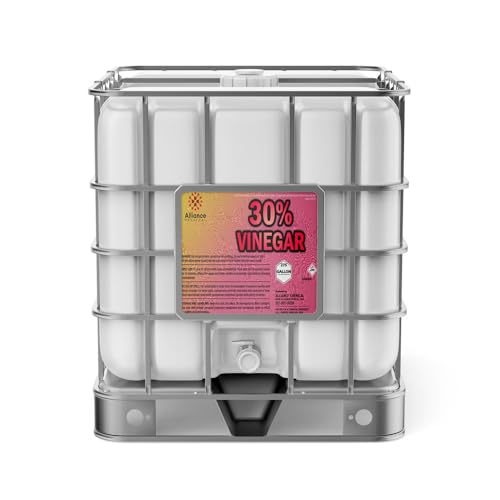
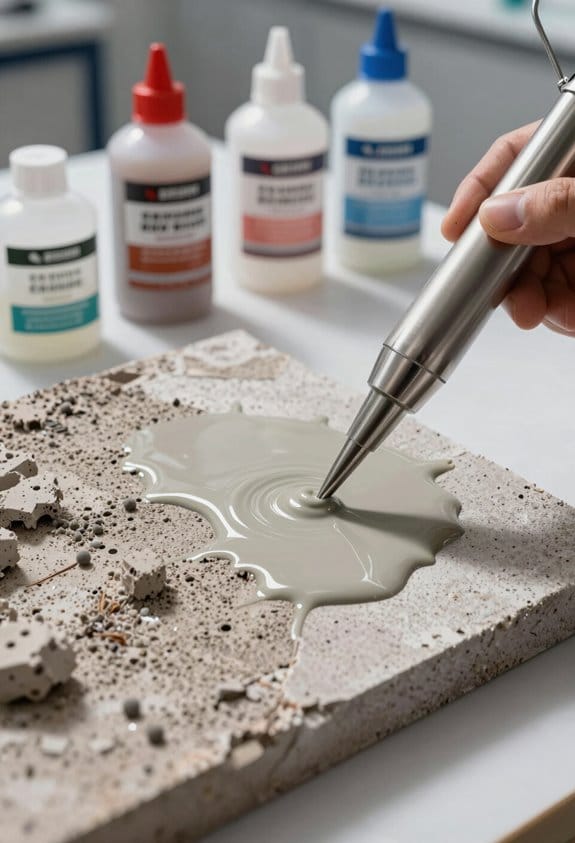
First off, start by cleaning the surface. You want to eliminate any dirt, grease, or oils. A simple 50/50 mix of isopropyl alcohol and water usually works well for plastics. But if you’re dealing with metal, you might want to grab some acetone. Just make sure to do this outside or in a well-ventilated area—safety first!
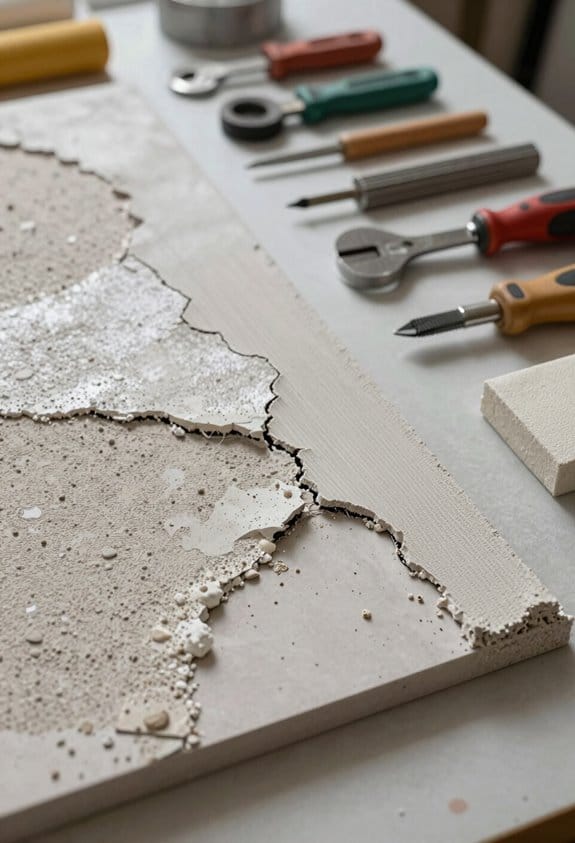
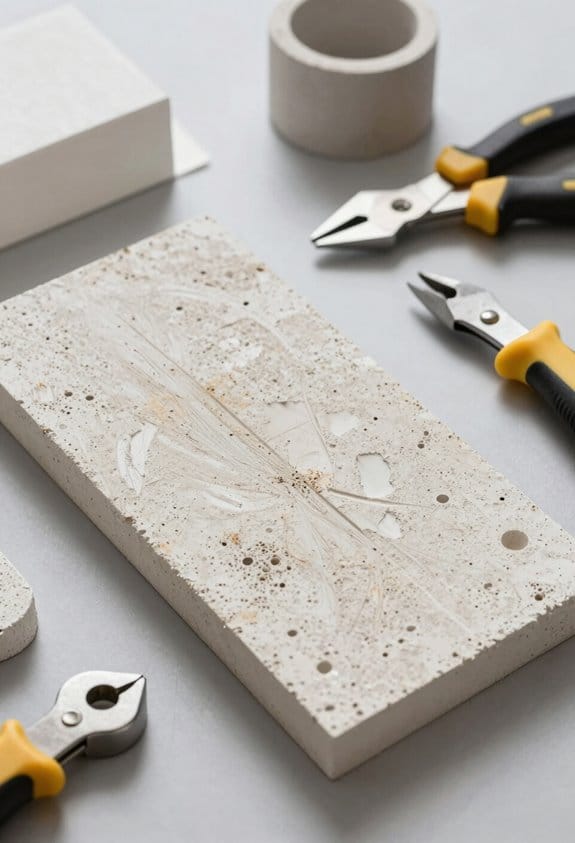
Next up, it’s time to sand the area. Aim for at least a 75-micron rough texture; this really makes a difference in how well things stick. Think of it like giving the surface a bit of “grip”. Plus, it doesn’t take much time, and the results are worth the effort.
After sanding, consider applying a primer. This step can be crucial depending on your adhesive choice, so it’s worth checking if it’s necessary for your project.
Then, you’ll want to select the right adhesive for the job. Pay attention to the materials you’re working with—that’ll guide you in choosing the best option.
Don’t forget: preparation really is key here. So, why does this matter? Because a little extra work upfront can save you from frustrations down the line. If you follow these steps, you’re setting yourself up for success.
In short, take the time to clean, roughen, and prime if needed before gluing anything together. What’s been your experience with adhesive projects?
Key Takeaways
- Thoroughly clean the damaged area to remove oils, dirt, and contaminants using appropriate cleaners like isopropyl alcohol or acetone.
- Roughen the surface to at least 75 microns with sanding or abrasive techniques to enhance adhesion.
- Check for chemical compatibility between the adhesive and the materials involved to ensure a strong bond.
- Utilize primers to improve adhesion on low-surface-energy substrates, ensuring compatibility with the chosen adhesive.
- Monitor drying and curing conditions, including temperature and humidity, to optimize bond strength.
Common Adhesion Challenges: What You Need to Know
Have you ever tried to bond materials together and ended up with a weak connection? One reason that happens is surface contamination. Think about it: dirt, oil, or even rust can sneak onto surfaces and really mess with your bond strength. To prevent this, proper surface prep is key.
Here’s the trick: before applying any adhesive, make sure to clean the surfaces thoroughly. You might want to use a good cleaner or some solvents, and don’t skip the primers if you’re working with tricky surfaces. Choosing the right adhesive is also super important. If the materials you’re trying to bond don’t get along, it can lead to problems.
And let’s not forget about the environment. High humidity or extreme temperatures can affect how well your adhesive cures. So, control the application conditions whenever you can. If it’s cold or humid where you’re working, it’s worth it to wait for better weather. Regular inspections are a must, too. If you keep an eye on cleanliness standards, you’ll reduce the chance of adhesion issues.
In a nutshell, focusing on thorough surface preparation can really boost your adhesion game. One way to enhance bond durability is by using sound isolation clips, which help maintain structural integrity in soundproofed assemblies. Have you had any sticky situations when it comes to bonding materials?
Recommended Products

CAN REPLACE MECHANICAL FASTENERS - eliminate drilling, grinding, refinishing, screwing, spot welding and clean-up in many applications

Increases bond strength on surfaces that are traditionally difficult to adhere, such as paint and metals

KIT INCLUDES - 2 Paintable Roof Tape 4'' x 25' with Roller, 4 x 10oz Tubes of Self Leveling Caulking Lap Sealant, 1G Roof Cleaner and 1G & 4G Silicone Pail
Effective Cleaning and Abrasion Techniques for Surface Preparation
Have you ever noticed how a good bond between materials can make or break a project? It all comes down to cleaning and abrasion techniques. When dealing with damaged areas, cleaning them thoroughly is key. For plastics, a simple mix of 50/50 isopropyl alcohol and water does the trick, but metals? You’ll want to reach for something stronger like acetone.
Now, after cleaning, it’s time to think about abrasion. You can try techniques like sanding or abrasive blasting to really ramp up the surface roughness. Aim for at least a minimum average surface profile of about 75 microns (around 3 mils). You might find that using emery paper and powerful industrial degreasers really helps break down those tough contaminants before you finish with a solvent clean.
Regular inspections are crucial too. It’s important to meet cleanliness standards, such as ISO 8501-1 Sa 2 ½, to ensure you’re on the right track. Why is all this important? Because when you combine these methods, you significantly boost adhesion and minimize the chances of any future failures. For enhanced results, consider the use of acoustic ceiling textures that improve surface characteristics and sound absorption during restoration projects.
Recommended Products

Laser power: 300W,Class 2 output power 0.874mW, pulse width: 20-500ns, modulation frequency: 1-3000kHz, 5m cable length, input voltage: AC110-220V±10%, input power: 2kw, ambient temperature: -5°C-37°C.

Model:BLC-1500, Laser source power:1500W, Laser wavelength:1080±10nm, Laser type:Continouous/Modulation, Maximum modulation frequency:20KHz, Cable lenght:10m, Max.scan width:160±10mm, Power configuration:AC220V±10% Single phase 8kw, Cooling method:Water cooling, Water tank capacity:16L[14-15L of water to be added].
High-purity 30% acetic acid solution designed for industrial applications requiring consistent concentration and reliable performance.
Priming: Enhancing Adhesion With Chemical Agents
Ever tackled a project that just wouldn’t stick? It’s frustrating when your materials don’t bond well, but knowing how primers work can really help improve adhesion. Priming is like giving surfaces a little love before the big bond happens. It creates a thin layer that works wonders with low-surface-energy substrates, which are often tricky.
So, what’s cool about primers? They’ve got these free ends in their molecules that reach out and grab onto adhesives. This boosts the overall performance of the bond you’re trying to create. If you’re dealing with tough surfaces, you definitely want to choose primers designed specifically for them. These surfaces can be notorious for poor bonding, so a good primer is essential.
When you’re priming, don’t forget about drying and curing conditions. Getting these right can really make a difference in how well your adhesive layer sticks. You also want to make sure that the primer you use is compatible with the adhesive. This combination not only helps the bond hold up stronger but also adds to its longevity.
So, here’s the trick: Don’t just slap on any primer you find; do a little research instead. Which ones are rated for the type of surface you’re working with? Honestly, a little prep goes a long way. You’ll be surprised at how much better your projects turn out with the right prep work.
In the end, understanding primers is key to achieving lasting results. Why not give it a shot next time you’re about to tackle a repair? It could save you time and effort down the road. Also, considering a primer’s low VOC options can be crucial for safer indoor applications.
Recommended Products

Timeless Craftsmanship: Our solid wood doors are a testament to timeless craftsmanship, expertly designed and built to withstand the test of time. Crafted from high-quality pine wood, they bring elegance and sophistication to any setting.

Impermeable to air, moisture, vapor and water
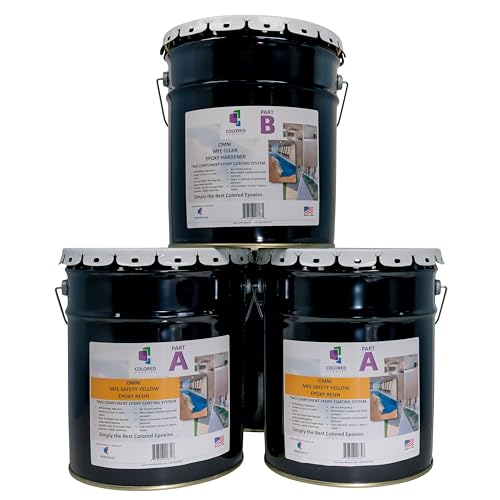
Select the Best Adhesive for Effective Repairs
Have you ever tackled a repair and ended up frustrated because your adhesive just didn’t work? Choosing the right glue is crucial for making those fixes hold strong, especially after prepping your surfaces. Start by thinking about what materials you’re working with. If you’ve got rigid items, epoxies usually do the trick, while polyurethanes excel in situations where a bit of flexibility is needed. It’s also super important to check compatibility—silicone sealants bond great with glass and metals, but they might not stick well to all types of plastics.
Now, let’s talk about where your repair’s going to live. Are you planning on using it outdoors or keeping it in a damp area? Some adhesives, like polyurethane, don’t hold up well against UV exposure. So, it pays to consider the environmental conditions your repairs will face. Plus, following the manufacturer’s guidelines is key. Make sure you adhere to their instructions for application techniques, curing times, and temperature ranges.
Choosing a product with mold and mildew resistance can also increase durability and maintain the appearance of your repairs in moist environments.
Here’s the trick: taking the time to choose the best adhesive can solve a lot of problems down the line. It improves the longevity and performance of your repair, reducing the likelihood that you’ll have to redo it later.
In the end, it boils down to picking the right tool for the job. What repairs are you planning to tackle next?
Recommended Products

Primerless Application: Excellent adhesion and bonds to most construction materials without requiring a primer
REALISTIC NATURAL APPEARANCE: Our grass is meticulously crafted with each blade having slight variations in color, dimension, and texture, giving it an incredibly realistic and natural appearance. Your lawn will be the envy of the neighborhood, creating a picturesque landscape that stands out from the rest.

CLASS-A FIRE RATED & ENERGY SAVING: Sprayman Spray Coat is a closed-cell polyurethane spray foam insulation with Class-A Fire Rating, tested according to ASTM E84 standards. Designed for trusted safety and high performance, it provides advanced flame resistance for roofs, walls, basements, tanks, and more. Its excellent roofing and wall insulation performance helps boost comfort, safety, and energy efficiency while reducing heating and cooling costs by up to 40%–60%, depending on application conditions.
Why Drying and Curing Matter
Have you ever finished up a project only to find out that the repairs didn’t hold? It can be frustrating, but understanding the importance of drying and curing can save you a lot of headaches down the road. When you dry surfaces properly, you’re getting rid of all that pesky moisture and solvents. This gives adhesives a much better shot at forming a solid bond, which is crucial because leftover moisture can break that bond and lead to failure.
Curing is another big deal. It’s not just about waiting around; it actually supports the chemical reactions that let your adhesives reach their full strength. Depending on what you’re using, curing can take anywhere from a few minutes to several days. And don’t forget, it often needs specific conditions like the right humidity and temperature to really work its magic. So, why does this matter? Regularly check these conditions to catch any potential issues before they turn into bigger problems.
Here’s the trick: Properly managing both drying and curing can really make a difference in how long your repairs last. Additionally, using materials with proven durability and quality ensures your adhesion efforts are not undermined by metal corrosion or material failure.
It might take a little extra time up front, but the end results will be worth it. Make it a part of your routine, and you’ll see improved performance in your projects.
In short, don’t overlook these steps if you want your repairs to stick. Are you willing to invest that little bit of extra time for solid results?
How to Apply Adhesives for Best Results
Before you dive into applying adhesives, ask yourself: are your surfaces really ready? If they’re not clean, you’re wasting your time. Grab some isopropyl alcohol to wipe away any oils or dirt—trust me, this step is crucial.
Now, let’s talk about choosing the right adhesive. For rigid materials, epoxy does a great job, while silicone is perfect for outdoor projects. It’s all about what you’re working with. You wouldn’t use a hammer to drive in screws, right?
When it’s time to apply the adhesive, make sure you follow the manufacturer’s instructions closely. Too much adhesive can weaken the bond, and nobody wants that! Be aware of the curing time too; it’s essential to know how temperature and humidity can alter your results.
Here’s a tip: don’t touch or disturb that bond until it’s fully cured. It’s like waiting for a cake to bake; if you poke it, you might ruin it.
In the end, paying attention to these details makes a difference. Knowing how to prep your surfaces and apply adhesives can save you a lot of headaches down the line. Using adhesion promoters can significantly improve bonding, especially on challenging surfaces.
So, what’s your next project going to be?
Recommended Products

One part, 100% solids, heat curing adhesive

Specifications: Center height: 85mm(3.34"); Bench Diameter: 109mm(4.3"); Total height: 132mm(5.2"); 4th A Axis Speed reducing ratio: 50:1; 5th C Axis Speed reducing ratio: 50:1; Size: 274mmx98mmx132mm(10.78x3.85x5.2"); Net Weight: 6.8 KG/14.98 LB

Professional Wood Repair Epoxy: Designed for restoring rotted, damaged, or cracked wood in structural and cosmetic applications around the home or jobsite
Watch Out for These Adhesion Mistakes
Ever had a project where the adhesive just didn’t stick like you thought it would? It’s frustrating, right? Many overlook common mistakes that can seriously mess with adhesion quality, but a few simple steps can make a world of difference.
First up, clean those damaged areas thoroughly. Dust, oil, and grease can block adhesive flow and weaken that all-important bond strength. It sounds basic, but skipping this step is a common mistake. Don’t forget about surface preparation, either. Try roughing up the area—aim for at least 75 microns of roughness. This little detail can significantly improve how well the adhesive adheres.
Here’s the trick: always check for chemical compatibility. The last thing you want is to mix substances that clash. If the manufacturer has guidelines, follow them. Following this advice can prevent all kinds of adhesion fails.
Don’t underestimate the impact of proper curing conditions, too. Temperature and humidity can really play a role in how well the adhesive performs. If conditions aren’t right, you’ll likely face issues down the line.
Also, take a close look at any structural problems before applying adhesive. If there are underlying issues, they’re likely to pop up again regardless of how well you applied the adhesive in the first place.
For enhanced adhesion and surface preparation, using tools with adjustable cutting depth can ensure a precisely textured surface that improves bonding efficiency.
Ensuring Long-Term Adhesion Performance
Ever tried to fix something only to have it fall apart a few days later? When it comes to repairs, long-term adhesion is what we all want, but it requires some careful steps.
First off, cleaning the surface is vital. You can’t just slap on some glue and hope for the best. Use an industrial degreaser to get rid of dirt, oil, and rust. A clean surface means better adhesion, so don’t skip this step.
Next, think about using a primer that suits the materials you’re working with. This isn’t just an extra step—it enhances how well things stick together. Also, create a rough profile by abrading the surface. This helps the bond get a grip, literally increasing the surface area for a strong mechanical hold.
Now, let’s talk about curing conditions. You want to monitor temperature and humidity closely because they can affect durability. If you let a repair cure in the wrong conditions, you might as well have done nothing at all.
Regular inspections are key, too. Ever had to redo a job because you didn’t check for signs of failure early enough? Keep an eye out so you can catch any problems before they escalate.
In short, to ensure your repairs hold up over time, remember these steps: clean, prime, abrade, monitor, and inspect. Improving worksite air quality during sanding and surface preparation also contributes to better adhesion and a safer environment.
What steps have you found helpful in your own repairs?
Tips for Future Maintenance and Repairs
Ever had a repair that seemed solid but started showing signs of wear sooner than you thought? It’s a bummer when fixes don’t hold up, but there are ways to keep those repairs looking good for the long haul.
First off, make it a habit to check on those repaired spots regularly. You want to keep an eye out for any signs of contamination or structural problems. Here’s a trick: use solvent cleaning to wipe away oils and dust. If you notice any rough edges, just take a little sandpaper to them to help with adhesion.
Applying a proper primer suited for the materials you’re working with can really boost the bond. Establish a regular maintenance schedule to keep the repaired areas in check. Addressing little issues as they pop up can save you from facing bigger problems down the line. And don’t forget to do some touch-ups when necessary—staying proactive here can make a world of difference.
For longer-lasting repairs, consider using water-resistant compounds especially in areas prone to moisture.
If you ever find yourself scratching your head over how to maintain your repaired surfaces, don’t hesitate to reach out for some expert advice. Keeping everything in good shape doesn’t have to feel overwhelming. So, what’s your next repair project?
Frequently Asked Questions
How to Enhance Adhesion?
To enhance adhesion, we should consider surface treatment techniques like plasma or flame treating, which improve bonding by altering surface chemistry. A clean, rough surface is key; let’s not forget that essential step!
How Do You Prepare Surfaces for Adhesive Bonding?
To prepare surfaces for adhesive bonding, we start with thorough surface cleaning to eliminate contaminants. Next, we enhance surface roughness and use appropriate primers to guarantee the best adhesion possible, optimizing the overall bonding process.
How to Prep Skin for Adhesive?
To prep skin for adhesive, we should clean thoroughly, guarantee dryness, gently abrade any rough patches, and possibly apply a suitable primer. Different adhesive types may require specific preparations, so let’s choose wisely!
How to Fix Poor Bed Adhesion?
Studies show that up to 30% of prints fail due to poor bed adhesion. To tackle that, we should enhance bed preparation by cleaning surfaces, adjusting temperatures, and utilizing brims for better results. Let’s optimize together!