Repairing large holes in drywall can be a hassle, but don’t overlook the importance of backing boards. Without them, your repair might crack or sag over time. So, how do you install these boards properly?
First, cut a rectangle around the hole you’re dealing with. This gives you a clean edge to work with. Next, grab some screws and secure the backing boards to the existing studs, spacing them about 6 to 8 inches apart. Make sure they’re level with the wall; that’s key for a smooth finish later. Honestly, it’s worth checking for any moisture damage before you get started.
Here’s the trick: proper installation not only boosts durability but also helps you achieve a flush look when you hang new drywall over it.
You might be wondering why you should go through all this trouble. Well, think about how frustrating it is to have uneven walls or, worse, a repair that doesn’t hold up.
When you take the time to do it right, you save yourself from future headaches. So, give these steps a try next time you’re faced with a big hole in your drywall. It’ll make a difference.
In summary, backing boards are essential for a strong and lasting repair. Why not tackle that wall issue head-on today?
Key Takeaways
- Backing boards provide sturdy support for large hole repairs, preventing cracking and sagging of patched areas.
- They ensure a flush finish with surrounding walls, enhancing the overall appearance of repairs.
- Proper installation of backing boards improves the durability and longevity of drywall patches.
- Regular maintenance and inspections of backing boards help catch moisture damage early, ensuring wall integrity.
- Using suitable materials, like moisture-resistant backer boards, protects against water infiltration in vulnerable areas.
Why Large Holes Require Backing Boards
Have you ever tried patching a large hole in drywall, only for it to start cracking or sagging later? If that sounds familiar, you’re not alone. When you’re dealing with holes that are 8 inches or larger, it’s crucial to use backing boards for a solid repair.
So, what’s a backing board? It’s usually a piece of plywood that you cut slightly larger than the hole itself. This board helps provide the support needed, especially when the hole is between the studs. By sliding these boards behind the drywall, you can create a sturdy foundation for your new patch.
Here’s the trick: make sure to securely fasten your drywall patch to the backer boards using screws. This is going to give you that nice, flush finish that blends effortlessly with the rest of your wall. Paying attention to this detail not only makes your repair look good but also ensures it lasts.
Frankly, without these backing boards, you might end up with weak patches that could crack and need even more repairs down the line. It’s a bit of extra work, but trust me, it’s worth it for the durability and peace of mind. For best results, use a strong adhesion patching compound that firmly bonds to the backing boards, ensuring the repair holds over time.
Installation Techniques for Effective Backing Solutions
Have you ever found yourself staring at a large hole in your wall, wondering how to tackle that repair? It can be daunting, but getting the backing boards right is key to making a long-lasting fix.
Start by cutting a rectangle around the hole. Make sure it’s big enough to fit your plywood strips snugly. Once you have the right size, attach those backing boards to the existing studs or joists. You can do this with drywall screws, spacing them out every 6 to 8 inches.
The edges of the backing board need to be level with the wall surface. This step is crucial because it sets the stage for a smooth finish when you apply the joint compound later. Have you ever tried to cover up uneven edges? It’s a headache, trust me.
After securing everything, double-check that the backing board is tightly fastened. This reduces movement that could lead to cracks as the wall settles. If you’re worried about moisture, consider using a moisture-resistant surface. It’s a simple tweak that can really enhance the repair’s durability. Be sure to remove any old adhesive residue first using a surface-safe adhesive remover to ensure proper bonding of the new materials.
Recommended Products

Modern Wood Wall Panel Design: These wood panels for wall feature a clean 3D slat structure that enhances interior walls with depth and texture, delivering a refined, professional look for residential and commercial spaces.
CONTENT: Black Solid Wood Frame. Acrylic Front Face (NOT GLASS). Fits 48x72 poster exactly but displays 47.5x71.5.
Clear Reflection & NO Distortion: Our gold bathroom vanity mirror features high-definition glass for a flawless reflection with NO distortion. The excellent reflection cannot be compared by any tempered glass.ANDY STAR stand behind the quality of our mirrors and offer free replacements if any distortion occurs
Evaluating Wall Integrity
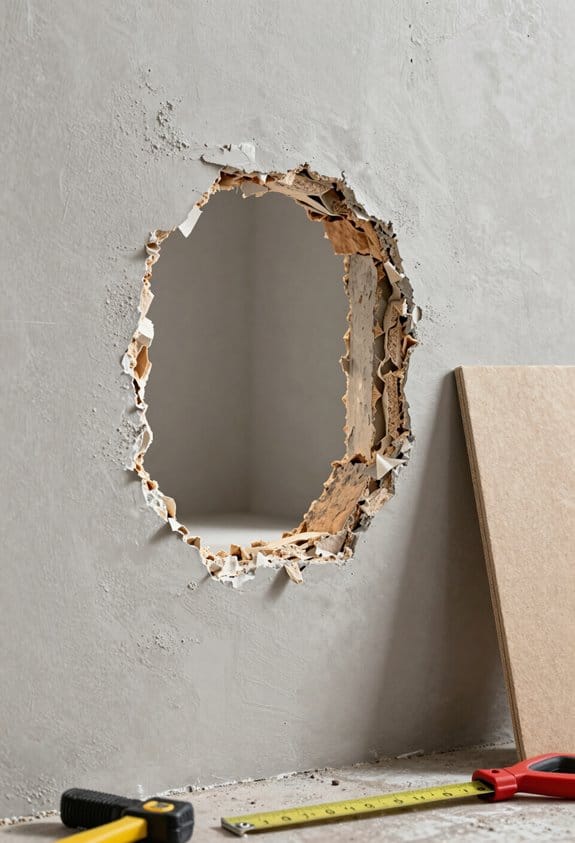
Before diving into your wall repair project, have you ever thought about checking the integrity of the wall first? It’s a big step that can really make or break the outcome. Moisture damage is a sneaky problem, especially if you’re dealing with older homes that still have plaster walls.
So, here’s the trick: grab a utility cutter or drywall saw and take a close look at the edges of any large holes you’ve got. This little inspection can reveal irregularities that point to structural issues lurking beneath the surface. If you spot any loose or damaged areas, don’t just patch them up and hope for the best. It’s vital to address those spots before you start adding any backing material—like cement backer board—because that way you’ll ensure everything sticks properly and the repair lasts longer.
Also, make sure that your backing material is securely attached to the existing studs or supports. Why? Because that added strength minimizes the chance of future problems. You want your wall to stand strong and proud for years to come.
Choosing materials compatible with conditions like moisture exposure can enhance the durability of repairs, much like how galvanized steel provides corrosion resistance in electrical junction box covers.
To wrap it up, taking a moment to evaluate your wall can save you a lot of headaches down the road. Have you checked your walls for damage lately? It might just be worth your time.
How Moisture Affects Your Choice of Backing Boards
Have you ever started a home project in a damp area, only to wonder if your materials could withstand the moisture? It’s a real concern, especially in spaces like bathrooms and kitchens where humidity is the norm. When it comes to choosing backing boards, you want to make sure you’re making the right decision to avoid costly repairs down the road.
For those really wet spots, cement backer boards are your best bet. These boards are not just waterproof; they’ll actively prevent moisture damage, which is crucial in areas that see a lot of steam and water. If you’re dealing with high humidity but not direct water exposure, consider fiberglass-reinforced backer boards. They provide extra durability without compromising on style.
Now, don’t overlook the importance of combining materials. Using water-resistant drywall with your chosen backer boards adds another layer of protection. It’s a smart move, but you also need to think about the thickness of the boards. Thicker options tend to resist warping better and hold up against moisture damage.
It is also important to properly seal joints and edges using moisture-resistant tape and compound to prevent any water infiltration that could compromise the installation.
So, why does this matter? Choosing the right backing boards can make all the difference in your project’s longevity. By taking the time to carefully select your materials, you’ll set your installations up for success in even the most humid conditions.
In short, keep moisture in mind when picking your backing boards, and don’t hesitate to reach out for advice if you’re unsure. What steps are you taking to protect your home from the effects of humidity?
Recommended Products

High-performance polypropylene construction wall panel with non-woven fleece webbing on both sides for superior mortar adhesion. Fully waterproof, vapor-tight, and thermally insulating - ideal for wet zones and high-humidity environments. Approved for residential and commercial settings

Pre-wired heating mat: Ultra-thin 1/8" (3 mm) pre-wired heating fabric allows for quick and easy installation, ensuring even heat distribution without cold spots.

Cable compatibility: Engineered for seamless integration with nVent Nuheat electric floor heating cables as part of the Chemelex Heating System, suitable for residential and commercial projects.
Top 5 Common Mistakes in Backing Board Installation
Have you ever tried to do a repair, only to find out later that the backing board you installed is sagging or showing cracks? It’s frustrating, right? Choosing the right backing board is just one piece of the puzzle. How you install it makes a big difference in whether your repair lasts.
First things first, cutting and sizing the backing board correctly is crucial. You want it to fit snugly in place. Make sure to secure it with screws every 6 to 8 inches. This really helps prevent sagging in the long run.
Now, if you’re working in a wet area, like a bathroom or kitchen, using moisture-resistant backing boards is vital to keep mold at bay. So, why does this matter? Because mold can wreak havoc on your home and your health.
When you’re putting the screws in, pre-drilling those holes is another tip you shouldn’t overlook. It can save you from cracking the board during installation, which can be a real headache later on.
And don’t forget about the seams! Sealing them with fiberglass tape or thin-set mortar will help stop those visible cracks from forming. The best part is, these little steps can lead to a stable repair that you won’t have to worry about for years to come.
Using a sturdy scaffold with adjustable height options can also improve your installation accuracy and safety while working on large repairs.
In short, avoiding these common mistakes ensures your repair job is up to par. What will you tackle next to make sure your project goes off without a hitch?
Recommended Products

Collaborative Kidney Activity Table
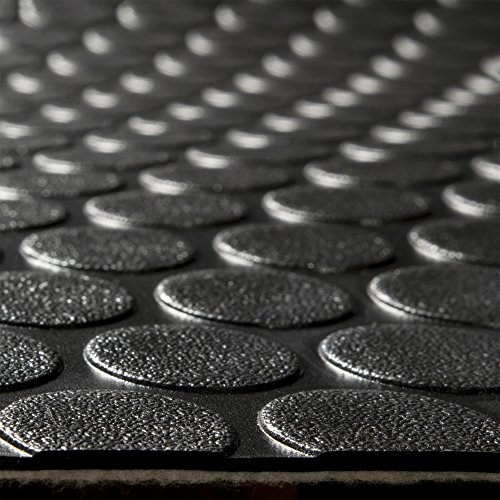
Durable Non-Slip Surface: Features a coin/nickel pattern for superior traction and safety—perfect for RVs, garages, trailers, and ramps.

Stackable Bistro Style Chair
How to Maintain Backing Boards for Longevity
Have you ever pulled out a backing board only to find it’s seen better days? Proper maintenance is key if you want these boards to last, especially when tackling any DIY repair job. It’s not just about fixing up the surface; it’s about ensuring your walls are solid and ready for whatever comes next.
Start by regularly checking your backing boards for any signs of moisture damage, especially in spots where humidity levels are high. Keeping an eye on them can save you a lot of trouble down the line. A quick inspection can tell you if it’s time to take action before it becomes a bigger issue.
Cleaning the boards is another important step. Dust and debris can accumulate, and you don’t want that getting in the way of their performance. Just a periodic wipe-down can keep them stable and functioning well.
Proper installation is crucial too. So, make sure you’re using the right screws and seals to avoid unnecessary flexing. This little detail can make a big difference in durability. When you store your backing boards, try to keep them in a dry and well-ventilated area. Moisture absorption happens faster than you think, and you don’t want to deal with the consequences later.
You’ll also want to reapply protective coatings or sealants whenever you’re working in wet areas. This helps boost moisture resistance and will keep your backing boards in good shape for a lot longer. For finishing touches, consider using a low odor primer to protect surfaces without overwhelming smells during your repair projects.
Truth is, giving your backing boards a bit of attention can really go a long way in extending their life. So, what’s your go-to tip for keeping your repair projects in tip-top shape?
Types of Backing Boards for Your Projects
When it comes to tackling DIY projects, you might find yourself wondering what kind of backing board will best suit your needs—especially for those pesky large holes. If you’re working in wet areas like bathrooms, cement backer board is a solid choice. It’s waterproof, which means it holds up well against moisture and helps prevent damage.
Another option to consider is fiber cement backer, such as Hardiebacker. This stuff packs a punch with its strength and moisture resistance, making it an excellent pick for durable repairs. And if you’re in a high humidity environment, glass mat gypsum boards can offer extra moisture protection. So, which one should you choose? It really comes down to your specific project and environment.
Once you’ve picked a backing board that fits your needs, don’t forget to measure accurately to ensure it properly covers the hole. Use screws that are about 1¼ inches long, which usually do the trick for securing the board based on the material. This step is crucial—trust me, it’ll make sure your drywall patches stay intact and sound for years to come.
For best results, consider using corrosion-resistant fasteners designed specifically for cement boards to enhance the durability of your repair.
In short, selecting the right backing board is key to a successful repair. What type of project are you planning next?
Recommended Products

GoBoard 1/2-in is durable, lightweight, waterproof tile backer board

Premium Construction: Engineered with reinforced sides and high-quality extruded polystyrene foam, the Go Board ensures exceptional stability and waterproofing for lasting performance.

Cable compatibility: Engineered for seamless integration with nVent Nuheat electric floor heating cables as part of the Chemelex Heating System, suitable for residential and commercial projects.
Long-Term Advantages of Proper Backing Board Installation
Have you ever tackled a DIY project that just didn’t hold up over time? Understanding the value of proper backing board installation can really change the way your repairs stand the test of time.
When backing boards are installed correctly, they offer solid support for larger drywall openings. This reduces the chance of future damage and keeps everything stable. Plus, they help spread out stress evenly, which can lead to fewer cracks and less wear with time. Want to make your repairs last? Here’s the trick: backing boards increase durability, so patched surfaces can better handle impacts and moisture.
Consider how they help reduce puffy walls and prevent sagging. That means you get a more polished finish that blends seamlessly with the rest of the wall. So, why does this matter? Well, proper backing boards make long-term maintenance a breeze and keep issues from moisture and temperature swings at bay.
Incorporating durable materials like heavy-duty steel clips during installation further strengthens the repair and enhances longevity.
In the end, taking the time to install backing boards can dramatically extend the life of your repairs, making them last longer with minimal effort. Next time you’re on a project, think of how this simple addition can save you from future headaches. What DIY troubles have you dealt with that could have been avoided with a little extra support?
Preparing for Future Repairs: A Guide
Have you ever stared at a big hole in your drywall and wondered how on earth you’ll fix it? Dealing with drywall repairs can feel intimidating, especially when you’re facing anything bigger than a nail hole. But don’t worry! With a few straightforward steps, you can get the job done right.
First off, if you’re tackling a hole that’s 8 inches or more, you’ll want to add some backing. This gives your repair a solid foundation. Grab some plywood—1/2 inch thick works well—and cut it to fit snugly between the studs. This extra support is crucial for a lasting fix.
Now, to create a clean workspace, cut a rectangle around the hole. Aim for about 12 inches by 12 inches. It might seem excessive, but creating a clean edge makes it easier to install the patch. Once you’ve got your shape, secure the plywood backing with drywall screws.
Next up, attaching the drywall patch. Use screws spaced about 12 inches apart for extra stability. This step is key for preventing further issues down the line.
Regular wall inspections are another smart move. Keeping an eye on your walls can help you catch problems before they escalate into bigger repairs. So, why does this matter? The sooner you notice a potential issue, the less intrusive the repair will likely be.
Additionally, using dust control solutions during the repair process can help maintain a clean and allergen-free workspace, making the job safer and more pleasant.
Frequently Asked Questions
What Are the Benefits of Using a Backing Board?
Using a backing board offers us cost efficiency and installation ease. It provides sturdy support for repairs, helps prevent future damage, and guarantees a smooth finish, making our drywall projects more reliable and aesthetically pleasing.
What Is the Purpose of a Backer Board?
We can’t even begin to emphasize how vital backer board applications are! They provide unmatched support for drywall patches, utilizing durable backer board materials to guarantee every repair remains sturdy, long-lasting, and seamlessly blends into our walls.
Is a Tile Backer Board Necessary?
Yes, a tile backer board’s necessary for enhancing tile durability and moisture resistance. It provides a stable foundation, helping us prevent future issues, such as cracking or shifting tiles, ensuring our installations last longer.
What Is a Backing Board Used For?
A backing board isn’t just a material; it’s our wall’s backbone. When we use plywood or cement board for reinforcement techniques, we create sturdy support that guarantees our patch holds strong against wear and tear over time.