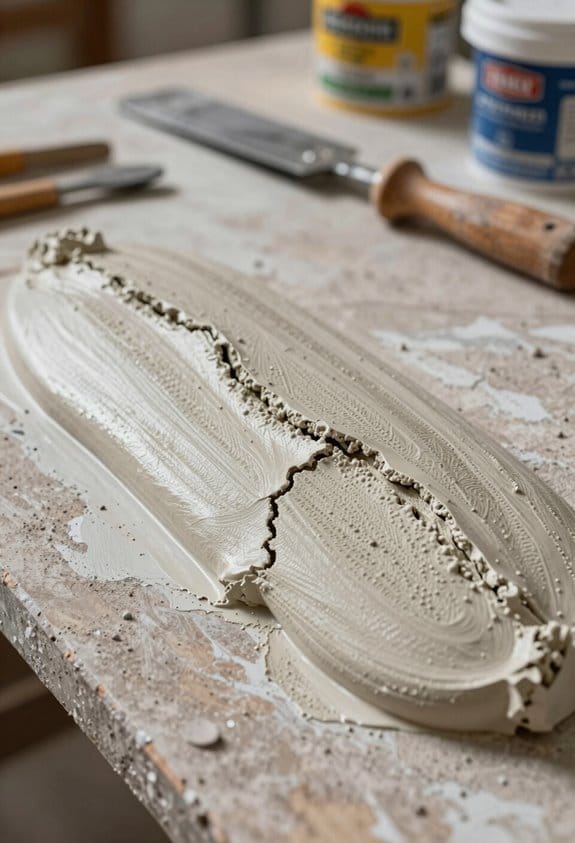
Joint compound can be a bit tricky, especially when it comes to drying. Have you ever noticed those annoying cracks that pop up after you think you’re done? It’s frustrating, right? Let’s dive into what actually causes the compound to shrink during drying.
First off, adding too much water can weaken the mixture. When that happens, you’re setting yourself up for cracks. It’s like making a cake and adding too much milk; it just doesn’t hold together well. Not to mention, high evaporation rates and environmental factors can really speed up the drying process. If it’s hot or the humidity is low, your joint compound might dry faster than you want, leading to more shrinkage.
Another thing to consider is how thickly you apply the compound. If you go heavy-handed, it might not dry evenly. You’ll end up with parts that dry quicker than others, which can easily result in cracks. Here’s a trick: aim for those thinner layers. They dry more evenly and reduce the chances of shrinkage.
Also, think about the compound you’re using. Some formulations are designed to minimize shrinkage, making them a better choice for a smooth finish. Mixing properly is key too—properly blended joint compound is less likely to shrink.
Truth is, taking these small steps can save you a lot of hassle in the long run. Next time you’re working with joint compound, keep an eye on these details to ensure a great outcome.
Have you tried different products or techniques that worked for you?
Key Takeaways
- Excessive water addition weakens joint compound, leading to higher shrinkage and cracking during the drying process.
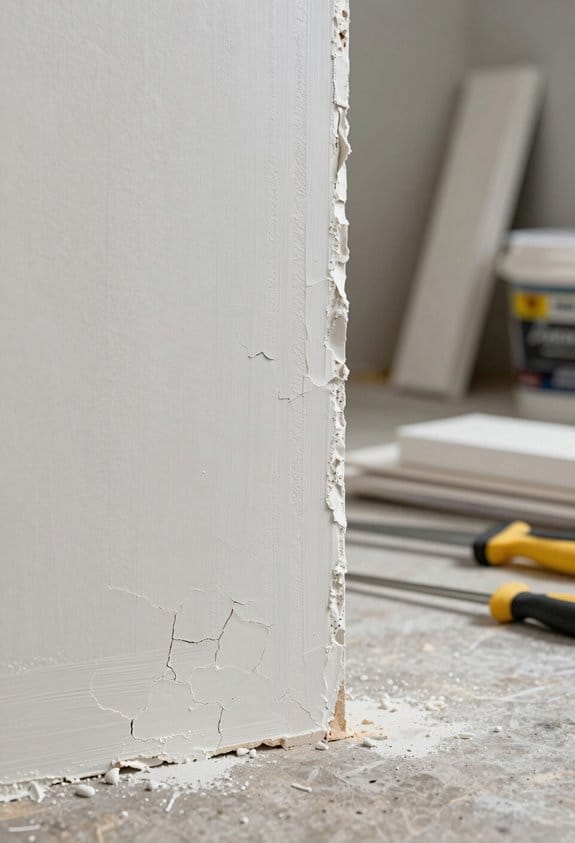
- High evaporation rates, caused by warm temperatures and low humidity, accelerate moisture loss and increase shrinkage risks.
- Thick applications of joint compound dry unevenly, resulting in higher chances of shrinkage and surface cracks.
- Use of lightweight compounds can lead to greater shrinkage due to lower moisture retention capabilities.
- Environmental fluctuations, such as varying temperature and humidity, contribute to unexpected joint compound shrinkage during drying.
Common Issues With Joint Compound: What You Need to Know
Have you ever struggled with joint compound? You’re not alone. There are some common issues that can really mess with your project’s outcome, and it’s worth knowing them if you want to avoid headaches down the line.
First off, let’s talk about the water you mix in. Adding too much can really weaken the compound, which leads to more shrinkage as it dries. Nobody wants to look at their freshly finished wall and see cracks appearing! To avoid this, try to keep your water ratios in check.
Now, drying time is crucial. If you don’t give each layer enough time to dry before adding the next, you can trap moisture in between. So, why does this matter? Well, it can cause the upper layer to harden much quicker than the lower layer, leading to an uneven finish. Aim for a solid drying time between coats to keep things smooth.
You also need to watch out for how thickly you apply the compound. Too thick in some spots can create differences in how fast each part dries. And guess what? This can lead to those annoying cracks and imperfections we all dread. Instead, aim for a nice, even application.
Environmental factors play a role, too. If it’s hot or the humidity is low, moisture can evaporate way too fast, which can encourage shrinkage. Honestly, nobody wants a project that ends up being all cracked and uneven. Keeping an eye on the weather can help you choose the best time to tackle your work.
Choosing a repair putty with durability against shrinking can also minimize this problem and ensure longer-lasting results.
Key Factors That Cause Joint Compound Shrinkage
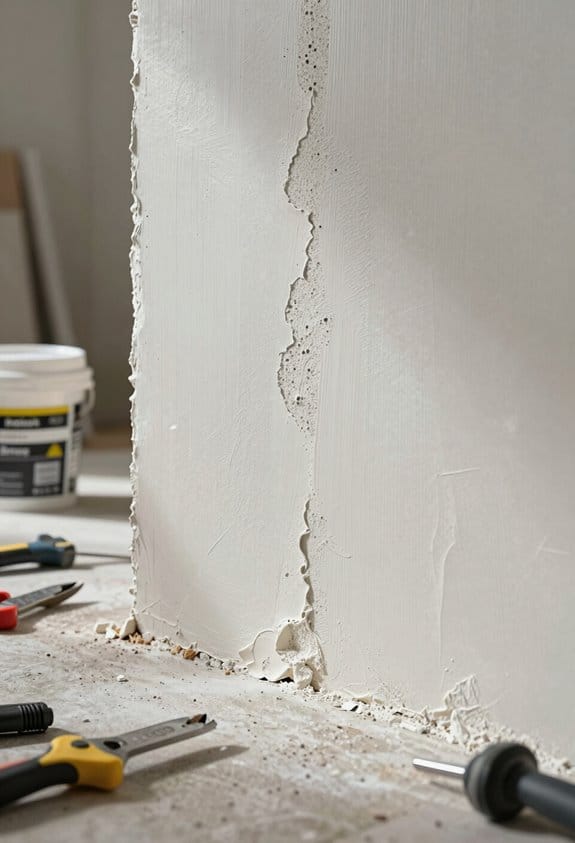
Have you ever noticed cracks in your joint compound after it dries? It’s frustrating, right? Understanding why joint compound shrinks can help you avoid those pesky issues and lead to smoother results in your projects.
The biggest culprit behind shrinkage is evaporation. As the water content in the compound decreases while it dries, it pulls the compound tighter, leading to those dreaded cracks. The type of joint compound you pick plays a significant role, too. Generally, lightweight compounds tend to shrink more because they retain less moisture.
So, there are a few things to keep in mind during your project:
- Higher temperatures and low humidity can speed up the drying process.
- Using too much compound at once can lead to uneven drying. When the outer layers dry faster than the inside, cracks are almost guaranteed.
The trick is to apply your joint compound in thin layers—no thicker than ¼ inch. This allows for even drying. You also want to be mindful of your mixing; aim for about a 10% water ratio for a consistent mix that doesn’t compromise the integrity of your work.
Additionally, choosing compounds with low shrinkage properties can greatly reduce the risk of cracking during drying.
So, why does this matter? Addressing these key factors can save you a lot of time and effort later on. With the right techniques, you can avoid those frustrating results and get the smooth finish you’re aiming for.
In short, keep an eye on your conditions and thickness, and you’ll be well on your way to a successful project. What challenges have you faced with joint compounds in the past?
Recommended Products
Stops Roof Leaks & Seals Problem Areas: High solids silicone mastic creates a thick waterproof barrier; seals roof seams, penetrations, flashings, curbs and fasteners; ideal for emergency roof repairs and preventative maintenance

Recommended for application to new or previously painted wood, hardboard, metal, drywall, cured plaster, masonry

This product adds a great value
How Does Joint Compound Drying Work?
Have you ever finished a drywall project only to notice cracks and uneven spots? It can be frustrating, but understanding how joint compound dries can really make a difference in the quality of your finish.
Joint compound drying isn’t just about waiting for it to harden. It’s a process where moisture evaporates, causing the compound to shrink and set properly. Evaporation is crucial here. As the compound is exposed to air, any trapped moisture and air bubbles escape, contributing to that shrinkage we’re all too familiar with.
The rate at which this happens can change based on several environmental factors. For example, if you’re working in a hotter space, the drying process speeds up, which can actually lead to more noticeable shrinkage. Also, consider the water-to-dry ingredient ratio in your compound; it’s key to getting it right for a smooth finish.
Here’s the trick: always allow enough time between layers. If you rush and slap on another coat too soon, you’re just asking for trouble—imperfections will stand out even more. Waiting gives each layer a chance to cure properly, reducing the chance of cracks or bubbles later on.
So, why does this matter? Proper drying not only avoids mess-ups but also gives you that polished look you’re aiming for in your projects. Understanding these nuances will really help elevate your skills in drywall finishing.
To wrap it up, timing and environmental conditions play a huge role in how your joint compound dries. Next time you’re working with it, think about how airflow and temperature affect the process. Using kits with fast-drying compounds can also significantly improve your repair efficiency. What other tips do you have for achieving a perfect finish?
How Environmental Conditions Affect Joint Compound Drying
Have you ever tackled a drywall project only to be frustrated by how long it takes for joint compound to dry? You’re not alone! The truth is, environmental conditions can seriously impact how quickly and evenly your joint compound dries.
High humidity is a sneaky culprit that can slow down the drying process. This creates a wet environment, which can lead to more shrinkage as the water evaporates. On the flip side, low humidity might rush things along, but don’t be fooled—this can cause the compound to dry too fast, resulting in surface cracks and uneven shrinkage.
Temperature matters too. Warmer air usually speeds up evaporation, which can ultimately lead to rapid shrinkage. And let’s not forget about airflow. While a nice breeze might seem beneficial, too much airflow can dry the surface too quickly while the inner layers are still wet. This creates uneven shrinkage that’s just begging for extra work down the line.
So, what’s the magic number? Aim for a consistent environment between 50°F to 90°F with humidity levels between 30% to 70%. This range really helps create the ideal conditions for drying without the headaches.
Frankly, managing these factors can make all the difference in your project. By keeping an eye on humidity, temperature, and airflow, you can save yourself time and effort. Have you found any tricks to manage these conditions effectively? Using quick set joint compounds designed for different environments can also help optimize drying and reduce shrinkage.
Mixing Joint Compound to Minimize Shrinkage
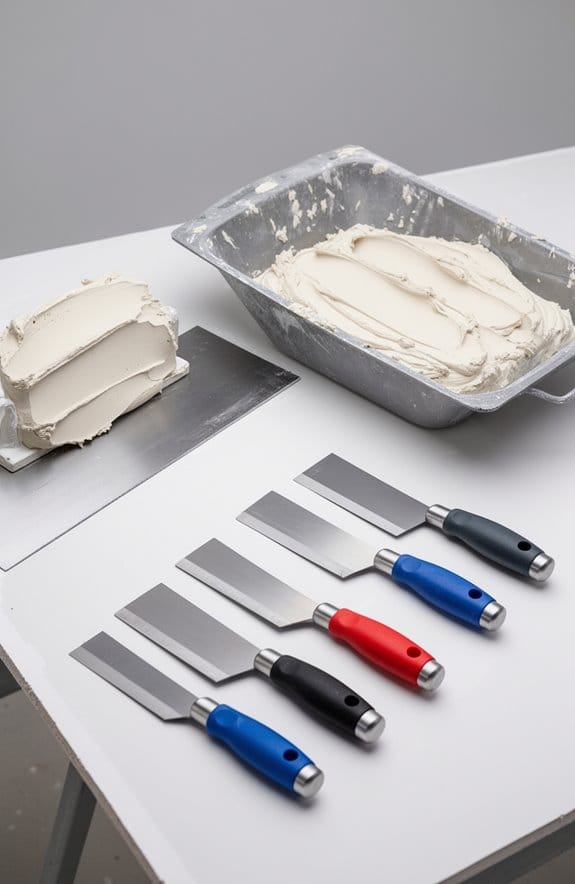
When you’re tackling joint compound, have you ever noticed how much it shrinks as it dries? It’s something that can be pretty frustrating, especially if you’re looking for a smooth finish. To get the right consistency, just add enough water so it’s about as thick as pancake syrup.
Honestly, using a drill-powered mud mixer makes a world of difference. It mixes everything thoroughly and gets rid of pesky air bubbles that can lead to uneven drying and more shrinkage. But don’t go overboard with the water! A mixture that’s too thin can really increase shrinkage, and nobody wants that mess.
Mixing in smaller batches can be your best friend here, allowing you to keep an eye on quality and stick to consistent ratios. And here’s the trick: picking a newer joint compound that’s tailored for what you’re doing can seriously help maintain a stable formula, cutting down on shrinkage when it sets.
Additionally, opting for compounds formulated with minimal shrinkage properties ensures a more durable and crack-resistant finish.
Recommended Products

ALL PURPOSE USE: Ideal for wall repairs and finishing, this lightweight joint compound offers smooth application and easy sanding for professional results on drywall projects.

Lightweight. Approximately 30% lighter than conventional ProForm Joint Compound

【30–80 Minute Setting Time】Provides a practical working window for mixing, application, and adjustments, helping improve efficiency on both small repairs and larger projects.
Application Methods to Prevent Surface Imperfections
Want to avoid those annoying surface imperfections when working with joint compound? You’re not alone—getting that smooth finish can be tricky. But it doesn’t have to be!
First off, mixing your joint compound with water is key for a good, consistent texture. Don’t skimp on this step; you’re aiming for that nice, creamy feel. Instead of slapping on one hefty layer, try applying several thin coats—around 1/8 inch each. This method not only helps the drying process but also cuts down on shrinkage.
Now, here’s the trick: grab a taping knife that’s at least 10 inches wide. This will help you feather those edges and really smooth out the surface. And don’t forget to lightly sand each coat with some fine-grit sandpaper (220 works great) before adding the next layer. That’s how you get that polished look.
Did you know that keeping the environment steady is also crucial? Aim for about 70°F and 50% humidity while everything dries. Fluctuating conditions can lead to issues, and it’s not something you want to deal with after working so hard on the application.
For best results, consider using set-type joint compounds, which offer varying setting times to match your project speed and reduce shrinkage during drying.
Recommended Products

Full TapeTech Drywall Finishing Set with Interchangeable Extendable Handle Plus 2 Standard Handles to Eliminate Swapping Handles

Full TapeTech Drywall Finishing Set with 4 Handles to Eliminate Swapping Handles

World Famous TapeTech Quality Yellow Drywall Finishing Tools
How to Select the Right Joint Compound for Your Project
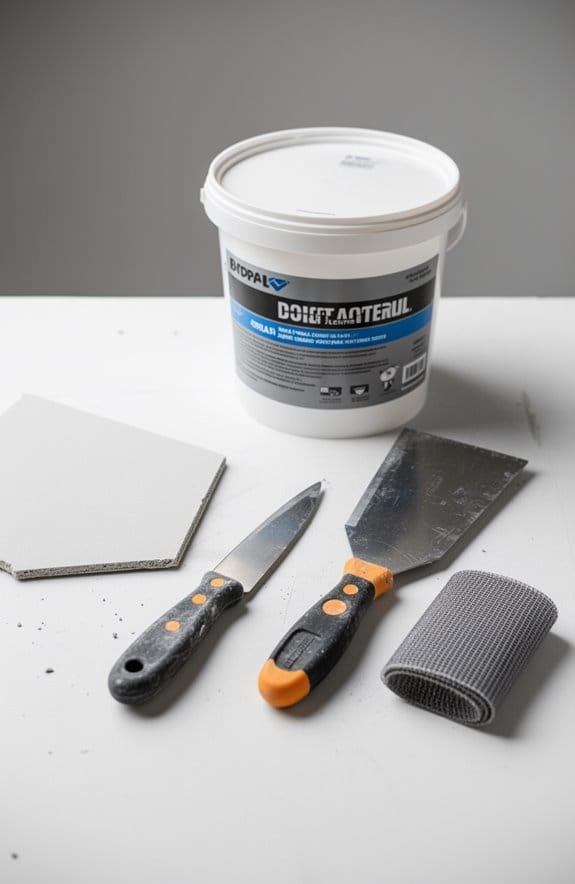
Have you ever found yourself staring at a wall that needs some TLC, wondering how to choose the right joint compound? It can be a bit overwhelming if you’re not sure what each type is used for. If you’re just making small repairs, a lightweight compound is your best bet; it dries quickly and is a breeze to sand down later.
When it comes to general applications, think about using all-purpose joint compounds. They’re pretty versatile, making them perfect for taping and a range of other tasks. If you’re working in a bathroom or another high-humidity area, it’s crucial to grab a moisture-resistant compound. This will help keep mold at bay, so you don’t end up with any unwelcome surprises down the line.
Got a project that needs to be done fast? Fast-setting joint compounds can patch drywall in under an hour. Seriously, they’re a must if you’re in a rush to finish things up. For larger surfaces, consider using a ready-mixed compound. It saves you the hassle of mixing and lets you get right to work.
Understanding these options can make a big difference in the outcome of your projects. So, what type of repair are you thinking about tackling? It’s all about choosing the right compound for the job! Remember to consider the compound’s drying time and compatibility with your project timeline for the best results.
Recommended Products

TIME = MONEY | Make the shift from hand finishing tools to automatic tools and dramatically increase your finishing speed with no compromises in quality.

TIME = MONEY | Make the shift from hand finishing tools to automatic tools and dramatically increase your finishing speed with no compromises in quality.

GENUINE LEVEL5 | If quality, performance, and reliability of your finishing tools matters, choose LEVEL5 brand tools.
Frequently Asked Questions
Does Drywall Mud Shrink When It Dries?
Yes, drywall mud does shrink when it dries. Factors like joint compound composition, drying time effects, application techniques, and environmental conditions can influence how much it shrinks, especially in varying moisture levels.
Why Do People Put Dawn Dish Soap in Drywall Mud?
Imagine effortlessly gliding drywall mud onto surfaces! We add dish soap for its benefits—improved workability and texture enhancement. Mixing techniques with a few drops provide smoother application tips that yield fantastic results every time.
How to Store Joint Compound so It Doesn’t Mold?
To store joint compound effectively, we should use proper sealing methods, maintain ideal storage conditions, control humidity, and monitor temperature effects. These mold prevention techniques help guarantee our compound stays fresh and usable.
Why Does Drywall Shrink?
Like a sponge in sunlight, drywall shrinks due to moisture loss. We should remember useful drywall installation tips and explore drywall types explained to avoid common drywall issues and guarantee effective drywall repair techniques and finishing methods.