Got a hole in your drywall? It happens to the best of us. Whether it’s from a rough move or just some wear and tear over time, repairing those small to medium-sized holes doesn’t have to be daunting. A butterfly patch is the perfect solution for holes up to about 8 inches wide.
To start, grab a utility knife or a hole saw. You want to create a clean, square or rectangular opening. It doesn’t have to be perfect, but the cleaner the edges, the better your patch will sit.
Now, get your drywall patch ready; make it about 3 inches larger than the hole you’ve cut out. This extra margin is key to getting a solid hold.
Once you’ve shaped the patch, the next step is all about that joint compound. This is where you’ll press the patch into the compound and smooth out the edges to blend it well with the surrounding wall. Here’s the trick: take your time when you’re smoothing the edges. If you rush, it’ll stand out later on, and you want a seamless finish.
Now, let’s think about why this process matters. Not only will it restore the look of your walls, but it also helps maintain the value of your home.
No one wants to deal with visible damage when potential homebuyers or guests come over.
Honestly, repairing drywall isn’t just about fixing a hole; it’s about taking pride in your space. With just these few steps, you’ll be well on your way to a professional-looking repair.
So, why not give it a shot? You might just surprise yourself with how easy it can be.
Key Takeaways
- Butterfly patches are designed for small to medium holes, up to 8 inches wide, simplifying the repair process without needing internal bracing.
- The trapezoidal shape of the butterfly patch allows for easy insertion and secure fitting into the damaged drywall area.
- Essential tools for applying a butterfly patch include a utility knife, joint compound, and a taping knife for smooth application.
- Proper preparation involves cutting a drywall piece larger than the hole and scoring it correctly to ensure a tight fit.
- Techniques for finishing include feathering edges, allowing each coat to dry, and using lightweight joint compound for easier sanding and a professional look.
What Is a Butterfly Patch and Why Use It?
Have you ever looked at that pesky hole in your drywall and thought, “How on earth am I going to fix this?” Trust me, you’re not alone. One handy solution to consider is the butterfly patch, also called a California patch. This technique works wonders for small to medium-sized holes—think up to eight inches wide.
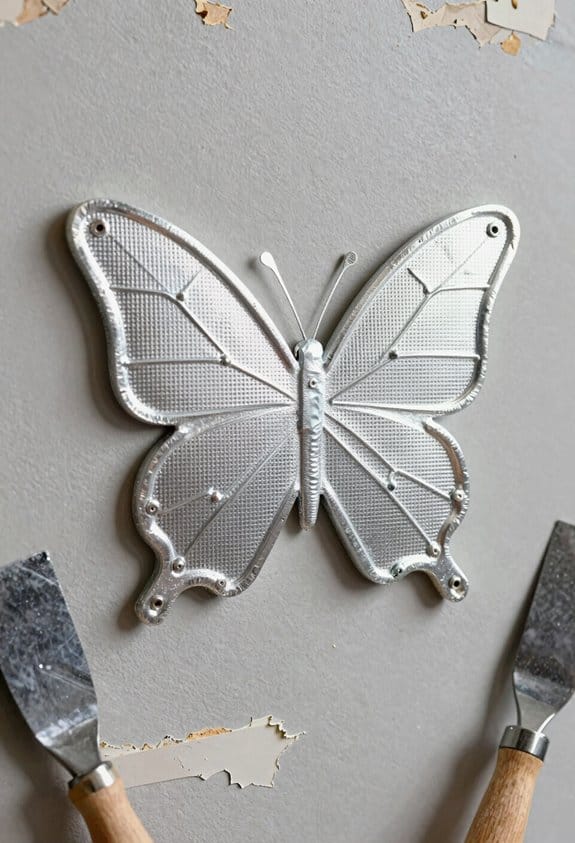
Here’s the trick: to make the patch, you’ll need to cut a square piece of drywall and then remove a central section, creating trapezoidal “wings.” These wings act like a little support system, holding the patch securely in place within the wall. The best part? You don’t even need to brace behind the damaged area, which saves you time and hassle.
Once you position the patch, cover it with joint compound to give it that smooth finish that’ll blend in seamlessly with the rest of your drywall. This method’s great for tackling everyday wear and tear, whether it’s from dents, nail holes, or any other little mishaps that come up in a busy household.
So, why does this matter? Because knowing how to handle these little home repairs can save you both time and money. Honestly, a small effort can lead to big improvements in your living space. With just a little patience, you can fix those unsightly wall imperfections and make your home feel just a bit more polished. Many drywall repair kits include user-friendly tools and materials that make applying joint compound and finishing the patch much easier.
Essential Tools for Butterfly Patch Repairs
Have you ever faced a wall with a hole that feels like it’s staring right at you? Dealing with those pesky drywall repairs can seem daunting at first, but with the right tools, you can tackle a butterfly patch repair like a pro.
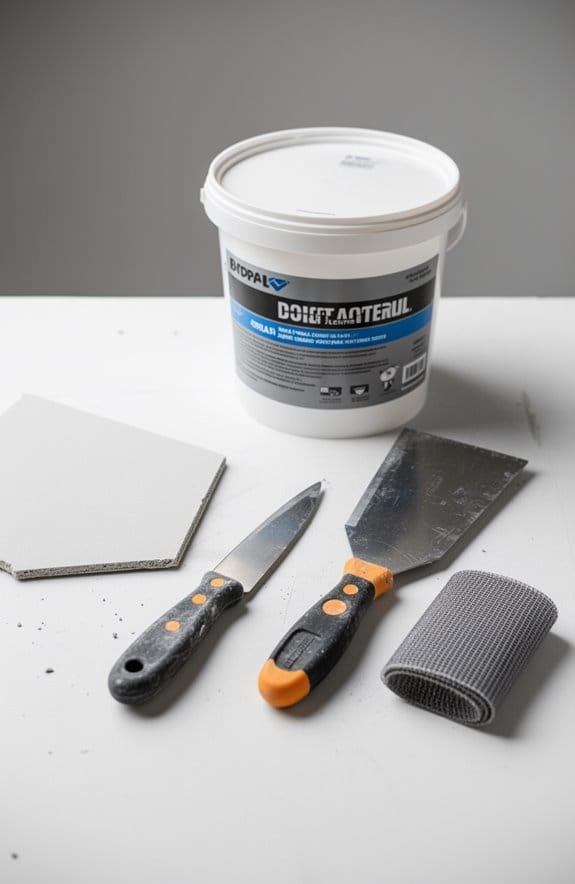
First up is the hole saw. It’s a must-have for cutting a circular piece from a scrap of drywall. You want it to fit perfectly, so don’t skip this step. Then there’s the trusty utility knife. This tool will score and cut your drywall, which is key for neat and clean edges—nobody wants ragged holes marring their walls.
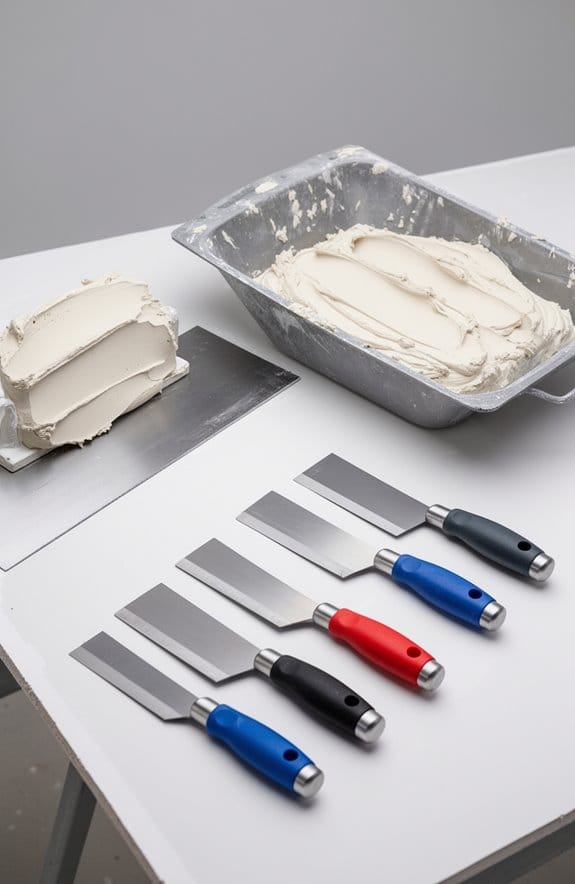
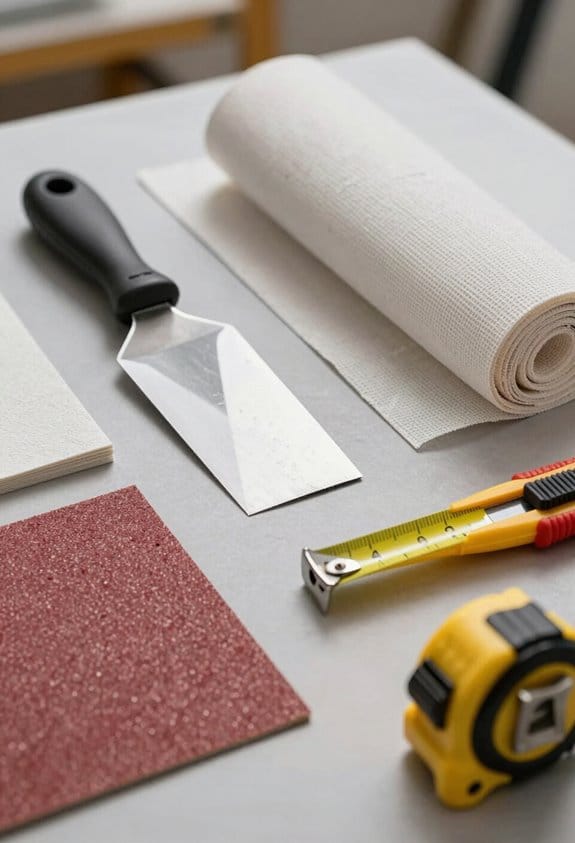
You’ll also need joint compound (or mud) for securing the patch. This stuff is your friend when it comes to smoothing out that repaired area. A taping knife is great for applying the joint compound evenly and getting rid of any excess mud. And once everything’s dry, grab some 150-grit sandpaper to refine the area. This ensures your patch blends in seamlessly with the rest of the wall, making it look as good as new.
So, why bother with all this prep? A good repair not only fixes the wall but also makes your space feel more put together. Honestly, who wouldn’t want that?
In short, having the right tools at hand makes all the difference when you’re ready to fix up those unsightly wall holes. For best results, apply multiple thin layers of joint compound, sanding lightly between each for a smooth finish. Curious about trying your hand at drywall repairs? Grab those tools and get to work!
Recommended Products

Professional Skimming System: Includes 10", 16", 24" and 32" stainless steel skimming blades, 9" compound roller, bucket scoop, putty knife, a 27"–60" aluminum extension handle and a protective case for full drywall finishing workflows.

[Professional Skimming Blade Set] The drywall knife set includes 10", 16" 24" and 32" four stainless steel skimming blades, a 6" arc scraper for ensuring you have all the tools you need to tackle any drywall project efficiently and effectively, a 28"-62" extensible handle pole, a high impact handle adapter and a portable storage box

[5-Sizes Blade Set with Replacements] Includes five skimming blades (16", 25", 40", 60", and 80cm widths) made of flexible 0.5mm stainless steel for precise, streak-free smoothing. Comes with matching replacement blades—ready for long-term professional or DIY use.
How to Prepare the Hole for Repair
Preparing a hole for repair is key if you want a smooth and lasting finish. First things first: take a close look to see if the hole is square or rectangular. You’ll want to cut the edges to create a clean shape. Grab a keyhole saw and make even cuts around the hole—just be careful not to enlarge the damaged area. Remember, for the butterfly patch method, you shouldn’t go over a hole size of 8 inches wide or long.
Now, it’s time to cut your drywall piece. Aim for a piece that’s about 3 inches larger than the hole so you have enough coverage. Here’s the trick: measure in 1-1/2 inches from each side and score the brown paper on the back with a utility knife. Then, just break the drywall along those scored lines while keeping the front paper intact.
So, why does this matter? Getting this part right sets the stage for a solid repair. If you rush through it or skip the details, you might end up with a messy finish that just won’t hold up.
To recap, make sure your hole is neatly shaped, cut a drywall piece slightly larger for coverage, and score it accurately before breaking. It’s all about taking those extra steps. Have you tackled a repair like this before?
Using lightweight compounds can also make applying the patching compound easier and help avoid cracking after repair.
Shaping Your Drywall Patch for Success
Got a hole in your drywall? It’s a common issue that can feel overwhelming, but don’t fret! Once you’ve prepped the area for repair, it’s time to shape your drywall patch so it fits just right.
Start with a scrap piece of drywall that’s at least three inches larger than the hole. Measure in 1-1/2 inches from each side, then grab a utility knife and carefully score that brown paper on the back. Here’s the trick: when you break the drywall along those scored lines, make sure to keep the front paper intact. This will leave you with a nice 1-1/2 inch flap around the edges, which makes installation a whole lot easier. If it doesn’t fit perfectly, you can always trim the excess gypsum gently to get a snug match.
Now, you might wonder, why go through all this trouble? Getting that patch to fit well keeps your repair looking seamless. Plus, it makes the job of taping and mudding go smoother.
With those steps done, you’re all set for the next phase of the repair process. Just remember, taking the time to shape your patch can save you a lot of headaches down the line. For best results, consider using repair kits with strong adhesive properties to ensure your patch stays securely in place. Ready to tackle the next step?
Inserting Your Butterfly Patch: The Installation Process
Let’s tackle that butterfly patch, shall we? If you’ve got a hole in your drywall, this is an essential step in your repair journey.
Start by prepping the area. Spread some all-purpose or quick-setting drywall mud around the hole—aim for about a ¼ inch thick layer. Once that’s done, gently insert the butterfly patch into the hole. You’ll want to press those paper flaps into the mud to ensure they stick.
Here’s the trick: grab a 6-inch drywall knife and flatten the edges against the wall. This helps avoid any excess mud sneaking behind those flaps. Once your patch is nice and secure, it’s time to be patient—let it dry completely. This drying time is crucial for the patch to hold up long-term.
After it dries, you can feather out the edges using a larger knife. This step is key because it makes your repair blend seamlessly into the wall. Honestly, using a butterfly patch like this can really simplify your repairs compared to those old-school methods.
For optimal results, be sure to use a compound with quick drying time to speed up the finishing process.
How to Apply Joint Compound for Flawless Finishing
Achieving a flawless finish on your butterfly patch can feel like quite the challenge. But with a bit of patience and the right technique, it’s totally doable! Start by grabbing your taping knife to spread a thin layer of joint compound over the patch edges. Make sure you cover the area evenly, so it sticks well.
Now, here’s the trick: go for two to three thin coats instead of one thick one. Each layer needs to dry completely before you add the next, which helps create that seamless finish we all want. After the final coat is dry, you’ll want to grab some 150-grit sandpaper. Lightly sand the area to smooth out any bumps. And definitely feather the edges of each coat. This is crucial for blending the patch into the existing wall texture.
Honestly, if your drywall already has some texture to it, you might want to reapply that texture after sanding. It’s key to matching the surface so everything looks uniform. For best results, consider using a lightweight joint compound to reduce shrinkage and make sanding easier.
Recommended Products

TIME = MONEY | Make the shift from hand finishing tools to automatic tools and dramatically increase your finishing speed with no compromises in quality.

TIME = MONEY | Make the shift from hand finishing tools to automatic tools and dramatically increase your finishing speed with no compromises in quality.

GENUINE LEVEL5 | If quality, performance, and reliability of your finishing tools matters, choose LEVEL5 brand tools.
Top Mistakes in Butterfly Patch Repairs
Repairing butterfly patches can seem tricky, but avoiding common mistakes can really help you nail that smooth finish. Have you ever noticed how a lopsided patch sticks out like a sore thumb? One mistake many people make is not squaring off the hole correctly, which leads to a patch that just doesn’t fit right. To make sure you get a good fit, cut your patch piece at least 3 inches larger than the hole. This way, you won’t leave any gaps.
Another tip? Don’t skip scoring and breaking the drywall along your marked lines. If you don’t, you risk ending up with a patch that doesn’t lay flat—definitely not something you want after all that hard work! When it comes to applying drywall mud, be careful not to overdo it. Applying too much can cause unsightly bumps later on. Instead, aim for a thin and even coat.
And here’s a key step: always sand between mud applications. It may seem like a hassle, but it’s better than dealing with a rough surface when you’re done. Think about this: would you rather spend a little extra time now making sure it’s smooth, or dealing with it later?
Using a spackle product with a color-change indicator can help you know exactly when the patch is ready for sanding and painting, ensuring a professional finish.
Ultimately, by avoiding these pitfalls in drywall installation, you can really boost your repair skills and get the results you’re after. Got any tips of your own? Let’s hear how you make your butterfly patch repairs shine!
How to Achieve a Professional Finish After Repair
How can you make sure your butterfly repairs look seamless and professional? It’s all about the details, and I’ve got some straightforward steps to help you nail this project.
Start by pressing that butterfly patch firmly into a layer of joint compound. This helps get rid of air pockets, which is key for a solid finish. Next, grab a larger drywall knife and spread a thin, even layer of joint compound over the patch. Make sure to feather the edges—it’s all about blending in well with the surrounding area.
Now, don’t rush this part. Allow each coat to dry for about 24 hours before you start sanding. When it’s dry, take some 150 grit sandpaper and gently smooth everything out. If you’re not happy with the look of the repair yet, consider applying a third coat of joint compound for extra durability and a better finish. Honestly, taking the time to refine your compound and sanding techniques will pay off when it comes to painting. Using a lightweight joint compound can minimize shrinkage and improve the ease of sanding for a smoother final appearance.
When to Choose the Butterfly Patch Over Other Methods?
Have you ever faced a hole in your drywall that just needs a quick fix? Knowing when to reach for a butterfly patch can really save you time and hassle. This method works best for small to medium-sized holes, especially those up to about 8 inches wide. If you’re dealing with a hole the size of a fist, a butterfly patch is the way to go.
Why? It fits neatly with the existing drywall and avoids the need for internal bracing, which can complicate things. The trapezoidal shape allows for easy insertion, making it simpler to secure in place. All you really need for these repairs are a hole saw, joint compound, and a taping knife. Blending in with the current drywall texture is a breeze with this method too.
So, why does this matter? If you want a repair that’s quick and blends seamlessly, a butterfly patch excels in those situations. It’s not just about patching; it’s about getting it done right. When considering your options for patching holes, think carefully about what’s going to give you the best results based on the size and location of the damage.
In short, the butterfly patch is a solid go-to for those pesky holes in your wall. Have you tried it out for yourself yet? For enhanced durability and crack prevention, combining a butterfly patch with fiberglass mesh drywall tape can provide long-lasting repair results.
Strategies for Maintaining Your Butterfly Patch Repair
Have you ever fixed a butterfly patch only to find it looking a bit worse for wear a few months later? It’s a pain, right? While that initial repair might give you a sense of accomplishment, keeping it looking great does require a bit of work.
Regular inspections are key. Check for any cracks or peeling, especially in spots that get a lot of foot traffic. It’s just a quick look every now and then, but it can save you a lot of hassle down the road. You don’t want moisture sneaking in, either. Applying a good sealant or a coat of paint can boost durability and keep water damage at bay. Don’t overlook the surrounding drywall; keeping it clean and dry is essential to avoid mold. Stick to light cleaning methods—harsh chemicals can do more harm than good.
If you notice wear, try this: light sanding, followed by a fresh layer of joint compound. It’s an easy fix that can restore that fresh look. Trust me, taking these simple steps will keep your butterfly patch in good shape for a long time. For best results, consider using tools with ergonomic handles to minimize hand fatigue during repair and finishing work.
Frequently Asked Questions
What Are the Three Types of Patching?
The three patching techniques we can use are California, butterfly, and traditional patches. Each requires different materials and offers unique benefits, ensuring we can effectively repair various hole sizes while maintaining wall integrity and aesthetics.
What Is a Butterfly Patch?
Did you know that butterfly patches can effectively repair holes up to 8 inches? A butterfly patch’s definition involves using a specific drywall piece; its application provides seamless repairs, and its benefits include easy installation and perfect finishes.
How to Use Repair Patches?
To use repair patches, we’ll choose adhesive products for strong bond, apply the patch carefully, and use effective repair methods. Let’s follow the instructions closely for a seamless patch application and beautiful finish together.
How Long Does Patch and Repair Compound Take to Dry?
Drying time considerations vary: quick-setting compounds may dry in 20 minutes to an hour, while thicker applications take longer. Environmental factors influence this too, so let’s be mindful of humidity and temperature during our repairs.