
Have you ever noticed your drywall tape starting to lift or come loose? It’s frustrating, right? Thankfully, fixing it isn’t as daunting as it sounds. Here’s a simple way to tackle those pesky areas and get your walls looking fresh again.
First things first, you’ll want to clean around the tape. Make sure there’s no dust or debris that could interfere with your repair.
Next, grab a drywall knife and carefully cut away any loose tape that’s longer than a foot. It’s essential to remove the damaged part so you can start with a clean slate.
Once the tape is out of the way, take some 150-grit sandpaper and give the exposed area a good sanding. This helps create a smooth surface for the joint compound.
Apply the compound over the tape at a 45-degree angle—this technique helps ensure it adheres well. Then, be patient and let it dry for up to 36 hours. Yes, it takes time, but it’s worth it for a solid fix.
After it’s dry, hit it again with sandpaper for a smooth finish, and then it’s time to paint. You want it to blend in perfectly with the rest of your wall.
So, why does this matter? Keeping your drywall in good shape not only improves the look of your home but also helps with overall stability.
Truth is, nobody wants to live with eyesores. In the end, it’s all about taking a little time to care for those areas before they turn into bigger problems.
Have you tackled drywall repairs before? What worked for you?
Key Takeaways
- Clean the area around the lifting tape, removing dust and debris for better adhesion and a smoother finish.
- Cut away any loose tape longer than a foot using a drywall knife to prevent further lifting.
- Sand the exposed area with 150-grit sandpaper to create a smooth base for the repair compound.
- Apply joint compound over the tape at a 45-degree angle, ensuring it covers the edges well.
- Allow the compound to dry completely, then sand and paint to match the surrounding area.
DIY Drywall Tape Repair: Step-By-Step Guide
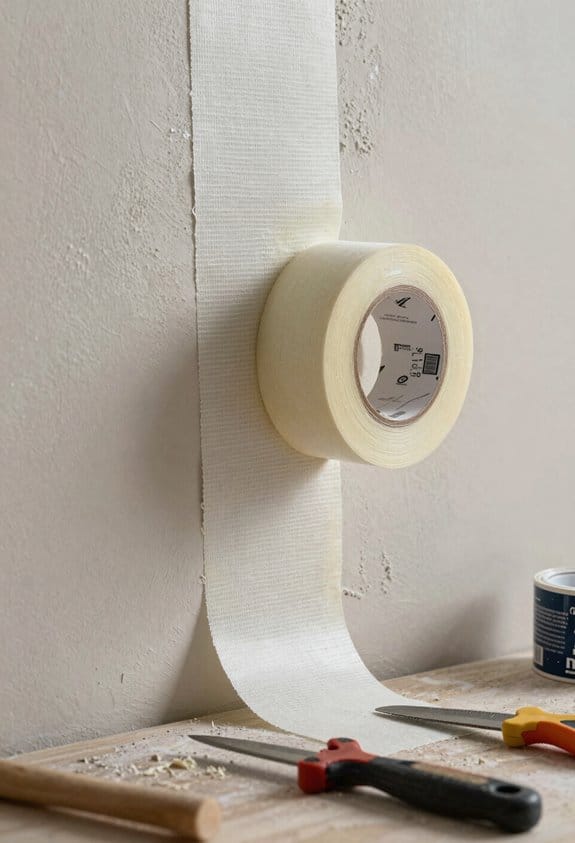
Have you ever noticed that pesky piece of drywall tape peeling away from your wall? It can be frustrating, but repairing it yourself isn’t as hard as it might seem. Let’s break it down step-by-step so you can tackle this project without feeling overwhelmed.
First off, grab a dry cloth and clean the area around the damaged tape. Dust and debris can make things tricky later, so a quick wipe will save you some hassle. If the tape that’s coming loose is longer than a foot, you’ll want to use a drywall knife to carefully cut it away. This isn’t a race, so take your time here!
Once you’ve got the old tape off, it’s time to sand the exposed area. Use some 150-grit sandpaper to smooth things out. You’re aiming for a flat surface that’ll be easy to work with. Then, it’s all about that joint compound. Apply it over the tape, extending it at a 45-degree angle. Don’t rush this part; a nice even layer makes all the difference.
Now comes the waiting game. You’ll need to allow the compound to dry for up to 36 hours. It might feel like forever, but it’s worth it. Once dry, revisit the area with sandpaper to make everything smooth again; nobody wants a bumpy wall, right? Finally, paint over the patched area to blend it with the rest of your wall.
Using drywall corner tape specifically designed for corners can help prevent future peeling and cracking. Truth is, these repairs can make a huge difference in your home’s appearance. It’s about taking the time to do it right. So, are you ready to tackle that drywall tape repair?
Recommended Products

GENUINE LEVEL5 | If quality, performance, and reliability of your finishing tools matters, choose LEVEL5 brand tools.

GENUINE LEVEL5 | If quality, performance, and reliability of your finishing tools matters, choose LEVEL5 brand tools.

CONTRACTOR GRADE 10/12 Standard Full Set A VALUE
Identifying Minor vs. Major Damage in Drywall Tape
Identifying the type of damage to your drywall tape is crucial for effective repairs. Have you ever noticed loose tape or cracks on your walls? Minor damage usually means tears or lifting that are less than a foot long. In these cases, you can just reinforce the existing tape instead of tearing it out. This simple fix can help you avoid bigger issues later on.
Now, if the damage is more severe—like tears that exceed one foot—you have some work to do. Removal and replacement of the affected section become necessary for a lasting solution. It’s also worth checking for any visible lifting, cracks, or gaps that might be hiding. Timely repairs for both minor and major damages are essential to keep your walls looking fresh and prevent any costly fixes later. Using texture spray products before repainting can provide a seamless finish and improve the appearance of repaired areas.
Replacing Damaged Drywall Tape
Got some damaged drywall tape that’s driving you nuts? It’s a common issue and fixing it isn’t as hard as it seems. Let’s get into how you can tackle this project and make those walls look good as new.
First off, start by clearing the area. You’ll want a clean surface for the tape to stick to, so scrape away any paint chips or debris. Trust me, this step sets you up for success. Once that’s done, grab your drywall knife. Carefully lift and remove the damaged tape, making sure to get any loose ends underneath.
Now it’s time to prep the area for the new tape. Sand the exposed surface with some 150-grit sandpaper. This helps create a smooth base for the new tape to bond well. Honestly, if you skip this, you might find your new tape peeling off later, and that’s just a headache you don’t need.
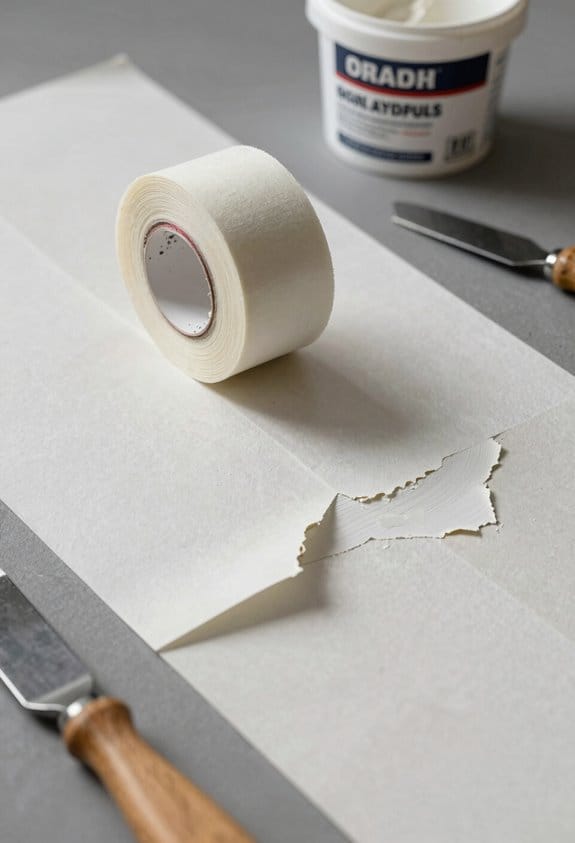
Next, mix up some fast-setting joint compound. Apply it over the area where your new tape is going. Make sure you’ve got good coverage—this helps everything stick properly. Here’s the trick: press the new tape into the wet compound, then smooth it out. After that, apply another layer of joint compound on top for a uniform finish. You’ll want to sand it smooth once it’s dry and then you can paint over it!
Using drywall repair clips can also provide extra support for larger damaged areas, helping to secure the new drywall patch firmly in place.
Quick recap: scrape the area, remove the old tape, sand, apply joint compound, press in new tape, and finish with more compound. By taking these steps, you can keep your walls looking sharp. Have you ever tackled drywall repairs before? If you follow these tips, you might just surprise yourself with how well you can do it!
Recommended Products

GENUINE LEVEL5 | If quality, performance, and reliability of your finishing tools matters, choose LEVEL5 brand tools.

GENUINE LEVEL5 | If quality, performance, and reliability of your finishing tools matters, choose LEVEL5 brand tools.

GENUINE LEVEL5 | If quality, performance, and reliability of your finishing tools matters, choose LEVEL5 brand tools.
Choosing the Right Joint Compound for Your Repair
Choosing the right joint compound can make or break your drywall repair project. Have you ever struggled with loose or lifting drywall tape? If so, a fast-setting joint compound might be your best bet. This option dries quickly, allowing you to layer it efficiently if necessary.
When you’re dealing with powdered joint compound, just mix it with water until it reaches a creamy consistency. This makes it easier to stick to the tape and the drywall itself. If you’re pressed for time, consider going with a pre-mixed joint compound—it saves you the hassle of mixing and makes the job a bit easier.
For vertical surfaces, I’d recommend a lightweight formula. It makes the application process a lot smoother and reduces the risk of sagging. Also, double-check that whatever you pick is compatible with your drywall finish—whether that’s smooth or textured.
And let’s be real, nobody enjoys sanding for hours on end. So, look for an “easy to sand” joint compound. It’ll save you time and effort once everything’s dried and you’re getting ready to finish up.
Additionally, choosing a compound with quick drying time can greatly speed up your repair process and reduce downtime.
At the end of the day, taking the time to choose the right joint compound can lead to a much smoother finish. What’s your next repair project going to be?
Recommended Products

Premium Epoxy: T-88 is a high-performance structural 2-part epoxy adhesive; Our wood- and marine epoxy is endorsed by leading designers, builders and organizations
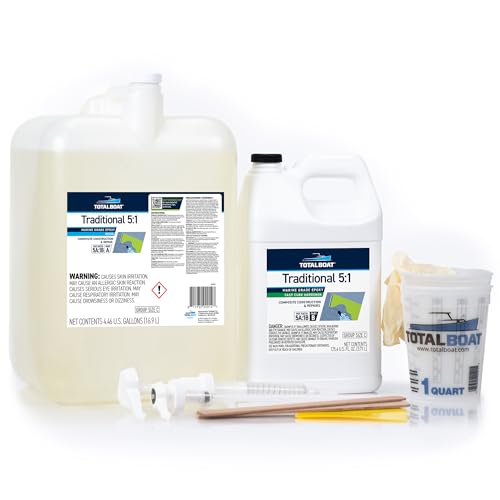
High-Strength Marine Epoxy Resin Kits: System formulated for bonding, coating, and laminating. Build, repair, and restore boats, canoes, kayaks, SUPs, surfboards, RVs, and trailers. Stronger bonds and more durable than polyester fiberglass resin.

Fill Joints Professionally: Joint-It Simple is a fast, easy, long-lasting, and ready to use polymeric sand alternative joint filler to fill joints of pavers, flagstones, and slabs. The 44-pound bucket is available in 3 colors (Neutral, Grey and Dark Grey) with a quick 4 step application and covers approximately 100 square feet.
How to Match Paint After Drywall Repairs
Have you ever tried to touch up your walls after a drywall repair, only to find yourself staring at a patch that’s a totally different color? It’s frustrating, right? Getting that paint to match perfectly is key for a seamless finish.
If you’ve got leftover paint from the original project, that’s your best bet. Just keep in mind that things like sunlight and air can fade paint over time, so the shade might not be exactly the same anymore. If you don’t have any paint or if it seems off, try bringing a small sample of your wall to a local paint store. They can mix up a custom color for you, which is super helpful!
Before you dive into painting, make sure that the repair compound is completely dry. If you paint over wet joint compound, you’re risking all sorts of problems like bubbling or poor adhesion. You don’t want to spend all that time fixing a wall just to have your paint peel. It’s also smart to think about the room’s lighting because different light can really change how colors look on your walls. Using a spackle with quick drying properties can help ensure your repair is ready for painting sooner and reduces the risk of paint issues.
Common Causes of Loose and Lifting Drywall Tape
Ever finish a drywall repair only to spot loose or lifting tape? It’s a frustrating situation many people face, and it’s often due to some common missteps.
First up, if the adhesive was applied carelessly during installation, it can really hinder the tape’s ability to stick. You want that tape to bond well, so it’s crucial to take your time and do it right. Environmental factors can come into play too. Changes in humidity and temperature can weaken that tape’s grip over time. Think about it—when the weather shifts dramatically, it can really affect your repairs.
Excessive moisture from leaks or spills is another big culprit. Even a little water can cause serious issues, weakening both the drywall and the tape, causing it to lift. And let’s not forget about the prep work. If the surface wasn’t cleaned properly and is covered in dust or debris, that tape won’t adhere as it should. So, it’s worth putting in the effort upfront.
Lastly, age can be a factor, especially in high-traffic areas. Over time, wear and tear can compromise both the drywall mud and the tape. You might not think about it, but all that daily hustle can take its toll.
Using high-quality, shrink-resistant putty can help ensure durable adhesion and prevent future tape lifting.
Bottom line, you can avoid these problems by being mindful of each step in the process. What’s been your experience with drywall tape? Do you have any tips or tricks to share?
Recommended Products

This product adds a great value

The information below is per-pack only

ALL PURPOSE USE: Ideal for wall repairs and finishing, this lightweight joint compound offers smooth application and easy sanding for professional results on drywall projects.
Should You Hire a Pro for Drywall Tape Repairs?
Have you ever faced a drywall tape issue and felt overwhelmed about whether to tackle it yourself or hire a pro? It can be tough to decide. But let me tell you, hiring a professional for drywall tape repairs usually makes life a whole lot easier.
When you go with an expert, you’re likely to get a finish that looks perfect, especially if you’ve got textured ceilings or other tricky spots. Professionals know all the ins and outs of blending paint and compound, which helps in achieving that seamless look you might be after. While costs for small repairs typically fall between $200 and $500, think about the time and energy you could save by leaving it to someone with the right skills.
You might be wondering, why hire someone instead of doing it yourself? Here’s the trick: pros can handle unexpected hiccups that can pop up during repairs, and they know how to match paint like a champ. This can save you from the headache of trying to figure it out on your own. They also give clear guidance on the entire repair process, so you’re never left in the dark.
Additionally, many repair projects benefit from moisture-resistant materials to ensure durability and prevent future issues in humid environments.
All in all, if you want to ensure that the job is done just right, hiring a professional really can be a smart move. So, the next time you’ve got a drywall tape problem, consider what’s more valuable: your time and peace of mind, or a potentially flawed DIY attempt?
Recommended Products

GENUINE LEVEL5 | If quality, performance, and reliability of your finishing tools matters, choose LEVEL5 brand tools.

GENUINE LEVEL5 | If quality, performance, and reliability of your finishing tools matters, choose LEVEL5 brand tools.

GENUINE LEVEL5 | If quality, performance, and reliability of your finishing tools matters, choose LEVEL5 brand tools.
Frequently Asked Questions
How Do You Fix Drywall Tape That Has Come Loose?
To fix loose drywall tape, we carefully lift the tape, apply wood glue underneath for better adhesion, then seal it with joint compound. After drying, we sand it for a smooth finish, ensuring a solid tape repair.
Why Is My Drywall Tape Lifting?
Did you know that nearly 30% of drywall issues stem from tape adhesion problems? Our tape can lift due to moisture, temperature changes, or poor installation, leading to that frustrating separation you might be seeing.
Can I Glue Down Loose Drywall Tape Without?
Yes, we can glue down loose drywall tape using adhesive options like white glue or construction adhesive. It’s important to apply carefully and guarantee a clean finish to maintain a neat look on our walls.
How to Get Drywall Tape to Stick?
To get drywall tape to stick, we should clean the surface, use fast-setting joint compound, and apply firm pressure. For added security, we can explore adhesive options like wood glue or drywall adhesive beneath loose areas.


