
Looking to apply drywall tape without those pesky bubbles? It can be a frustrating challenge, but don’t worry, I’ve got some practical advice for you.
Start by spreading a generous layer of joint compound, about 1/8 inch thick, over the joints. This gives the tape something to stick to. Here’s the trick: take a moment to wet the tape. This makes it more flexible and helps prevent creasing when you’re applying it.
When you’re ready to embed the tape, use even pressure with your taping knife. You want to smooth it out nicely. If, despite your best efforts, bubbles do crop up, don’t panic. Simply slice through them with a utility knife and peel back the tape. Then, you can apply a little more joint compound before repositioning the tape. It sounds complicated, but once you get the hang of it, it gets easier.
So, why does this matter? Well, a smooth finish makes all the difference in your final project. It gives your walls a polished look and saves you from having to deal with repairs later on.
To sum it up, a little patience and the right technique can go a long way in drywall taping. Are you ready to give it a shot?
Key Takeaways
- Apply a generous layer of joint compound (about 1/8 inch thick) to ensure good adhesion of the tape.
- Wet the drywall tape before placing it to enhance flexibility and prevent creasing during application.
- Use even pressure with the taping knife to smooth out the tape and avoid trapping air underneath.
- Employ a trowel or taping banjo tool to push out any remaining air pockets and ensure a smooth finish.
- Practice your technique for better control, reducing the likelihood of bubble formation while applying the tape.
How to Apply Drywall Tape Without Bubbles

When it comes to applying drywall tape without bubbles, you might find it more challenging than it seems. Have you ever tried to get that perfect finish, only to end up with pesky air pockets? Here’s a straightforward method that can help.
Start by applying a good amount of joint compound over the joints before you lay down the tape. This step is essential because it helps create a solid bond and keeps air pockets at bay. Then, consider wetting the tape a bit. A little moisture makes it more flexible and easier to work with.
As you glide your taping knife over the tape, make sure your pressure is even. Too much pressure can force excess joint compound through, leading to those frustrating bubbles. The trick here is to keep your compound a bit thinner for a smoother application. It might take a little practice, but once you get the hang of it, you’ll notice a real difference!
Using a rolling tool after you’ve laid the tape can be a lifesaver. It helps push out any trapped air without disturbing the tape or the mud. Seeing those air bubbles disappear is honestly satisfying.
For the best results, choose a lightweight joint compound to ensure easier handling and quicker drying time, which helps reduce the chance of bubbles forming under the tape.
Common Causes of Bubbles in Drywall Tape

Bubbles in drywall tape can really be a pain, right? After all the hard work you put in, seeing those pesky bubbles pop up is frustrating. A big reason for this issue is trapped air, which often happens when we don’t apply the joint compound correctly. If you skimp on the amount of mud, the tape just won’t stick as it should, and that’s when bubbles start making an appearance.
Here’s the trick: don’t use that thick, stiff mud straight from the bucket without thinning it a bit. It’s like trying to put glue on with a rock, just doesn’t work as well! And remember to wet the tape before you apply it. This simple step helps it bend and mold to the surface better, which makes a huge difference.
Another thing to keep in mind is your technique when embedding the tape. If you’re applying uneven pressure or working at the wrong angle with your drywall knife, it’ll lead to bubbles, no doubt about it. Here’s where some practice can come in handy; getting your technique down can save you from a lot of headaches later on. Using tools with automatic countersink features can also help ensure even pressure and consistent tape embedding for a smoother finish.
Drywall Tape Techniques to Prevent Bubbles

Tired of dealing with pesky bubbles in your drywall tape? It can be a frustrating issue, but with a few practical techniques, you can get a smooth finish every time.
First off, don’t skimp on the joint compound. Apply a nice, generous layer—about 1/8 inch thick—over the joints. It sets a solid foundation. Here’s the trick: wetting the tape before you place it can make a world of difference. It adds some flexibility, making it easier to work with.
Once you’ve got the tape in place, use a trowel or putty knife to embed it smoothly. Applying even pressure while gliding the knife over the tape helps keep excessive compound from squeezing out. Frankly, it’s all about the technique! You can also thin the joint compound slightly for better bonding. A little less thickness can mean fewer air pockets hiding in there.
Honestly, tools can make all the difference, too. Consider using a taping banjo; it’s great for pushing out any leftover bubbles. This way, you’ll achieve that consistent, flawless surface you’re going for.
For even better results, choose lightweight joint compounds which are easier to handle and help reduce the number of coats needed.
Recommended Products

Convenient & Efficient: You will get 1 x banjo dry tape tool and 1 x blue steel taping knife. With the Banjo, you don’t need to apply joint compound with a knife and then apply the joint tape, it does both at once. Equipped with a taping knife will smooth and embed tape on wall to make the work perfect
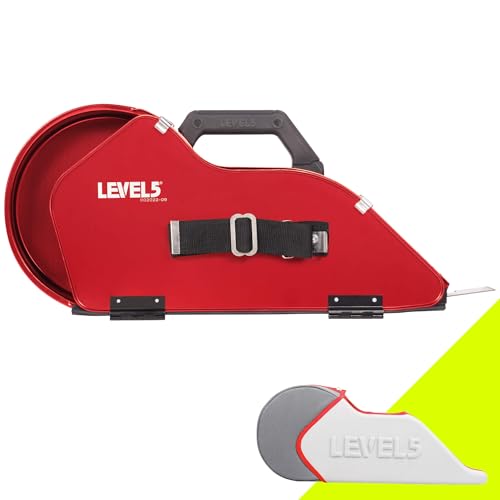
SAVE TIME & MAKE MORE MONEY | Simultaneously apply an even coat of joint compound and tape over flat drywall seams. By using a LEVEL5 Banjo, you'll save valuable time, achieve professional results, and increase your profitability.

Manufactured from durable Polycarbonate ABS
Choosing the Best Drywall Tape for Your Project
Choosing the right drywall tape can feel overwhelming, especially if you’re new to DIY projects. If you’re looking to avoid bubbles and achieve a solid finish, self-adhesive fiberglass tape might be your go-to option. It sticks well and is less likely to leave those pesky air pockets. Many folks swear by it for a reason.
But let’s not overlook paper tape. Sure, it takes a bit more skill to work with, but it can give you a smoother finish thanks to its flexibility. Ever thought about trying perforated self-stick paper tape? It’s designed to help minimize air pockets while you’re applying it, which is always a plus.
If your project is on the heftier side, you might want to consider using wider tape, around 3 or 4 inches. Wider tape boosts coverage and adds strength to those joints you’ll be working on. So, if you want to tackle more demanding jobs, this could be the way to go.
Now, here’s the trick: take the time to evaluate your specific project needs. Different situations call for different tapes, after all. Trying out a few options can really help you find the one that minimizes bubbles and enhances your overall finish.
In the end, it really boils down to what works best for you. What’s your experience with drywall tape? Are you ready to give one of these a shot? High-quality tapes with high tensile strength can help ensure long-lasting, crack-resistant results.
Recommended Products

【100% Fiberglass Mesh 】0.8mm Thickness -Made Of High-Quality Commercial 100% Grade Fiberglass Mesh.

APPLICATIONS: LLPT Drywall Fiberglass Tape is widely used for repairing and reinforcing wall cracks, ceiling joints, plasterboard seams, drywall repair, kitchen bathroom renovations, DIY projects, concrete walls, sanding, painting and curved edges; suitable for both exterior and interior applications; it provides a fast, neat, professional and permanent repair to cracks and holes; spackle the tape area is required for long time support. It's compatible with cement, wood, tile, concrete, plaster, paint and so on

100 percent fiberglass mesh
Step-by-Step Drywall Taping Guide
Ever tried taping drywall and ended up with more frustration than satisfaction? You’re not alone! Taping can seem tricky at first, but breaking it down into steps makes the process a whole lot easier.
First up, you’ll want to apply a generous amount of joint compound over those drywall joints. Don’t be shy here; a good amount is key for proper adhesion. Next, consider wetting the drywall tape. This simple step increases its flexibility, which can make it easier to lay down without those annoying creases.
When it’s time to apply the tape, focus on using even pressure with your taping knife. You want to smooth it right into that joint compound to create a flat surface. Here’s the trick: slightly thinning the mud and spreading it a bit wider than usual will help everything blend seamlessly.
As you’re working, keep an eye on the taped area while it dries. Truth is, if you see some air bubbles popping up, you need to tackle them fast. If left unchecked, those little bubbles can cause bigger problems down the line. Using drywall finishing tools with ergonomic handles can help reduce hand fatigue and improve control during this delicate process.
Troubleshooting Common Drywall Tape Issues
Have you ever finished up a drywall project only to find unsightly bubbles forming under the tape? It can be frustrating, but don’t worry—this is a common issue and there are ways to tackle it. One of the first things you want to get right is the joint compound. Aim for about 1/8 inch over the seams; too little and the tape won’t stick, and too much can cause problems.
Here’s the trick: when you’re applying the tape, maintain even pressure with your taping knife. If you press down too hard, you’ll end up pushing the compound through the tape, leading to those pesky bubbles. A little pro tip? Try wetting the tape before you apply it. This simple step can help it stick better and gives it a bit more flexibility, which can make a difference.
Now, if you do spot some bubbles, don’t panic. Just grab a utility knife and gently cut out the bubbled section. It might sound tedious, but it’s better to remove the damaged part now than deal with it later. After that, reapply the joint compound and place new tape over the area. Make sure it’s set properly, so it doesn’t just lift again.
Oh, and if you really want to reduce the chances of trapping air in the first place, consider using a thinner compound. It’ll give you peace of mind knowing you’re lowering the risk of a repeat problem. Additionally, selecting tape with strong adhesive quality ensures a secure bond that minimizes bubbling or wrinkling after application.
Recommended Products
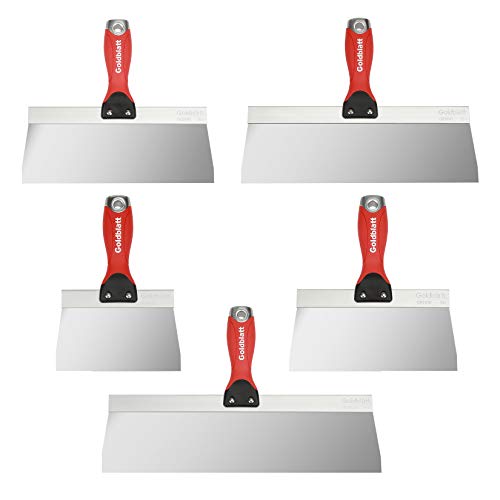
TIPS: The taping knives require proper care and storage or it will corrode/rust

High-quality Materials: The 14 inch taping knives are manufactured from the highest quality materials and undergo stringent quality control measures. It’s really a good buy and even more than that

Bates taping knife set includes 2 knives, providing versatility for drywall taping, finishing, and smoothing tasks.
How to Cut Out and Repair Bubbles
Bubbles in drywall tape can really mess with your wall’s finish. Got a little hiccup with your DIY project? Don’t worry, fixing it is easier than you think.
Start by grabbing a utility knife. You’ll want to slice right through that bubble from end to end, but be careful not to push too hard—just focus on the solid parts of the mud underneath. Once you’ve made the cut, gently peel back the troubled section and toss it in the trash.
Now, it’s time to patch things up. Grab your taping knife and apply a new layer of joint compound over that area. Make sure to cover the tape completely, and don’t be shy about extending beyond where the old compound was. The best part is, this extra layer helps seal everything up nicely.
Next, you’ll need a fresh piece of drywall tape. Cut or tear it to size so it overlaps the area you just filled. Center it over the new compound and press it down, making sure you push out any bubbles that might try to stick around. Smooth it out with even pressure for a neat finish.
Using a tape like Hubaow Drywall Paper Tape ensures better air bubble escape due to its water-permeable design.
So, why does this matter? Because nobody wants to look at a wall with unsightly bubbles! Taking a little extra time now will save you from headaches later on.
Wrap it up with a final look and touch-up if necessary. Now you’re ready to paint over that area and show it off. Have you ever dealt with this kind of issue before? It’s all part of the journey in home improvement!
Recommended Products

Drywall repair kit can be used for repairing interior or exterior surfaces like drywall, plaster, wood, brick and stone
Package includes 12 pieces of drywall repair patch in three different sizes (8 pieces of 4-inch, 2 pieces of 6-inch and 2 pieces of 8-inch), 2 pieces of sandpaper (240 grit), and 2 plastic scrapers.

Complete Repair Kit: Contains 1 pieces repair putty(8.5oz), 2 inch wall repair patches(2pcs), 4 inch wall repair patches(1pcs), 2 pieces of sandpaper, and 4 plastic scrapers.
Tips for Finishing and Sanding Seamlessly
Achieving a seamless finish on drywall can be a bit tricky, but it’s doable if you take your time with the sanding process. Start by applying two or three thin coats of drywall compound. Patience is key here—make sure each layer dries completely before you even think about sanding it down.
Now, once it’s dry, grab a sanding block or sponge instead of powering through with an electric sander. You’ll have better control this way, which really makes a difference. Here’s the trick: sand in circular motions. This not only helps blend the edges but also creates that smooth transition we all want.
After each round of sanding, take a moment to look over the area. Are there any bubbles or small imperfections staring back at you? If so, don’t stress. Just do some quick touch-ups to perfect it.
Using a lightweight joint compound can make the sanding process easier and help achieve a smoother finish.
This method can help you achieve a flawless and professional finish on your drywall project. So, next time you find yourself tackling a drywall job, remember these tips for a better outcome. What other DIY projects are you excited to dive into?
Expert Recommendations for a Flawless Finish
Are you tired of dealing with pesky air bubbles and uneven seams when applying drywall tape? You’re not alone. Getting a flawless finish can be tricky, but a few simple tips can really help you nail it.
Start by using a joint compound, and don’t be shy about applying it generously across the seams. Grab a wide knife and apply even pressure while smoothing the tape. This ensures the tape is well embedded, without those annoying air pockets that can ruin your hard work. Wetting the tape beforehand can really boost its flexibility and help it bond better. Why does this matter? Because it noticeably reduces the chances of bubbles forming.
Alternatively, you can switch to self-adhesive fiberglass tape if that’s more your style. It has a way of improving adhesion, making your life a bit easier. Also, consider experimenting with a thinner mud formula—this can create a smoother application and makes it simpler to embed the tape properly. Using lightweight joint compounds can also reduce user fatigue and improve application ease for a smoother finish.
Recommended Products

Self Adhesive for Easy Application: forget about the problem of using additional adhesives; Our drywall joint tape sticks easily to surfaces, thus saving time and efforts; This self adhesive drywall joint tape just needs to be peeled and placed on the crack

【Heavy-Duty Fiberglass Construction】 Made from Industrial-grade premium fiberglass with high tensile strength, this 1.97Inch x 180 FT Drywall Joint Tape resists cracking, alkali, and extreme temperatures for durable, long-lasting repairs.

【Heavy-Duty Fiberglass Mesh】 Made from premium high-density fiberglass mesh, this drywall joint tape offers excellent tensile strength, crack resistance, and alkali resistance. Designed to reinforce drywall seams and help prevent future cracking for long-lasting repairs.
Frequently Asked Questions
How Do You Keep Drywall Tape From Bubbling?
To keep drywall tape from bubbling, we should use proper tape techniques. Applying joint compound evenly, wetting the tape beforehand, and ensuring a smooth, thin mixture all contribute to achieving a bubble-free finish together.
Is It Better to Wet or Dry Drywall Tape?
We believe it’s better to wet drywall tape before application. This method helps achieve a smoother bond with the mud, reducing air pockets and ensuring a more seamless finish throughout our tape application process.
What Are Common Drywall Taping Mistakes?
When we think of flawless walls, it’s clear that common drywall taping mistakes stem from poor taping techniques. Not enough compound, uneven pressure, or neglecting to wet tape can all lead to unsightly bubbles.
How to Get Rid of Air Bubbles in Grip Tape?
To get rid of air bubbles in grip tape, we can carefully slice them, peel back, and apply heat. Bubble prevention starts with proper adhesion; let’s guarantee everything’s smooth for the best results together.


