Want to tackle a drywall project but not sure where to start? You’re in luck! Having the right tools on hand can make all the difference between sweating over a project and finishing it like a pro.
First off, a utility knife is essential for making those precise cuts you need. But don’t stop there! You’ll want joint knives in both 6-inch and 12-inch sizes. These are perfect for applying and smoothing out joint compound, so don’t skip them.
How about a drywall saw? It’s handy for those tricky cuts that come up from time to time.
And if you’re aiming for that smooth finish, get your hands on a sanding sponge with a grit range from 120 to 220. Trust me, a smooth wall can make or break the final look of your project!
Safety is key too, so don’t forget a dust mask when you’re cutting and sanding to protect your lungs.
So, why does this matter? Having these tools will set you up for success on various drywall projects. You won’t believe how much easier the job gets when you’re geared up with the right stuff.
In summary, don’t underestimate the importance of these basic tools in your DIY arsenal. What’s your next project going to be?
Key Takeaways
- A utility knife is essential for making clean cuts in drywall, ensuring precision and maintaining the strength of the edges.
- Joint knives in 6-inch and 12-inch sizes are necessary for applying and feathering joint compound efficiently.
- A drywall saw is crucial for intricate cuts and maneuvering in tight spaces, enhancing project efficiency.
- Sanding sponges and pads help achieve smooth finishes and control dust during sanding, maintaining a clean workspace.
- A dust mask protects against harmful drywall dust, promoting safety during cutting and sanding processes.
Essential Drywall Tools for Every DIY Project

Starting a DIY drywall project can be a bit daunting, especially if you don’t have the right tools on hand. Have you ever tried working on a project and realized you’re missing something crucial? It can really slow you down. Let’s talk about some essential drywall tools you’ll need for a successful job.
First off, grab a 6-inch joint knife. This tool is key for applying joint compound smoothly over seams. You’ll want that clean finish to make your work look professional. Next, you can’t go wrong with a utility knife. It’s perfect for scoring drywall sheets and making precise cuts, ensuring everything fits just right during your installation.
After you’ve applied the joint compound, you’ll need to smooth out any rough spots. This is where a sanding sponge with a fine grit of 120–220 comes in handy. Just remember to take your time here; it makes a huge difference in the final look of your walls. And don’t forget to wear a dust mask while cutting and sanding! It’ll protect your lungs and keep your workspace a lot cleaner.
Additionally, having safe and stable access to higher drywall areas is important, which you can achieve by using reliable drywall scaffolding designed to support your work safely.
So, why does this matter? Having the right tools at your fingertips can make your DIY experience much smoother and more enjoyable. You’ll find you spend less time fixing mistakes and more time admiring your work.
In short, make sure you’ve got a joint knife, utility knife, a sanding sponge, and a dust mask as part of your toolkit. What other projects are you planning to tackle next?
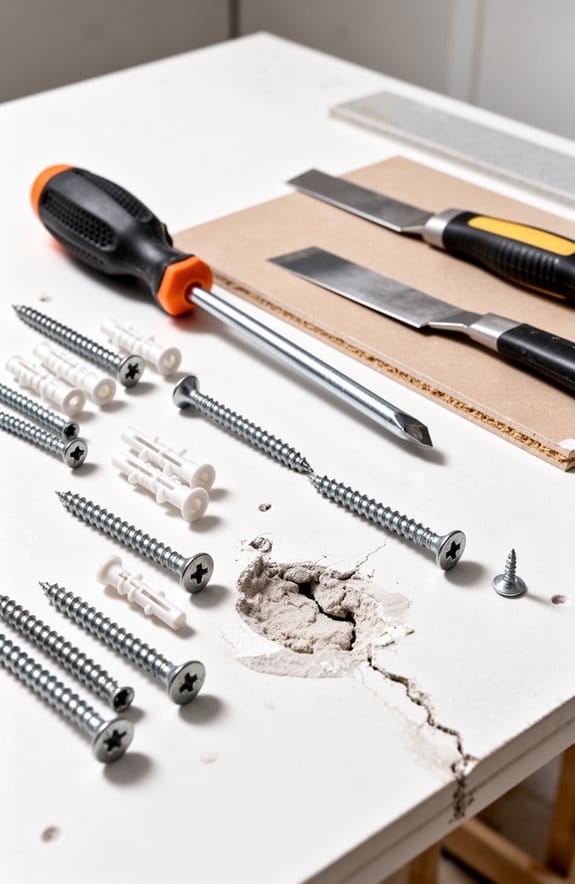
Common Drywall Issues and How to Address Them
Ever tried a DIY drywall project and felt overwhelmed by all the little hassles? It’s pretty common to run into some annoying issues like small nail holes or those pesky anchor tear-outs. Don’t stress too much; you can easily fix them with some spackle and a 4-inch putty knife.
For even minor dents and dings, a lightweight joint compound does wonders. After applying it, just sand it down for a smooth finish. And what about those hairline cracks? They usually happen because of settling, but don’t worry; just apply a thin layer of joint compound and feather the edges to blend everything in.
Have you ever dealt with screw pops? They’re more common than you’d think. To fix them, simply re-tap the screw into the stud and cover it with more joint compound. For holes under 6 inches, a drywall patch kit with a mesh patch is pretty straightforward and effective.
Many kits also come with included tools like scrapers and sandpaper, making the application process easier for DIYers.
The best part is, with these tools in your arsenal, keeping your drywall looking great isn’t that hard.
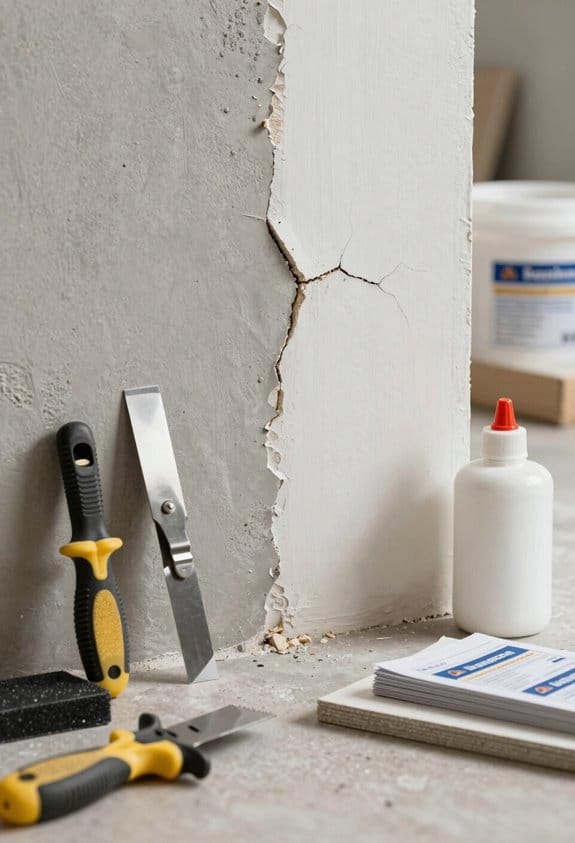
Tips for Selecting the Right Patch Kit

Have you ever found yourself staring at a hole in your drywall, wondering what to do next? Choosing the right patch kit can truly make a difference in tackling those repair projects. You want a kit that comes with a mesh patch, joint compound, and a putty knife. This trio works wonders for fixing holes under six inches.
For small repairs, lightweight spackle is your best friend. It’s easy to apply and dries quickly. But if you’re dealing with something a bit larger, joint compound will give you a smoother finish.
Now, here’s something to keep in mind: make sure the patch kit matches your drywall type. If you live in an older home, the materials can vary, and you don’t want to end up with something that doesn’t stick well.
Reading reviews is another great way to find kits that are known for their durability and user-friendliness. And let’s be honest, who doesn’t want a hassle-free repair?
Before diving in, always check the manufacturer’s instructions. Following the guidelines on application and drying times can help you achieve better results, making those repair marks less visible. Also, consider kits that include self-adhesive patches for easier and cleaner application.
Why Is a Utility Knife Critical for Success?
Have you ever tried to cut drywall without the right tool? It can be a frustrating experience, especially if you don’t have a sharp utility knife on hand. A utility knife is a must-have for any drywall project. It helps you make clean, accurate cuts that are crucial for a solid installation.
When you’re working with drywall, you’re looking for precision. A sharp blade prevents tearing the paper on the edges, which can weaken them. This is really important for keeping everything sturdy in the long run. Plus, a lightweight utility knife is easy to handle, whether you’re making big cuts or trying to fit things into tight corners.
But the benefits don’t stop with drywall. You’ll find a utility knife handy for all sorts of DIY projects around the house. From opening boxes to trimming materials, it’s a versatile tool that should have a permanent spot in your toolkit.
Here’s the trick: always keep a few extra blades handy. Dull blades can turn a simple job into a headache. So, make sure you’re swapping them out regularly for the best results.
Ultimately, knowing how to effectively use a utility knife not only saves time but also boosts your overall efficiency. Many professional drywall knife sets also feature ergonomic handle designs that reduce hand fatigue and improve grip, which can be beneficial during extended projects.
So next time you’re gearing up for a project, don’t forget to grab that knife! What’s your favorite tool for DIY projects?
The Role of Joint Knives in Achieving a Great Finish
Have you ever struggled to get that perfect finish on your drywall? You might not think much of joint knives, but they’re a key player in achieving that smooth look you want.
A 6-inch joint knife is great for tackling smaller areas where precision counts. If you’re working on larger seams, you can’t underestimate the importance of a 12-inch knife—it really helps with feathering. This feathering technique is like magic for reducing seam visibility and giving your walls that professional touch. You’ll appreciate how a flexible stainless steel blade glides on the compound, leaving behind a sleek finish without any streaks.
Here’s the trick: these knives aren’t just for mud application. They also shine when it comes to shaping compound around corners. So, the next time you’re getting ready to patch up those walls, remember that the right joint knife makes all the difference.
Selecting tools with an ergonomic handle design can significantly reduce hand fatigue, allowing you to work longer with greater precision.
After you’re done, don’t forget to clean your joint knives! A quick rinse will prevent dried mud from building up. Trust me, keeping your tools in top shape means you’ll get the best results in your future projects.
How Does a Drywall Saw Help Make Precision Cuts?
How can you make precision cuts when working with drywall? If you’re tackling a DIY project that requires cutting out spaces for outlets or fixtures, a drywall saw is your best friend. These tools are usually around 6 to 8 inches long and come with a sharp, pointed tip that easily pierces through the drywall surface. This design gives you great control over your cuts.
The serrated edge of the drywall saw smoothly slices through gypsum board. This is key because it helps you get clean edges and reduces the chances of tearing – trust me, no one wants ragged edges on their new drywall. For those times when you need to make intricate cuts or maneuver in tight corners, the flexibility of a drywall saw really shines.
Ever tried using a utility knife for larger cutouts? It’s definitely more effort. With a drywall saw, you’re saving time and muscle while speeding up the process. It’s about efficiency, letting you get through your projects faster and with more confidence. Many drywall saws also feature triple ground teeth that enable faster and smoother cutting, which further improves precision and ease of use.
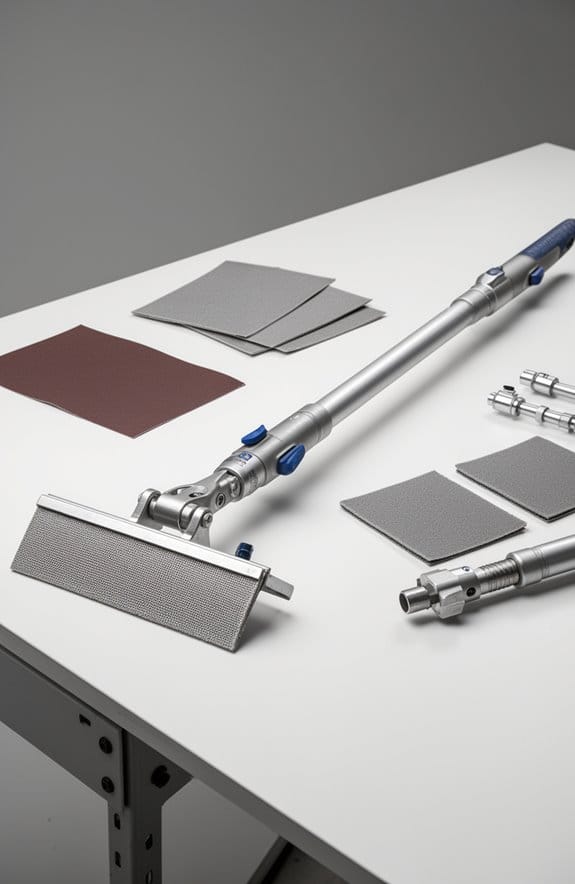
Achieve Smooth Finishes With a Sanding Sponge
Are you tired of rough finishes on your drywall? If you’re aiming for that smooth, polished look, using a sanding sponge can really help. These sponges are made from flexible foam, which means they’ll fit into those tricky contours and corners without any hassle.
When it comes to drywall seams, try to grab a sanding sponge with a grit between 120 and 220. This range is perfect for smoothing things out without taking away too much of your joint compound. While sanding, it’s best to use a circular or back-and-forth motion. This will help you avoid flat spots and blend the compound seamlessly with the surrounding drywall.
One of the best parts is that sanding sponges are reusable and easy to clean. That makes them a more budget-friendly option compared to traditional sandpaper. And don’t forget about dust control! A dust mask is a must when you’re sanding. Keeping your space—and yourself—clean is definitely worth it.
For even better results, consider hook-and-loop backing sanding pads, which simplify pad changes and improve dust collection.
Frequently Asked Questions
What Tools Do Drywallers Need?
For drywalling, we need a drywall knife, drywall screws, and a drywall lift for easier handling. In addition, mastering drywall taping techniques guarantees smooth seams and a professional finish on our projects.
What Tools Are Essential for DIY Home Projects?
For our DIY home projects, we need home improvement essentials like a tape measure, utility knife, and sanding sponge. These cost-effective tools will help us master drywall installation tips and conquer any project must-haves with confidence.
What Are Two Common Mistakes Made During Drywalling?
Did you know that nearly 70% of DIY drywall projects face issues? We often see common mistakes like overcutting edges and using improper tape, leading to inadequate insulation and insufficient drying for a flawless finish.
How Much Would It Cost to Drywall a $1500 Sq Ft House?
To drywall a 1,500 sq ft house, we’re looking at installation costs ranging from $2,250 to $4,500. Material costs average $600 to $1,050, while labor cost estimates vary from $1.00 to $2.50 per square foot.