Have you ever looked at a wall and thought, “This could use some TLC”? Blending new texture with what’s already there can feel like a daunting task, but it doesn’t have to be.
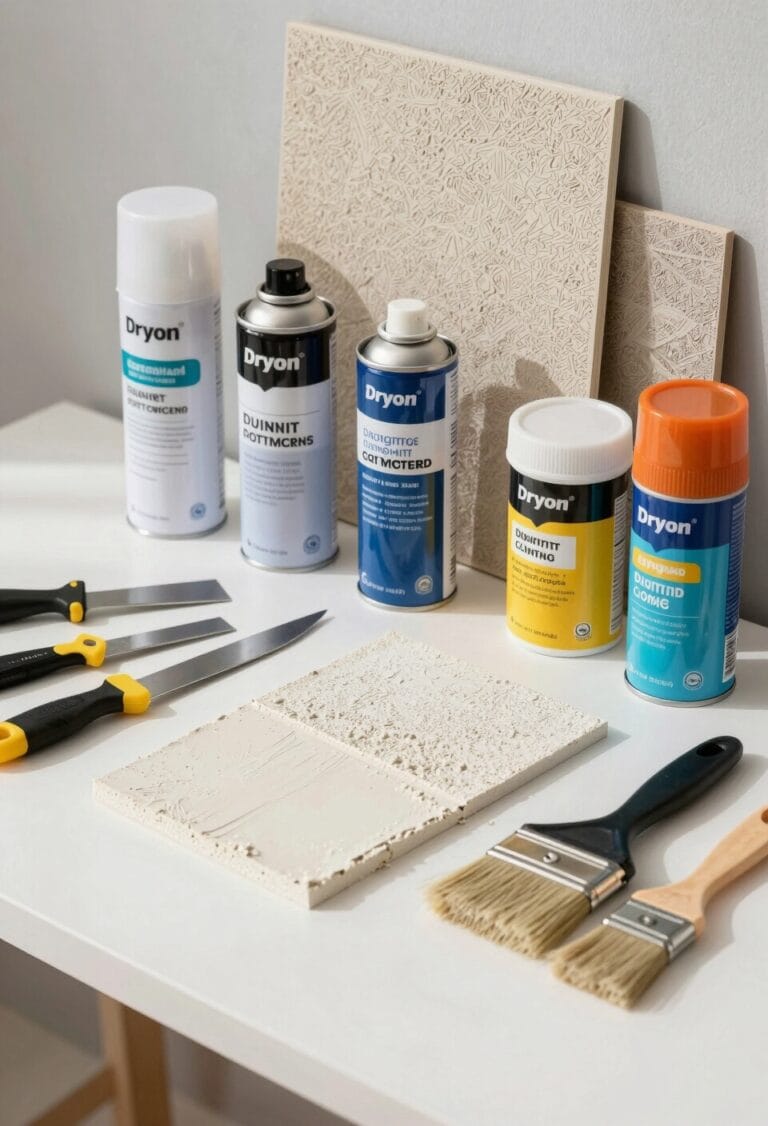
First off, figure out what kind of wall texture you’re dealing with. Is it smooth or does it have that lovely knockdown look? Once you’ve identified the surface, gather your supplies. You’re going to need a texture spray gun and some joint compound. It’s not a huge investment, and they’ll make your job much easier.
Before diving in, take a moment to prep the surface. Sand down any rough edges and don’t skip the painter’s tape; it’ll save you from a whole world of mess.
When you’re ready, use your texture tool to apply the new texture, making sure to overlap it onto the old material. This overlap is key for a seamless transition.
The best part is, you don’t have to hold your breath after applying the texture. Just let it dry completely. Once it’s dried, you can move on to priming and painting for that polished finish.
So, why does this matter? Blending textures not only freshens up your space, but it also shows that you’ve got an eye for detail.
Want to take on that project? It’s definitely worth it!
Key Takeaways
- Identify the existing wall texture type to ensure the new application matches it closely for uniformity.
- Gather essential tools and prepare the surface by cleaning, sanding, and applying painter’s tape for clean edges.
- Use the same texture tool that matches the existing pattern and feather the edges to create a seamless transition.
- Allow each layer of joint compound to dry completely, sanding high spots gently before applying a primer to smooth imperfections.
- Consider practicing on scrap drywall to refine techniques and avoid overworking the compound, ensuring a smoother finish.
Identify Your Wall Texture Type for Easy Blending

How can you figure out your wall texture type so you can blend it perfectly? Start by inspecting the surface under different lighting conditions. This can really help you determine if it’s smooth, orange-peel, knockdown, or swirl. For example, if it’s a knockdown texture, know that it’s applied using a specific technique. You lightly flatten the compound after it’s sprayed, which gives it that nice uniform finish.
Try this: take some clear photos of the texture or even cut a small piece of the drywall for comparison later. That way, when you’re doing repairs, you’ve got a solid reference right in front of you. Pay attention to the thickness and how consistent the pattern looks, too. Honestly, this extra attention to detail makes a big difference in the outcome.
Don’t forget to practice your technique on some scrap drywall before tackling the real wall. It’s worth it to refine your skills a bit before diving in. The best part? You’ll be more confident in your repair work, which can really pay off in the end. For added durability, consider using powder-coated finishes on trim or shelf brackets around textured walls to resist corrosion and maintain a clean look.
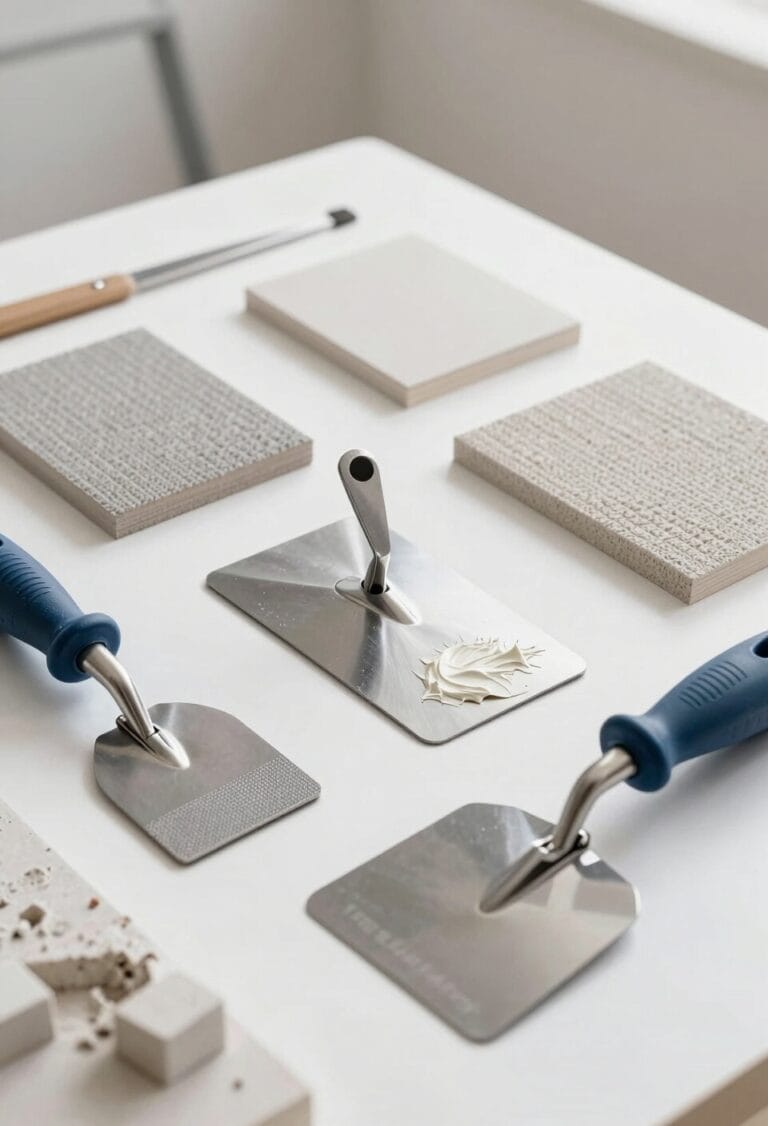
Gather Essential Tools for Your Texture Project
Have you ever looked at a blank wall and thought it just needs something special? When it comes to adding texture, getting the right tools together can make all the difference. So, let’s dive into what you’ll need for your upcoming project.
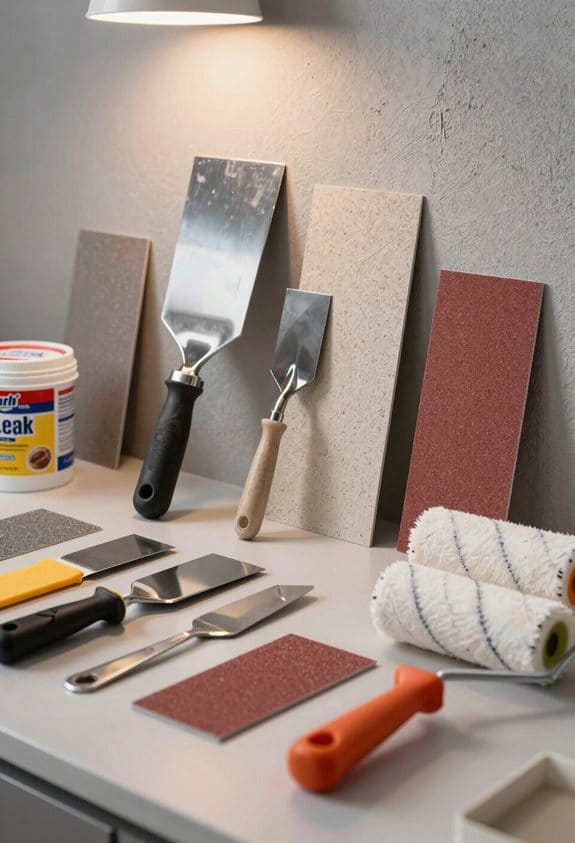
Start with joint compound. This is key for creating texture on your walls. You’ll also need a trowel or a putty knife—these will be your main tools for spreading the compound smoothly. If the wall you’re working on is large, a spray texture gun is a fantastic option for an even, consistent layer. For those of you who want to get a bit more creative, think about picking up a texture brush or roller for detailed designs.
Don’t forget about sandpaper! Choosing a grit between 180-220 will help you smooth out any rough spots and achieve that flawless finish. Now, protecting your space is just as important as the application itself. Plastic drop cloths and painter’s tape will keep your floors and any adjoining areas safe from splatters while helping you to maintain crisp lines.
Finally, grab a clean bucket. This is for mixing your joint compound with water until you reach the perfect consistency for your specific texture. Mixing properly can really set the stage for a successful project. For larger areas, consider using a texture gun hopper with a large tank capacity to minimize refills and increase efficiency.
Get Your Surface Ready for a Flawless Blend
Is your wall texture not blending in with the new repairs you’ve made? It can be frustrating when your efforts don’t quite match up—no worries, though, you’re not alone in this!
To kick things off, it’s all about figuring out what kind of texture you’ve got going on. Do you have a smooth finish, orange-peel texture, or a knockdown effect? Identifying this is crucial before you dive into any repairs. Once you know the texture type, clear out the repair area. You’ll want to remove any loose drywall pieces and give the edges a good sand to ensure everything bonds well.
Now, here’s the trick: grab some painter’s tape and apply it around the repair zone. This helps keep your lines clean and is a simple way to make your work look more professional. When it’s time to apply your joint compound or whatever texture you’re using, make sure to overlap the new material onto what’s already there. Mimicking that pattern can be the difference between a noticeable fix and a seamless one.
After you’ve let the new texture cure, don’t forget to lightly sand it down. A thin coat of primer before painting is also key to getting a consistent finish. Using repair kits with self-adhesive mesh patches can enhance adhesion and help achieve a durable texture match.
Select the Best Method for Applying Wall Texture
Have you ever looked at your walls and thought they just needed a little something extra? If you’re thinking about adding some texture, the right method makes all the difference.
First off, take a good look at your existing wall surface. Is it smooth, or does it have a texture like orange-peel, knockdown, or swirl? This step is key because it helps you decide the approach you’ll take. For matching textures, it’s a great idea to use a texture brush or roller designed for this kind of job. It’s your best bet for keeping that consistent look.
When you’re tackling larger areas, a spray texture gun can really save you time. It’s especially handy if you’re going for that knockdown or orange-peel effect. Just remember to practice on a scrap piece of drywall first—this is where you’ll fine-tune your technique. You want to feel confident before you tackle the real deal, right?
Now, here’s the trick: once you start applying the drywall compound, make sure to feather the edges of the new texture into the old one. This little detail can make a huge difference by ensuring a smooth transition. It can be tough to tell where the repair is once you paint over it. Using the right tools, such as a keyhole saw designed for drywall, can help you prepare the surface optimally before applying new texture.
Apply the New Texture Seamlessly for Natural Results
Ever tried adding a new texture to your walls only to end up with something that looks mismatched? Achieving a seamless blend with what’s already there is key to making it look natural. You want to pick the right texture tools, like brushes or rollers, that vibe well with your wall’s current texture. A little trick? Overlap the new texture onto the old stuff. This can create a more uniform look in terms of pattern and depth.
The consistency of the joint compound matters a lot here. Thicker compounds are great for bolder textures, while thinner mixtures work better for delicate patterns. After you’ve applied it, blending the edges by feathering the compound outwards can really help make those changes less noticeable.
Before diving into primer, it’s a good idea to check for any inconsistencies. Getting this right can determine how the final paint job turns out. So, don’t rush it!
Using adjustable nozzles on knockdown texture sprays can also help you tailor the texture thickness for a perfect blend with existing surfaces.
In the end, this careful approach can lead to a beautiful finish on your textured walls. Doesn’t it feel good to know you can tackle this project with confidence?
Wait for Textures to Dry Completely Before Continuing
Are you ready to tackle texture work but feeling a bit overwhelmed? You’re not alone. One of the cardinal rules in this process is letting each layer of joint compound dry fully before you jump to the next coat. Depending on your space, the drying time can range from 24 to 48 hours, heavily influenced by how humid or warm it is.
Check each layer closely! You want to look out for air bubbles or any bumps that could spoil your final finish. These little imperfections can be tricky, especially in wet areas, and they might end up showing more than you’d like. After the first layer dries, take a moment to lightly sand down any high spots. This will help you spot flaws and set the stage for a smoother application on the upcoming coats.
Here’s a tip: keeping the room well-ventilated can speed up drying times. Just make sure to avoid any direct drafts, as they can cause uneven drying and lead to surface issues. So, why does this matter? It’s all about achieving that flawless texture you want in the end.
Using washable sanding sponges can make sanding easier and help maintain a clean workspace during the drying process.
In short, be patient! Let those layers dry completely and don’t skip the prep work. It’ll make a world of difference. What’s your best tip for ensuring a smooth finish in DIY projects?
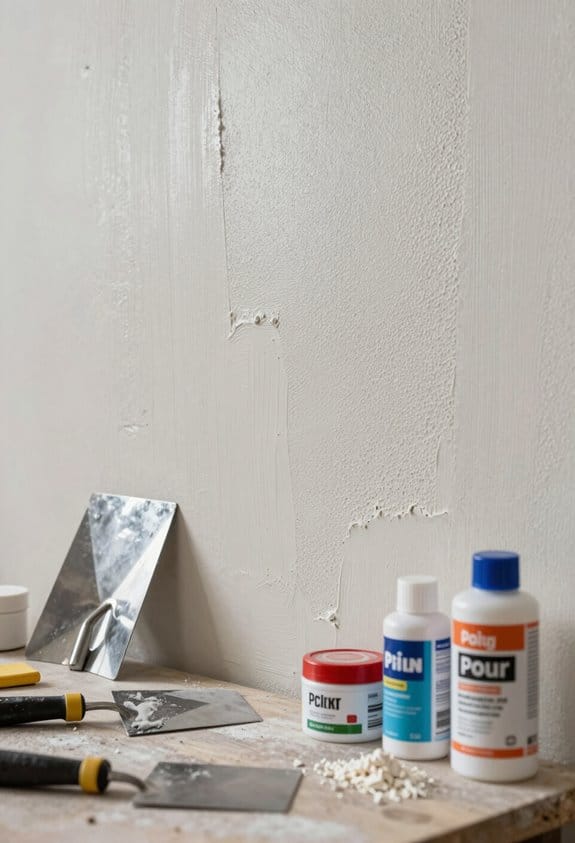
Finish and Prime the Blended Area for Painting
You ever find yourself staring at a patched wall, wondering how to make that ugly repair blend in seamlessly? It can feel overwhelming, but don’t worry, I’ve got some straightforward advice for you.
First off, you want to feather the edges of that joint compound around the repair. This is where you smooth it out to create a gentle transition between the old and new textures. Once you’ve done that, let it dry completely. I can’t stress this enough—if you skip this step, you might end up with a bumpy finish later. After it’s dry, grab a drywall sander and give the area a light sanding until everything feels nice and even. It’s a small but crucial step for a uniform look.
Next up, you’ll want to apply a thin coat of high-quality water-based primer. Use a paint roller or brush for this. Not only does it protect your work, but it also ensures that the topcoat of paint sticks well. So, why does this matter? A good primer makes all the difference in achieving a smooth finish.
Honestly, take a moment to inspect the surface for any imperfections. Sometimes, you might notice spots that need a little more joint compound. If that’s the case, don’t hesitate to patch those areas before moving on to the final paint.
For best results, consider using a primer with stain-blocking technology to prevent any underlying marks from showing through the paint.
Recommended Products


Smooth Primer

Perfect Primer asbestos sealer is an encapsulant and primer in one. It is specified for use over any surface or mastic. Perfect Primer encapsulates the mastic, and primes the floor to bond with your choice of new flooring materials such as: epoxy, tile, self-leveling cements, latex paint, glue down wood, sheet vinyl, etc.
Tips for Achieving a Professional Finish on Your Project
Achieving a professional finish on your project can feel daunting, but with some key tips, you can get there. First things first, have you ever tried practicing texture application on scrap drywall? It really helps to refine your skills. Remember to use the same type of joint compound and application method as you’ll use on the actual project.
When you start applying the new texture, aim for thin, even layers. Let each layer dry completely before adding the next. Another thing to consider is feathering the edges of your repair. This creates a smooth transition between surfaces, which is crucial for that polished look.
After texturing, it’s a good idea to lightly smooth the area with a hand sander before moving on to priming. Choose a primer that matches your original wall paint type. This really boosts adhesion and ensures a flawless surface for your finishing touches.
Additionally, using the appropriate drywall corner tape can significantly improve the durability and finish quality of repaired corners in your project.
Common Mistakes and Troubleshooting in Texture Blending
When you’re tackling the task of blending new texture with your existing surfaces, it can feel a bit overwhelming. Have you ever ended up with a finish that just doesn’t look quite right? That’s often because of a few common pitfalls.
First off, it’s super important to match the thickness and pattern of what you already have. If you don’t, it’ll definitely show. You might be tempted to really work that joint compound, but trust me, overworking it can lead to a patchy look. The best approach is to apply thin layers and let them do their thing. Letting each coat dry completely is key to avoiding air bubbles and cracks—nobody wants that mess!
When it comes to tools, reach for a spray gun or a roller instead of a brush. Brushes often leave streaks that can ruin your finish. And don’t underestimate the power of primer; skipping this step can seriously mess with how well the paint sticks.
Honestly, if all of this sounds like too much, don’t hesitate to consider hiring a pro. Sometimes it’s worth it, especially for those bigger drywall patches that can be tricky.
To achieve the best results, be sure to select the right type of ceiling texture to match your existing surface before applying any repairs.
Frequently Asked Questions
How to Match Existing Drywall Texture?
To match existing drywall texture, we’ll start with a drywall texture comparison. We’ll use texture spray techniques to replicate the pattern, practicing first on scrap material for a seamless finish that blends perfectly.
How to Finish a Drywall Joint Where New Meets Existing?
Did you know that nearly 80% of renovation projects involve drywall work? To finish drywall joints, we should use effective drywall joint techniques, layering joint compound and blending finishes smoothly for a seamless progression between new and existing materials.
Can You Add Texture to an Already Painted Wall?
Yes, we can definitely add texture to an already painted wall. Let’s explore various texture options and application techniques, ensuring a smooth adherence and creating a stunning finish that’ll enhance our walls’ overall appeal.
How to Touch up Textured Drywall?
To touch up textured drywall, we assess the damage, clean the area, apply joint compound with a putty knife, and use a spray technique to replicate texture. Finally, we sand and prime for a seamless finish.