What tools do you really need to explore different texture styles in your artwork? It can feel overwhelming with so many options out there, but I’ve got some straightforward recommendations to help you navigate the world of textured painting.
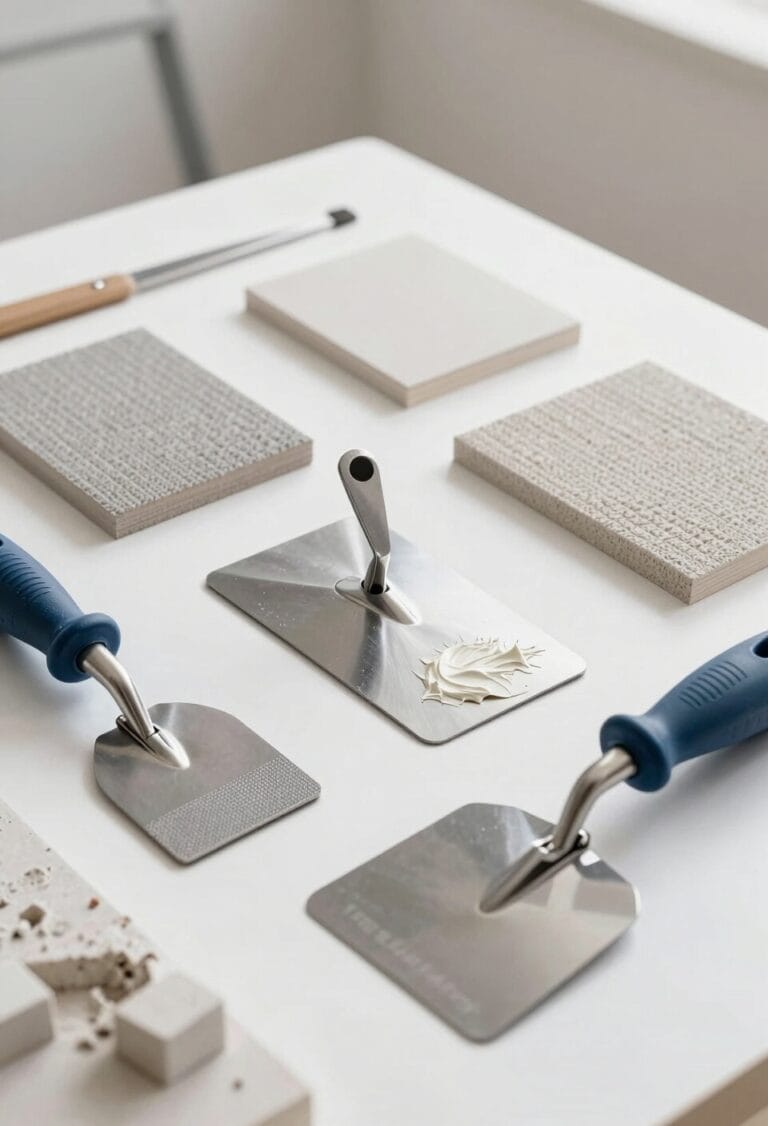
Start with varied palette knives. They come in different sizes, perfect for applying thick or smooth textures. Trust me, playing around with different sizes can lead to some really unique results.
Stiff brushes are also essential; they’re your best friends for creating depth and those cool directional textures that really pull the viewer in. You’ll want a solid surface too—stretched canvases or wooden boards work great as strong bases for your art.
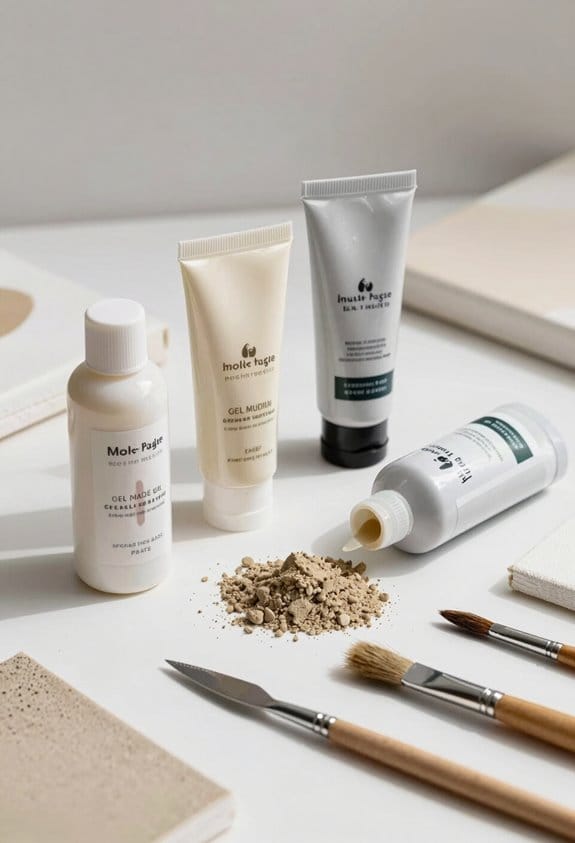
Don’t forget about quality modeling paste or texture mediums. These materials are key to building up layers and adding dimension. For mixing those mediums, flexible silicone spatulas are super handy. They help you blend everything together without much fuss.
Honestly, understanding these tools will take your textured painting to another level.
So, why does this matter? Knowing exactly what you need can save you both time and money in the long run. Once you have the right tools, you can focus on exploring your creativity rather than stressing about what to buy.
If you’re ready to dive into textured painting, start gathering these essentials and get your hands dirty! What’s stopping you from experimenting today?
Key Takeaways
- Use varied palette knives in different sizes for creating bold ridges and delicate details in textured painting styles.
- Stiff brushes are essential for building directional textures that add depth and interest to artwork.
- Golden Hard Modeling Paste is ideal for heavy impasto techniques, while lighter texture pastes allow for finer details in painting.
- Household items like credit cards, combs, and sponges can be repurposed to create unique textures in different styles.
- Finishing tools, such as medium-grit sandpaper and sealers, are crucial for smoothing edges and protecting artwork after texturing.
Essential Tools for Textured Painting
Have you ever stared at a blank canvas and thought, “Where do I even start?” Textured painting can seem daunting, but with the right tools, it doesn’t have to be. First off, a varied set of palette knives is essential. Having different sizes at your fingertips allows you to create everything from bold ridges to delicate details that can make your work pop.
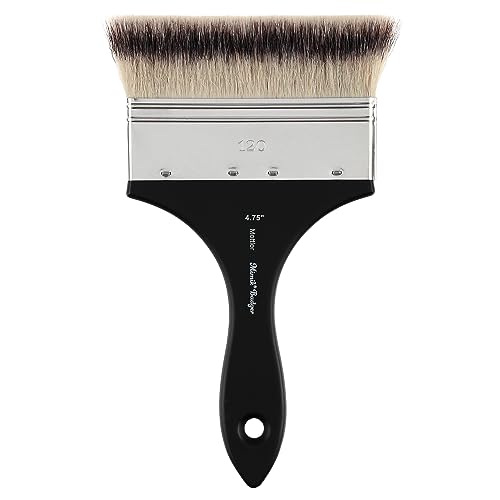
Stiff brushes are another must-have. They’re perfect for building directional textures that add depth to your art. Honestly, nothing compares to the dimensional quality they can bring to a painted surface. And let’s not forget about modeling paste. It’s a fantastic base for developing your techniques without the fear of it being too flat or lifeless.
Now, here’s the trick: always clean your tools right after you use them. This simple habit keeps paint from clumping and ensures your palette knives and brushes stay in top condition for future projects. Think about it—investing in quality tools means you want them to last. For example, products like the Homax 4067 Aerosol Texture provide an easy application method that complements textured painting with aerosol spray textures.
Recommended Products

Versatile Surface Compatibility: These Victorian ceiling tiles are specifically designed to be installed directly over popcorn ceilings, drywall, and most other flat surfaces. This eliminates the need for messy removals or expensive specialized tools, allowing for a clean and efficient renovation.

All 80 original PanPastel colors

How to Choose the Right Canvas or Board for Texture
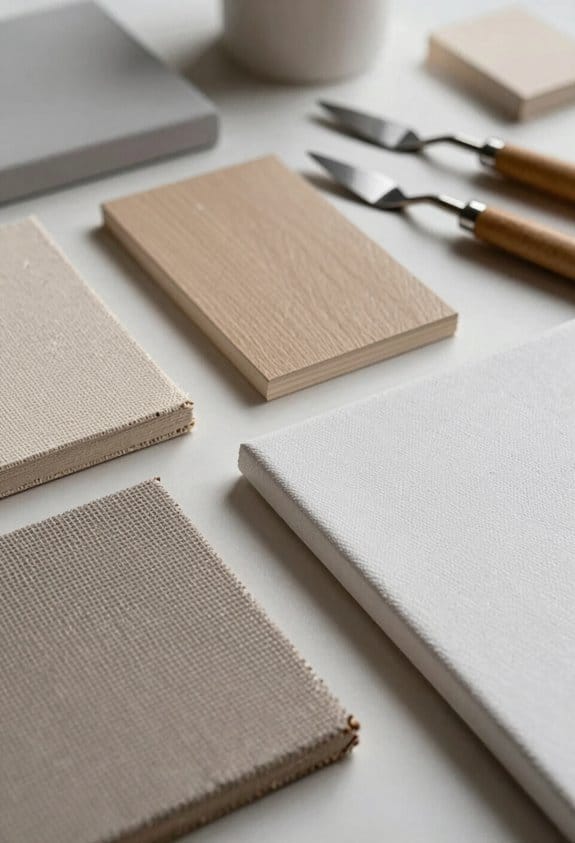
Choosing the right canvas or board for textured painting can genuinely change how your artwork looks and feels. Ever wondered why that choice matters so much? Here’s a tip: if you’re working with thick applications of paint, go for stretched canvases. They keep everything nice and taut, which helps prevent sagging under heavy layers.
When you’re diving into heavier textures, wooden art boards are a solid option. They provide the kind of sturdy surface that can take on all your layering without warping. If you’re just starting out, pre-framed canvases can save you some time and hassle, too. They come ready to hang, which means less work before you get to the fun parts of painting. You can even check out thrift shops for framed prints—this is a great way to find unique boards without spending a fortune.
Don’t forget about the texture of the canvas itself! Going with medium or coarse textures can really spice up your artwork, especially when you’re working with different materials. So, what texture feels right for the vibe you want to create?
In the end, the right canvas or board can make all the difference in your textured painting journey. Have you thought about what materials you want to explore next? For home projects involving textured repairs or fillings on different surfaces, using tools like putty knives can significantly improve your work’s precision and finish.
The Best Texture Mediums for Various Painting Styles
Have you ever struggled to bring your artwork to life with texture? It’s such a simple thing, yet it can make a huge difference in the final look of your painting. Texture mediums can really help add that dimension and interest you might be after.
For those who love heavy impasto techniques, give Golden Hard Modeling Paste a shot. It dries hard with an opaque finish, making it ideal for acrylics and mixed media projects. Joint compound is another choice that won’t break the bank and works great on larger surfaces like walls.
When you want to add finer details, texture pastes can help. They’re lighter and offer more flexibility than heavier mediums. And if you’re feeling crafty, try mixing glue with baking soda to make a DIY texture paste. It’s surprisingly effective!
Don’t overlook specialty texture mediums either, like foam or silicone-based pastes; these can really elevate your artwork. Using a palette knife can be key to achieving unique textures and finishes that reflect your personal style.
So, why does this matter? Adding texture not only makes your piece visually interesting but can also convey feelings and depth in your artwork. Selecting the right medium with durable material composition ensures your textured effects last and maintain their quality over time.
Recommended Products

Durable Molding Paste: Made with extra heavy acrylic molding paste for strong, durable results.

Hard Molding Paste is an off-white, semi-opaque medium for building hard texture

100% polymer emulsion that dries more slowly than other modeling pastes to a hard yet flexible surface
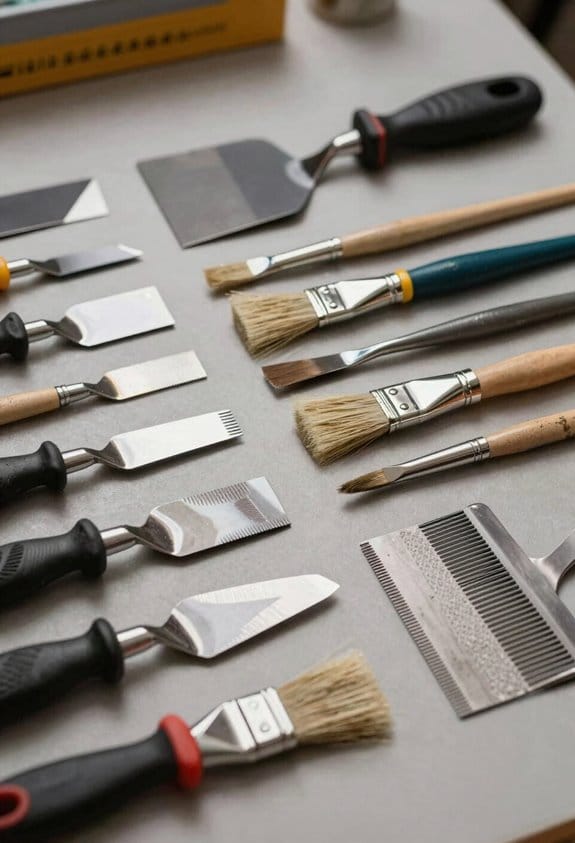
The Role of Palette Knives in Creating Texture
Have you ever struggled to add that perfect texture to your paintings? Palette knives can be real lifesavers in this department. They’re not just for mixing paint; they’re fantastic for creating all sorts of interesting surfaces. You’ll find them in different sizes and shapes, which makes it easy to switch things up based on what you’re working on.
When you’re trying to spread thick paint or texture mediums, the flat edges on these knives come in handy. They glide over the canvas, giving you a smooth finish without any hassle. For finer details, just grab a knife with a pointed tip; it’s like holding a brush but with a different flair. Try using notched edge palette knives too. They can produce some unique patterns that add depth and complexity to your work, which is something you definitely want in your art.
One of the best parts is how flexible these metal knives are. You can scrape off paint or layer it up without worrying about ruining your canvas. Plus, they’re great for mixed media projects, adding that extra touch you might be looking for.
Cleaning your palette knife right after you’re done is important. Trust me; it keeps their shape and makes sure you can recreate those awesome textures in your next piece. Moisture resistance is also key in maintaining tools and materials, much like how moisture resistant drywall extends the durability of wall surfaces in high-humidity areas. So, what’s stopping you from giving palette knives a try? They could be just what you need to elevate your painting game!
Recommended Products

Oil Paintings Size: 60x40 inch(150x100cm). Please pay attention to the size when placing an order.

WORKS ON ALL YOUR FAVORITE SURFACES - This acrylic paint set works on watercolor paper, wood, canvas, and more ideal for greeting cards, art journals, collages, and gifts.

Paintings Size: 60x30 inch(150x75cm). Please pay attention to the size when placing an order.
Using Brushes to Enhance Texture in Your Paintings
Have you ever looked at a painting and thought, “How do they get those amazing textures?” Well, playing around with brushes can seriously boost the texture in your art. Give Creative Mark FX Special Effects Paint Brushes a shot; they’re specifically made to kick up the physicality in both oil and acrylic paintings.
Let’s talk about brush types for a minute. Using stiff brushes can help you create directional textures and those cool fibrous details that really bring a piece to life. Specialty brushes can add depth and unique effects that you might not have considered before. By switching up your brush shapes and sizes, you’re basically controlling the texture of your artwork. You can go from broad, sweeping strokes to those tiny, intricate details pretty easily.
Do you want to soften those sharp edges in dark paints? Here’s a trick: use your brushes ever-so-gently on those areas to create some nice contrasts. It’s all about finding that balance. If you want to add more texture variation, try this: dip your brushes in modeling paste before loading them with paint. It can lead to some seriously intriguing layered effects that will take your artwork up a notch.
Texture doesn’t just happen—it takes experimentation and practice. Also, just like selecting the right trowel size enhances control in masonry, choosing the appropriate brush size and stiffness can significantly improve texture application by providing better control and minimizing material waste, making it a key consideration for artists exploring brush size selection. So, what will you try in your next painting? It might just lead to some incredible discoveries!
Recommended Products

🎨 BRUSH SET IN WOODEN BOX: A curated set of six filbert brushes housed in an elegant wooden case — perfect for artists who appreciate craftsmanship and organization.

Pro White Brushes: Crafted from remarkably fine soft white filament hair, these brushes for acrylic painting offer excellent brush response and hold a lot of color, providing artists with lots of control over their work
Features: Designed to mimic Natural badger hair, very strong, crimped, and tapered synthetic filaments, more break and tear-resistant than Natural badger hair, animal-friendly, cruelty-free brush, hairs are tight at the ferrule and have soft bushy ends, and the brush body stays open when wet and holds Paint well
Why Mixing Bowls and Spatulas Are Essential for Your Textured Art
When you’re diving into textured art, the right tools can really elevate your work. Mixing bowls play a crucial role in blending texture mediums and paints to create an even consistency before you get started. Plus, using flexible silicone spatulas makes mixing and scraping easy, which helps to cut down on waste. And let’s be honest, who wants to waste supplies when creating a masterpiece?
Keeping dedicated mixing bowls for your art supplies is another smart move. It helps keep your workspace tidy, which can make the whole creative process a lot smoother. When you’re knee-deep in your project, a clutter-free area can really help you focus. Think about it—what’s more frustrating than digging through a mess for that one tool or color?
Size matters, too. Choose your bowls wisely, opting for sizes like 1-quart or 2-quart depending on how much mixture you’ll need. This way, you won’t end up scrambling to mix more paint halfway through. The best part is that mixing bowls are easy to clean and reusable. This supports sustainable art practices by keeping single-use items out of the equation.
For those who handle drywall mud as a texture medium, selecting tools with ergonomic design features can greatly improve comfort and efficiency while working.
Household Items for Unique Textures in Painting
Ever stared at a blank canvas and thought, “How can I make this more interesting?” If you’re looking to spice up your painting game, household items can be your best friends. It’s amazing what you can create by experimenting with things you already have lying around.
For starters, grab a credit card. It might seem odd, but scraping it across the canvas can give you sharp lines that add a slick, modern vibe. Feeling adventurous? Use a comb. Just drag it through wet paint to see those unique patterns come to life. Bubble wrap is another fun option; when you press it into paint, you get these organic, random textures that just bring your piece to the next level.
Don’t forget about those stiff bristle brushes you have in your cleaning supplies. They’re perfect for making directional textures and adding fibrous details to your work. In the kitchen, a good spatula (aim for at least 3 inches wide) can be a game-changer for spreading your medium evenly and introducing varied texture effects.
Looking for softer touches? Old rags or sponges are your friends here. Dabbing paint with them can create lovely textures or help you blend colors beautifully. Honestly, who knew your home could be filled with so many artistic tools? For added functionality, consider tools with hook-and-loop backing that make changing textures or pads quick and efficient during your project.
Specialized Tools for Advanced Texture Techniques
Looking to add some serious texture to your paintings? Texturing can really take your artwork to a whole new level, but it’s not always easy to know where to start. You might be wondering which tools to use for those bold ridges or delicate details.
Palette knives and scrapers come in all shapes and sizes, and they’re perfect for creating different effects. Depending on the edge profile you choose, you can achieve anything from dramatic peaks to tiny, intricate features. And let’s not forget about specialized brushes, like the Creative Mark FX brushes. They’re amazing for achieving unique textures and softening edges in oil and acrylic paints.
Have you tried flexible silicone wedges or resin spreaders? These tools are lifesavers when it comes to smoothing out surfaces after applying joint compound. They help you get a refined finish that can make a huge difference in your overall look. Natural and synthetic sponges are also fantastic for simulating organic textures, giving you control over how much detail you want to apply.
And don’t overlook putty spreaders! They’re perfect for achieving clean lines and well-defined textures. With these tools in your kit, you can easily incorporate advanced techniques into your projects. Additionally, using materials like self-adhesive mesh tapes can provide a durable and textured base when working with joint compound, enhancing your surface preparation and repair capabilities.
How to Finish and Protect Your Textured Artwork?
How to Finish and Protect Your Textured Artwork?
Do you ever worry about your textured artwork losing its charm over time? It’s a common concern for artists who pour their hearts into their creations. Fortunately, there are a few straightforward steps you can take to ensure your artwork remains as stunning as the day it was completed.
First off, grab some medium-grit sandpaper. It’s perfect for smoothing out rough edges without sacrificing that beautiful texture you’ve worked so hard to create. Just be gentle while you sand; we want to enhance the artwork, not damage it.
Next, you’ll want to apply a sealer, and you’ve got options! Whether you prefer a matte or gloss finish, this step is crucial. A good sealer protects your piece from dust, moisture, and fading. Plus, it can give your artwork the perfect finish that complements your style. Remember, it’s important to choose a sealer that works well with the paint and texture medium you’ve used. This way, you can be sure it’ll stick and look great for years to come.
Keep in mind that using a low odor formula for finishing can enhance your working environment and make the process more pleasant.
Here’s the trick: don’t skip the drying time. It might be tempting to display your work right away, but allowing it ample drying time will make a huge difference in the long run. And when you do display your pieces, try to keep them in a space away from direct sunlight and areas with high humidity—this will help keep them looking fresh.
Troubleshooting Common Problems in Texture Application?
Have you ever struggled with applying texture in your artwork? It can be incredibly frustrating when things don’t go as planned. The last thing you want is for your hard work to look off because of a little hiccup.
First off, check the consistency of your medium. If it’s too thick, good luck getting it to lay down evenly. On the other hand, if it’s too thin, you might find it running all over the place. So, what’s the sweet spot? Finding that perfect consistency is key.
Timing is another big factor. You don’t want to rush in with your tools too early or too late, as that can lead to unwanted smears or those stiff peaks you don’t want. Cleaning your tools right after you finish is also super important. It might seem like a drag, but it prevents clumping that could mess up your future applications.
Here’s a tip: always test a small area before diving in. This step can really spotlight any issues before they get out of hand. And let’s not forget about pressure. It might seem minor, but adjusting how hard you press can make a world of difference. Play around with light and heavy contact to find what gives your art the depth you’re looking for.
Using a 9-inch drywall texture roller can also improve the efficiency and consistency of your texture application.
Frequently Asked Questions
What Tools Do I Need for Textured Art?
For textured art, we need palette knives, specialty brushes, modeling pastes, and everyday items like credit cards. These tools allow us to explore various textured techniques, creating both bold and intricate surfaces in our artwork.
What Tools Are Used to Create Textures?
To create textures, we use palette knives, specialty brushes, sponges, modeling paste, and everyday items like combs or bubble wrap. These tools help us explore various texture techniques, making our art more dynamic and engaging.
What Are the 4 Types of Texture?
In our texture exploration, we’ll encounter Skip Trowel, Swirl, Slap Brush, and Stomp Brush textures. Each style paints its own story on walls, bringing unique character and charm to our living spaces.
What Are Texture Tools?
Texture tools are essential for our creative process. From palette knives to specialty brushes, each aids in exploring texture techniques, allowing us to build depth and dimension in our artwork with ease and precision.