Are you gearing up for a renovation and dreading the thought of drywall dust taking over your home? Trust me, it’s a real hassle! But don’t worry—there are some effective steps you can take to keep that pesky dust under control.
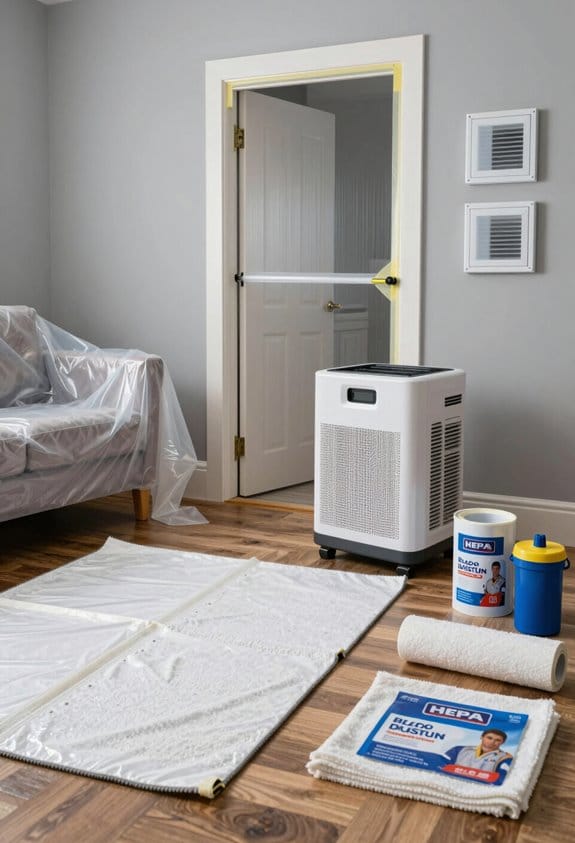
First, sealing off the work area is crucial. You can easily do this with plastic sheeting to create a barrier. This keeps most of the dust from spreading to the rest of your home.
Then, consider covering your furniture and floors with heavy drop cloths. It’s a bit of extra work, but it’ll save you a lot of cleaning later on.
One commonly overlooked tip is to turn off your HVAC system and seal any vents. This will help prevent dust from circulating throughout your home, which could result in more mess.
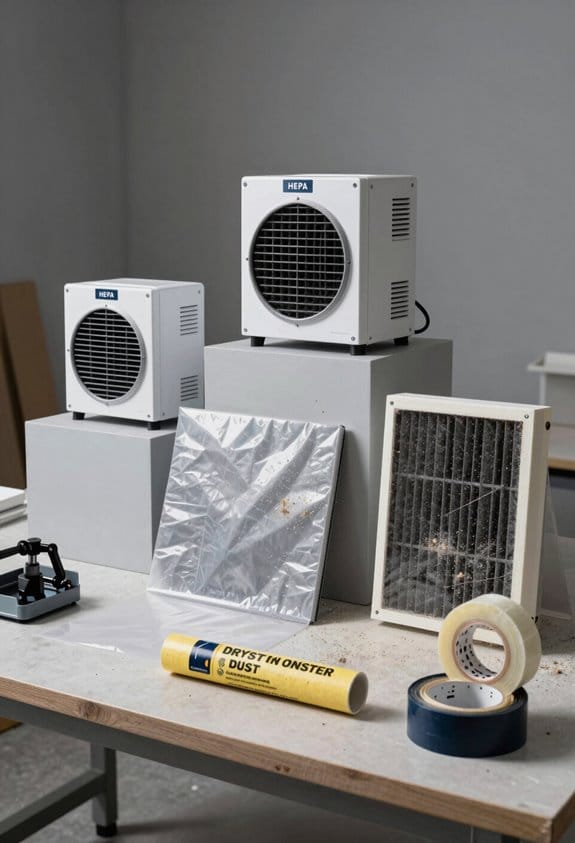
During the actual renovation, it’s wise to use a vacuum with a HEPA filter. These vacuums are great at capturing small dust particles that other vacuums might miss. You’ll be surprised at how much of a difference it makes.
Once your project wraps up, you shouldn’t just kick back and relax. It’s important to wipe down all surfaces and give your floors a thorough vacuuming. This final clean-up is key to making sure your living space is dust-free and welcoming again.
So, why does this matter? Keeping your home dust-free isn’t just about aesthetics; it helps you breathe easier and keeps your space healthier.
Remember, a little extra effort in preparation and clean-up goes a long way in protecting your home from that annoying drywall dust. Have you tried any of these tips? Let me know how it goes!
Key Takeaways
- Create barriers with plastic sheeting to contain drywall dust within the work area and protect other spaces in your home.
- Seal off HVAC vents and turn off the system to prevent dust circulation throughout your home during the renovation process.
- Cover furniture and floors with heavy drop cloths or cardboard to protect surfaces from settling dust during drywall work.
- Use box fans in windows to exhaust airborne dust outside while you are cutting or sanding drywall.
- Equip power tools with vacuum attachments or dust bowls to capture debris immediately while working.
How Drywall Dust Affects Your Home
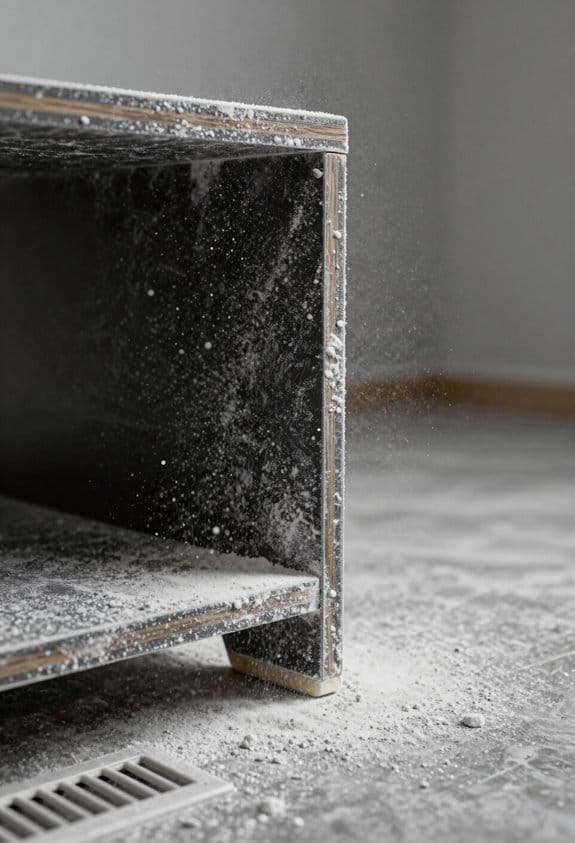
Have you ever started a drywall project only to find your space covered in a fine layer of dust? It’s a pretty common struggle, and that dust can be more than just an eyesore. Made up of gypsum, silica, and mica, drywall dust can irritate your eyes, nose, and throat. If you happen to breathe it in, it might cause respiratory problems. Plus, if you don’t manage it well, that pesky dust can clog your HVAC filters, making your air quality worse and jacking up your energy bills.
So, why does this matter? Dust accumulation can mess with how well paint and primer stick to surfaces, leading to unsightly peeling. Regular cleaning and effective dust management throughout your project is key.
Try this: before you even start your drywall work, think about setting up dust barriers with plastic sheeting to keep your living spaces as clean as possible. Use a vacuum with a HEPA filter to catch that fine dust while you work. Honestly, it can make a huge difference.
Here’s the trick: keep a damp cloth handy to wipe down surfaces. This helps grab the dust instead of just moving it around. And don’t forget to change or clean your HVAC filters often to keep the air from getting too grimy.
The best part is that by managing dust, you’re not just avoiding a messy home but also ensuring clean air and better-looking painted surfaces when you’re done. Investing in a dust collection system helps capture up to 99% of drywall dust particles for a healthier environment.
How to Prepare Your Home and Minimize Dust?
Preparing for a drywall project can feel overwhelming, especially when you start to think about all the dust that could end up everywhere. Ever notice how fine dust seems to find its way into every nook and cranny of your home? If you’re looking to keep your living space clean while tackling renovations, I’ve got some solid tips for you.
Start by creating a barrier around the work area. Hanging plastic sheeting around doorways and openings is key to containing the mess. You don’t want all that drywall debris floating around your home. Don’t forget to seal your vents and shut off the HVAC system to keep dust from circulating through the house.
Next, think about your floors and furniture. Cover them with heavy drop cloths or even cardboard. It’s a simple step that can save you a lot of cleaning later on. Want to really keep dust in check? Set up a few box fans in your windows to push the dust outside. It’s like creating your own little air current that keeps the mess where it belongs.
Also, take a moment to cover air handlers and ductwork with plastic sheets. This is one of those things that can make a big difference because it keeps dust contained where you’re working. Make sure to secure attic vents too—no need for dust to sneak into spaces you weren’t even working in.
Using open mesh sanding screens during drywall sanding helps minimize dust, making cleanup much easier.
Truth is, taking these steps can make your life a lot easier both during and after your project. So, as you get ready to tackle that drywall, think about how a little preparation can go a long way in keeping your home dust-free. What other home projects do you have on the horizon?
Recommended Products

Build a dust barrier in minutes without tape, ladders or damage

Ready to meet any dust barrier challenge

Create a doorway in a plastic dust barrier quickly and easily
Step-by-Step Dust Control Strategies During Renovation
Renovating your home? Let’s talk about dust control. You know how it gets everywhere—your furniture, your floors, and even your lungs if you’re not careful. So how do you tackle this messy situation? Here are some straightforward steps to keep that dust in check during your big project.
First off, try hanging plastic sheeting around the area you’re working on. It’s a simple way to create a barrier that stops dust from spreading throughout your entire home. Next, don’t forget about those HVAC vents; seal them up and turn off the system. This minimizes dust circulation and can save you a whole lot of cleanup later.
You might also consider using box fans in the windows to help exhaust air outside. It helps with reducing the indoor dust levels especially when you’re cutting or sanding. The best part is, it just makes the air feel fresher too! And if you want to be proactive, using a vacuum with a fine particulate bag can really capture that dust right away.
Frankly, keeping your workspace clean can be a challenge, but a quick wipe-down with a wet sponge or damp cloth goes a long way. Regularly cleaning the area helps to contain dust before it has a chance to settle on everything.
For even more effective dust control, consider investing in a portable dust extractor with HEPA filtration for capturing the finest particles during renovation.
Recommended Products
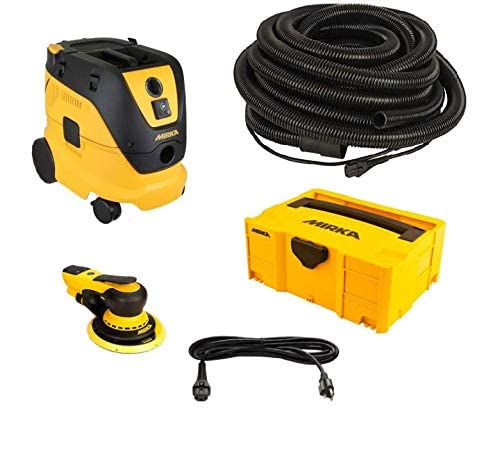
Variable speed control with lever, for an optimal control when working Separate on/off switch, for easy and safe handling

Multiple Filtration - DecDust V1 Air scrubber with 2-in-1 filter system, used with pre-filter, HEPA filter which captures 99.97% of 0.3-micron airborne particles such as smoke, pet dander, wood chips, and debris allergens, etc. Heavy-duty air scrubbers are ideal for use in large commercial spaces to improve air quality.

The Milwaukee 8-gallon dust extractor provides users with an osha-compliant solution for the regulation on reparable crystalline silica dust
Post-Renovation Cleaning Tips
Cleaning up after a renovation can feel like an endless task, right? But when you break it down step by step, it doesn’t have to be overwhelming. Start by grabbing a shop vacuum with a HEPA filter. This is great for sucking up dust before it gets sent flying back into the air.
Once you’ve tackled the big stuff, it’s time to get down and dirty—literally! Wipe down all walls and floors using a damp sponge or a microfiber cloth. It’s best to begin at the top and work your way down—this way, you’re not spreading dust around. Don’t forget those spots where dust loves to hide, like corners, window sills, and ledges. If you encounter any stubborn particles, a soft brush can help dislodge them.
After you’ve collected all that debris, make sure to toss it in heavy-duty garbage bags and seal them tight. You don’t want all that dust escaping back into your clean space. And here’s a crucial step that’s often overlooked: replace the air filters in your HVAC system. This will help maintain better air quality, which is super important after all that dust flying around. Using tools equipped with built-in vacuum systems during sanding can significantly reduce dust spread and ease post-renovation cleaning.
Best Tools for Effective Dust Management
Are you tired of dust creeping into every corner when you’re working on a project? It’s like that annoying relative who overstays their welcome. When you’re installing drywall or sanding surfaces, it can happen so quickly that before you know it, you’re in a cloud of dust. Here are some practical tips to keep your workspace cleaner and make your life a little easier.
First off, grab yourself a shop vacuum with a HEPA filter. That’s really important because these filters capture those tiny, pesky particles that would otherwise float around. When you’re drilling, consider attaching a dust bowl to your tools. It’s a straightforward way to keep that debris from scattering everywhere.
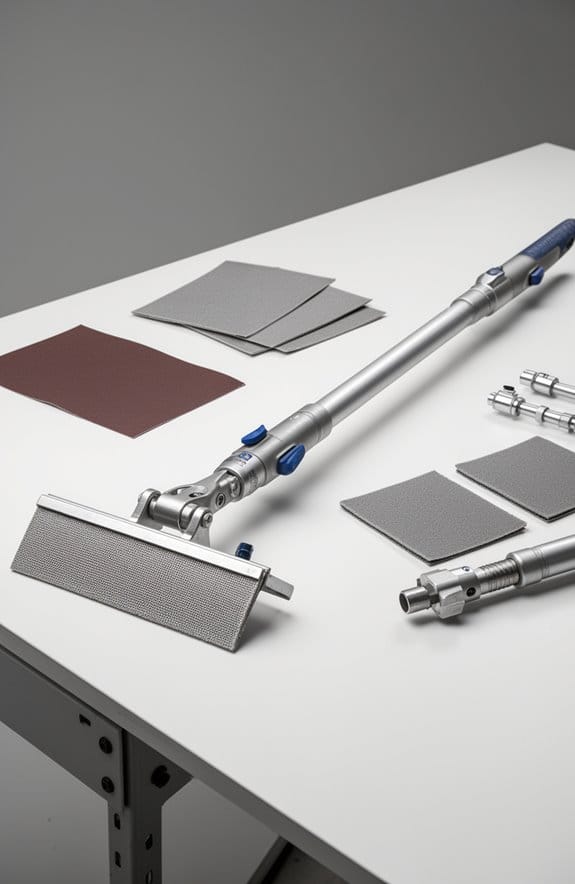
When sanding, don’t skimp on equipment. Dust control sanders with built-in vacuum attachments are worth the investment; they help significantly reduce the airborne dust. You’ll actually notice a difference. The best part is that it saves you a ton of cleanup time later.
After you’ve finished, give the area a once-over with a push broom. It’s simple but effective for gathering any leftover dust that the vacuum or sander may have missed. Another smart trick? Hang lightweight poly or plastic sheeting in your work areas. It not only blocks dust from spreading throughout your space but also makes clean-up a breeze when you’re done.
For extra air quality, think about setting up box fans with HVAC filters. They help push air out and catch larger dust particles floating around. Truth is, cleaner air means a healthier workspace and more enjoyable projects.
Using a drywall sander with a built-in dust collection system can minimize mess significantly and improve air quality during sanding.
In the end, keeping dust at bay doesn’t have to be a chore. These tips can help you maintain a cleaner work environment, so your next project can be a bit more pleasant. How do you manage dust when you’re working on your projects?
Recommended Products

Our largest Dust Collector features a whopping 4029 CFM capacity and can handle any large duct system with a static pressure loss less than 16

10X HIGHER SUCTION POWER than standard dust collectors and the only dust collection system on the market with high enough levels of static pressure (WC) and airflow (CFM) to effectively capture and contain dust from every tool in the shop with a dust port size of 1” to 5”. BEST DUST COLLECTOR – Popular Mechanics 2020 Tool Awards

Frequently Asked Questions
How to Protect a House From Drywall Dust?
To protect our house from drywall dust, we can use dust containment methods, effective cleaning techniques, and home renovation tips. Plus, wearing protective gear options guarantees we stay clean while creating a dust-free environment.
How to Detox From Drywall Dust?
To detox from drywall dust, we should prioritize thorough cleaning using HEPA vacuums and damp cloths. Monitoring health effects and employing effective prevention methods will help guarantee our indoor environment remains safe and dust-free.
How Harmful Is Drywall Dust?
Drywall dust poses significant health risks, including respiratory issues and allergy triggers. Long-term exposure can lead to serious discomfort. We should prioritize safety measures to minimize these dangers and protect our well-being during such projects.
Will an Air Purifier Help With Drywall Dust?
Absolutely, an air purifier’s advanced filtration systems can greatly enhance our indoor air quality. By capturing airborne particles, we’re not only improving our respiratory health but also creating a more comfortable environment during our projects.