Sanding between coats is often the secret ingredient to achieving that smooth, polished finish you’re after. It’s not just about aesthetics; it enhances adhesion, which means your next coat will bond better.
So, how long should you wait to sand? Give it at least 24 hours after the first coat dries. Trust me, rushing this step can lead to regrets later.
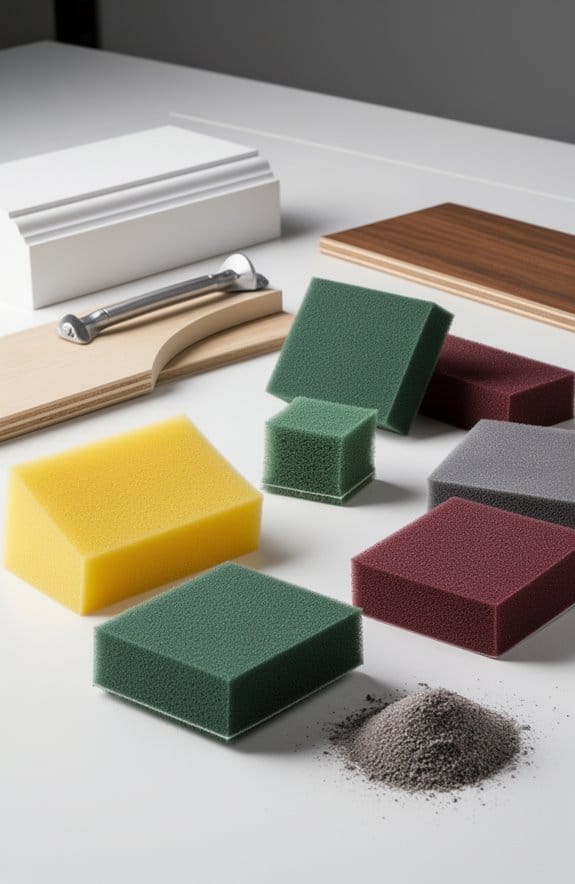
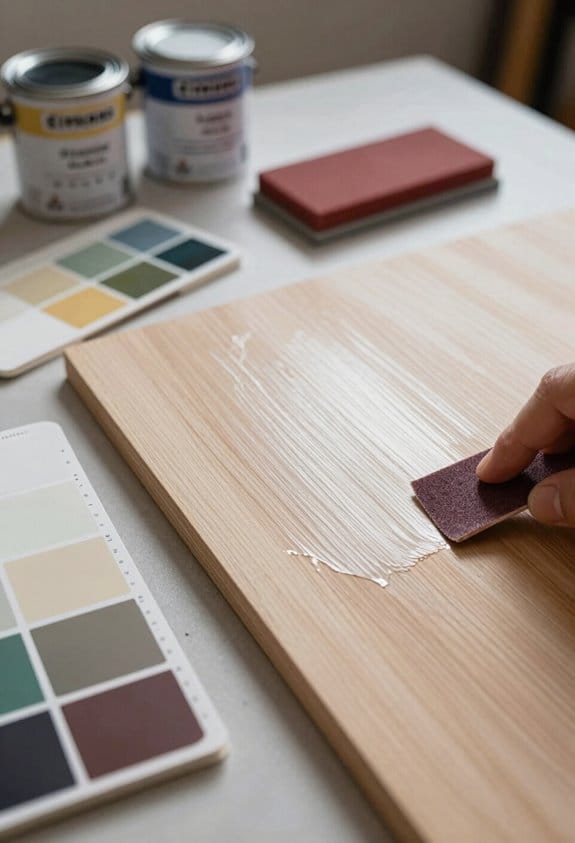
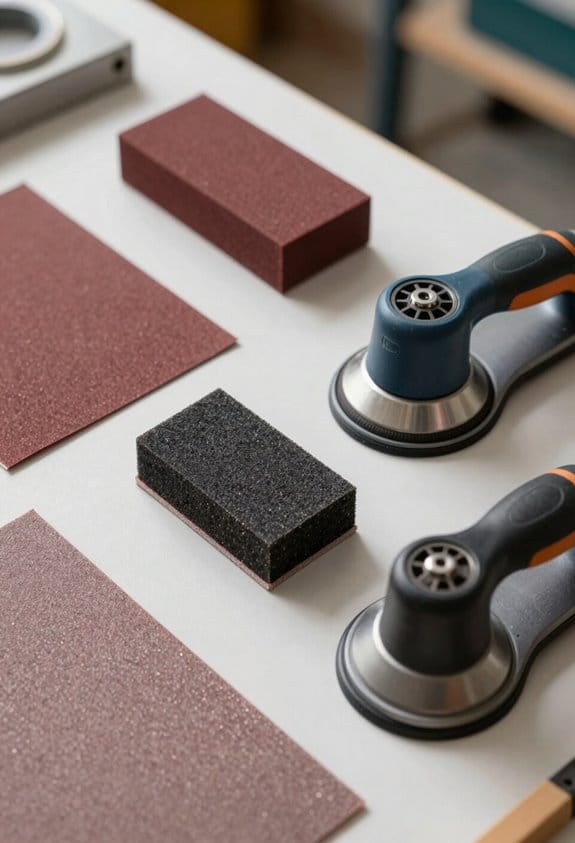
When you do get around to sanding, picking out fine-grit sandpaper—like 320-grit—makes a world of difference. This helps you eliminate any dust or bubbles that might’ve formed during the drying process. And don’t skimp on technique; applying even pressure while sanding is key. Using a sanding block or an electric sander can really set you up for success.
Why is this sanding step so important? It doesn’t just smooth out imperfections; it prepares your surface for a flawless finish. It’s like giving your wall a little tune-up before the big performance.
Honestly, skipping this step could lead to a finish that looks more DIY than professional. The best part is that getting this right now means less chance of disappointment later. You want a beautiful finish that you’re proud to show off.
When you put in that bit of extra effort during the sanding process, it pays off big time in the end.
In summary, taking the time to sand between coats leads to a finish that looks and feels fantastic. So, what will your next project be? Are you ready to give this technique a go?
Key Takeaways
- Sanding between coats creates surface abrasions that enhance adhesion for better bonding of subsequent layers.
- It helps eliminate imperfections like dust and bubbles, resulting in a smoother overall finish.
- Properly timed sanding prevents chipping and peeling, especially important for high-wear surfaces.
- Fine-grit sandpaper improves adhesion of paints and reduces brush strokes on high-gloss finishes.
- Consistent sanding practice reflects a commitment to quality, leading to improved project results.
Why Sanding Between Coats Enhances Adhesion
Sanding between paint coats is a step you shouldn’t skip if you want your paint job to look its best. Why bother with sanding, you ask? It creates tiny surface abrasions that help the next coat stick better. Just grab some fine-grit sandpaper—around 320-grit works great—and give that surface a light scuff. This technique not only ensures better adhesion but also helps eliminate dust and bubbles that can ruin your finish.
Think about high-wear surfaces like furniture or cabinetry. If you want to avoid chipping and peeling, sanding between coats is essential. You don’t want to see your hard work go to waste, do you? A smooth surface can really make a difference, especially when you’re aiming for high gloss or semi-gloss finishes that can highlight any imperfections.
Here’s the trick: follow the manufacturer’s guidelines. They often stress the importance of sanding because it truly leads to a professional-quality finish. So next time you’re painting, remember that little extra effort between coats can make a world of difference in the final look.
For drywall finishing, using tools with an ergonomic design and high-grade materials can help you achieve that flawless surface more efficiently.
Are you ready to take your painting projects to the next level? Trust me, a little sanding goes a long way!
When to Sand Between Coats: Timing and Paint Type Considerations?
Sanding between coats is crucial for that smooth, polished finish we all want, but timing and the type of paint you’re using really matter. So, how long should you wait? It’s best to hold off at least 24 hours after the first coat dries completely before grabbing the sandpaper. This waiting period helps your next layer adhere better, which is always a good thing.
When you’re working with high-gloss or semi-gloss paints, use fine grit sandpaper. It gives the surface tiny abrasions that help the next coat stick. On the flip side, if you’re using flat or eggshell finishes, you might not need to sand unless you spot imperfections—you know, those little annoyances that just scream to be fixed.
Now, let’s talk water-based paints. Why should you sand them? Well, it improves adhesion because the fast drying leaves a slightly rough texture, which helps the next coat grip better. So, it’s worth considering.
And don’t forget about the environment! Humidity and temperature can really mess with your drying times and, by extension, your sanding schedule. Honestly, keeping an eye on these factors can save you a lot of headache later on.
Also, using low-VOC paints can make your sanding process and overall painting experience more environmentally friendly and safer indoors.
In the end, timing your sanding just right is key to a beautiful finish. What tips do you have for making your next paint job a success?
Recommended Products

Motor: 1HP, 110V, single-phase

Premium Epoxy: T-88 is a high-performance structural 2-part epoxy adhesive; Our wood- and marine epoxy is endorsed by leading designers, builders and organizations

9 Amp motor provides up to 3450 RPM
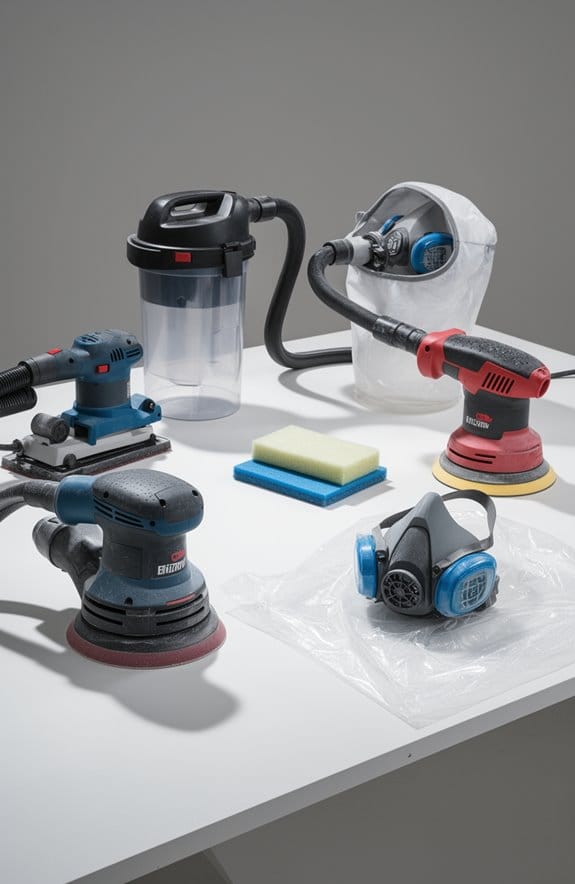
Essential Sanding Tools for a Perfect Finish
Sanding can feel like a daunting task, especially when you’re after that perfect finish. So what’s the secret sauce? It’s all about having the right tools at your disposal. Start with medium grit sandpaper, around 220-320, for the rough stuff. After that, switch to fine grit, 400-600, for those finishing touches.
If you’re trying to get a smooth and even surface, consider using sanding blocks. They do a great job of helping you apply even pressure, which means fewer uneven spots. For larger areas, electric sanders can be a real time-saver. But don’t count out hand sanding, especially when it comes to detailed areas where precision matters.
After you’ve sanded, don’t skip the step of wiping down your work. Use a damp cloth to clear off dust and debris; trust me, this minor detail can make all the difference and keep imperfections at bay. And one more tip: opt for no-clog sandpaper. It keeps you sanding efficiently, reducing those annoying interruptions for dust buildup between coats.
For extensive sanding projects, investing in a drywall sander with a built-in vacuum can significantly reduce cleanup time and improve dust management.
In short, having the right tools and techniques in your sanding arsenal can make a world of difference. So, the next time you’re about to tackle a sanding project, remember these tips. What’s your go-to sanding trick?
Recommended Products

PROFESSIONAL 11 INCH SIZE – 11 inch sanding discs designed for wide surface coverage and steady control during dry sanding and finishing work. Compatible with many orbital disc sander tools and orbital sander pads used in workshops and repair environments. Ideal for countertops, marine parts, and repair tasks using 11 inch orbital sanding discs, orbital sander sandpaper, circular sander pads, circular sander sandpaper, sanding pad systems, and power sanding discs.

DESIGNED WITH EVERYONE IN MIND: From the DIYer to the contractor this is the perfect product to fill the grain and seal the pores of wood before painting to get a smooth finish on oak, ash, mahogany, walnut and other porus woods. A favorite product for cabinet and vanity refinishing, millwork, and furniture refinishing. For that glass smooth finish, start and finish all your wood projects with Aqua Coat.

High-Quality Primer Surfacer: Exceptional filling capabilities and patented 4:1 mix ratio technology
How Sanding Improves Finish Quality
Have you ever wondered why your paint job doesn’t look as smooth as you imagined it would? The secret often lies in a process that seems simple but makes all the difference: sanding. When you sand between coats of paint or finish, it creates tiny scratches on the surface. These abrasions are what help the next layer stick better, leading to a more durable and attractive finish.
Sanding also helps smooth out any bumps or imperfections. Things like dust nibs, bubbles, and streaks can really ruin the overall look. By grabbing some fine-grit sandpaper—aim for around 320 to 400 grit—you can level that surface without causing harm to the coat underneath. This approach ensures that the final coat goes on perfectly, leading to that flawless finish we all want.
Now, let’s talk about durability. Sanding isn’t just for looks; it actually reduces the chances of chipping and wear, which is especially important for things like furniture that see a lot of use. Frankly, it’s a crucial step to ensure your hard work stands up to everyday life.
So, why does this matter? If you want your projects to look professionally done, don’t skip the sanding step. You’ll be amazed at how much it boosts the visual quality of your work. Remember, a little patience now will save you headaches later.
In the end, taking the time to sand between coats really pays off. Using a dust collection system can enhance the sanding process by minimizing airborne particles, making your workspace cleaner and your finish smoother. Are you ready to give your next project that extra touch of professionalism?
Recommended Products

Stucco Lamundo is a genuine, mineral authentic lime-based Venetian Plaster. Produced with limestone, Stucco Lamundo’s thin layer application creates the illusion of depth and color variation. Stucco Lamundo can be used as a finish coat for interior walls, ceilings, and many other architectural details. Primarily applied to plaster and gypsum board substrates, Stucco Lamundo can also be used to beautify other smooth-surfaced materials.
Ergonomically formed to fit comfortably in any size hand. Compact and light weight enough for extended vertical and overhead use.
【Product Size and Packaging】The french door 36''W x 80''H,5 sizes to choose from.NOTE: Please carefully measure the size of the door opening before purchasing,to avoid purchasing wrong size. Only one door panel,No hardware kit, door frame, hinges, etc,are not included.Door slab has already been assembled, no need to assemble it again.
Common Sanding Errors and How to Avoid Them
Have you ever poured your heart into a painting project only to see it fall short because of simple sanding mistakes? It can be really frustrating. One common error is using too coarse a grit to start; it can leave behind nasty deep scratches. Instead, kick things off with a fine grit like 320 and gradually move to finer ones.
Now, let’s talk about pressure. Sanding too aggressively or unevenly can create issues with paint adhering properly. Applying gentle, even pressure is key—it’s like giving your surface a little TLC. And don’t forget the cleanup! A quick wipe-down with a damp tack cloth will eliminate dust without ruining your progress.
Another tip? Pay special attention when sanding near the edges. If you’re not careful there, it could result in uneven surfaces that can really mess up your finish. A sanding block can do wonders by ensuring that you apply even pressure across your project.
Honestly, remember that proper ventilation is crucial while sanding. You want to keep the air clean and comfortable for yourself as you work. Choosing sanding pads with dust collection features can significantly reduce airborne particles and help maintain a cleaner work environment.
Recommended Products

Country Of Origin: Germany

Excellent Foundation Primer: Convenient primer surfacer for any paint system

CLASSIC MARINE VARNISH contains premium tung oil, phenolic resins and UV blockers for a beautiful transparent amber finish on all types of interior and exterior wood on boats, strip canoes, kayaks, outdoor wooden bar tops, garage doors, furniture and more
Achieving a Flawless Finish Through Sanding
When it comes to achieving that perfect, smooth finish, there’s often a little trick that makes a huge difference: sanding between coats. If you’ve ever layered paint or finish, you know it can be frustrating to end up with a bumpy surface. That’s where fine-grit sandpaper, like 320-grit, becomes your best friend. When you lightly sand between coats, you’re actually creating tiny scratches that help the next layer to stick better. This simple step not only improves adhesion but also makes for a more durable finish.
So, how do you get it right? Here are some tips to keep in mind:
- Make sure to remove all the dust and imperfections after sanding. It’s a must if you want that flawless look!
- Take your time with the sanding process. A little patience goes a long way in achieving that professional touch.
- For furniture and any surfaces that will see a lot of wear and tear, this technique can really extend the life of your paint job.
Don’t forget to let each coat dry completely before sanding. If you rush this step, you won’t get the best results. Honestly, that’s one of the most common mistakes people make. So, why does this matter? Because taking the time to sand correctly leads to a smoother, high-quality finish that you’ll be proud of. Using an electric drywall sander with a dust collection system can help manage debris and create an even smoother surface between coats.
Recommended Products

✅ WHY CHOOSE POR-15 HIGH TEMPERATURE PAINT? – POR-15 High Temp paint is capable of withstanding extreme temperatures up to 1200°F / 648.8°C and will resist cracking, chipping, and peeling.

【Product Size And Packaging】This wooden door 32''W x 80''H,5 sizes to choose from.NOTE: Please carefully measure the size of the door opening before purchasing,to avoid purchasing wrong size. Only one door slab,No hardware kit, door frame, hinges, etc,are not included.Door slab has already been assembled, no need to assemble it again.

【Product Size And Packaging】This wooden door 32''W x 80''H,4 sizes to choose from.NOTE: Please carefully measure the size of the door opening before purchasing,to avoid purchasing wrong size. Only one door slab,No hardware kit, door frame, hinges, etc,are not included.Door slab has already been assembled, no need to assemble it again.
Why Patience Pays Off in Painting
Patience is key when it comes to painting. Many people rush through their projects, but taking the time to let each coat dry properly can make a huge difference. If you’re using paint, try waiting the recommended 24 hours between coats. This isn’t just about letting the paint dry; it allows it to cure, which can really cut down on any imperfections that might show up later.
Why should you bother with all this waiting, you ask? Good adhesion and durability are basically guaranteed when you don’t skip the drying step. Plus, if you lightly sand between coats, you can get rid of dust and bubbles. This little extra effort really sharpens the final result!
Being patient reflects your commitment to quality. Good work doesn’t happen overnight, and embracing this mindset can make your DIY experience much more rewarding. Honestly, when you remind yourself that “patience is a virtue,” it can boost your confidence for future projects. Additionally, choosing the right compound with appropriate drying time considerations can further enhance the smoothness and durability of your finish.
Share Your Sanding Success Stories
Have you ever noticed how a little extra effort can make a huge difference in your DIY projects? Sanding between paint coats is one of those steps that can really take your work from amateur to professional. It’s all about creating a smoother surface, which means better paint adhesion and a finish that lasts longer.
When you grab a piece of 320-grit sandpaper between coats, you’re not just making it look nice; you’re also taking care of those annoying little dust nibs and brush strokes that can spoil an otherwise great job. This straightforward step leads to impressive improvements. Sure, it might take a bit more time, but I promise, your finished project will reflect that effort. Trust me, the results not only look more polished but also hold up better against everyday use.
So, why does this matter? Well, sanding effectively can drastically reduce the risk of chipping and peeling down the line. By sharing our sanding success stories, we can motivate each other to stick to these techniques and achieve even better results.
Honestly, it’s about honing your skills and finding joy in the process. Keep refining those methods, and watch how your projects transform over time! What’s been your experience with sanding between coats?
In addition, using tools with ergonomic design features can help reduce fatigue during sanding and cutting tasks, making the process smoother and more enjoyable.
Frequently Asked Questions
How Important Is Sanding Between Coats?
Sanding between coats is essential for us. It enhances surface preparation, improves paint adhesion, and guarantees a smooth finish. By using proper sanding techniques, we’re setting ourselves up for a more durable and appealing outcome.
What Happens if You Don’t Sand Between Coats of Paint?
Skipping sanding between coats is like ignoring a foundation for a house; we risk poor paint adhesion, reduced finish durability, and compromised surface preparation. The result? An uneven and unattractive finish that’s likely to peel.
What Is the Golden Rule of Sanding?
The golden rule of sanding is to use proper techniques with ideal tools, like fine-grit sandpaper. We should avoid common mistakes, ensuring a smooth surface by sanding between coats for best results in our projects.
Why Do You Need to Sand Between Coats of Paint?
Did you know that 80% of paint failures stem from poor adhesion? We must sand between coats to enhance paint adhesion techniques and guarantee solid surface preparation, leading to professional-quality finishing methods and long-lasting results.